How To Make Better Art Journal Pages: Tips You Can Actually Use
Art journaling is a fun ride, but it can sometimes feel like a roller-coaster when you feel lost.
That’s why my goal today is to share art journal tips that can definitely transform the way you look at your art and your art-making process.
I share mindset tips, stamping and stenciling tips, composition tricks, and other useful bits I know can help you.
Some of the tips are about the mindset you might have when it comes to your art, while others are purely practical tips.
Mindset art journal tips
Tip 1: Be patient
Making art requires patience. I didn’t believe this until I started creating in my art journal every day.
And when you start creating layers and begin exploring mixed media, you realize how patience is important.
Layers need to dry in most cases and if you don’t want smudgy pages, you need to wait.
As impatient as I am, I got myself a heat gun to solve this waiting issue. It helps a lot, but I still need to be patient and wait, because the heat gun isn’t always the best solution. Sometimes I don’t like how it crumples a wet page in a matter of seconds. But these things take practice.
I also want to emphasize the importance of patience when it comes to developing your art skills. These things take time, especially if you’re just starting out, so don’t be judgmental about your art.
When I first started I knew little about composition, color wheels, face proportions, supplies, and media. However, I just started from there, learned bits as I went, and after months of persistent experimentation and learning, I could say I was heading somewhere.
Just tell yourself that you have the time and don’t pressure yourself to do things quickly and expect growth in a matter of days. Enjoy the ride and the experience you’re getting.
Tip 2: Always focus on the process
I think this art journal tip is worth gold. I can’t remember if somebody had told me this or if I realized it myself, but it’s powerful and might change the way you look at your art.
What does this mean?
When you start a page in your art journal, and you think about how this page should look in the end, you’re suddenly frozen.
Why?
Because it’s too much pressure to know exactly what to make and how it’ll all look. Oh my God, this is terrifying to even write about. How could you possibly know the end result at the moment you’re looking at that blank page?
If you can, then kudos to you.
But I assure you that by focusing on the process rather than the exact end result, you’re going to be more satisfied with what you do. If you set any high expectations, it’s a sure road to feeling like a failure.
That’s why I always encourage you to enjoy the process with your journal and art supplies. Time spent on art journaling is more precious for your growth than the beauty of the end result. Even if you don’t like what you make, you can still learn from that: OK, that’s not what I like and I’m not going to repeat that again. As simple as that.
Tip 3: Experiment
This art journal tip is a logical next step from the previous one. Focus on the process and just experiment in your art journal.
Choose the supplies you’d like to try and just try them out without trying to accomplish anything in particular.
You can do swatches, for example. Or experiment with your supplies in any way you like.
Sometimes you’ll find out what really works well, but you’ll also learn what always ends in a disaster and stop doing that.
For instance, when I do a mixed media page, I know that I’m going to use a bunch of supplies. I prepare the paints I love, some paper that can go with that, stencils and stamps I like. And then I just go for it, put some paint here and there, try out the stencil in a few places. Then I can add a stamped image, cover some things with gesso, etc.
I have no idea what’ll come out of this. But playing with my supplies is a time well spent and I can’t tell you how much I enjoy this.
That’s how I learned all these things I’m sharing with you here on my blog. It took me years of experimenting (patience, my darling, patience, check tip #1).
Tip 4: Lower your expectations
I read an article on Psychology Today about expectations, and here’s what John A. Johnson, Ph.D. says about this:
The problem of expectation occurs when we expect something to happen without good reasons for that expectation.
So, to translate this into our artsy language, it means that if you set high expectations by looking at other artists and their work, you’re not focusing on your progress, but the desired skill that someone else has.
There’ll always be artists that you feel are better than you, so what? Let them be better, it’s not the end of the world.
Your focus should be on your own progress with the learning process unique to you.
Maybe you’re just starting out with art journaling, so go from there and tell yourself that you’re a beginner, and give yourself some break.
If you don’t have the foundation for setting big expectations, then those expectations will leave you feeling like a wet cat stuck in a tree.
Practical art journal tips
Here are some practical tips you can use in your art journal process. Even a tiny change sometimes can lead to great discoveries.
Tip 5: Use stamps and stencils
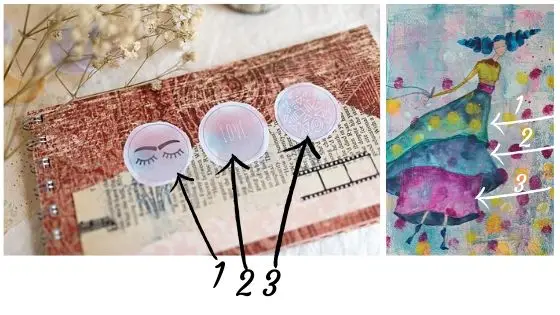
When you use stamps in your art journal, try using only bits of it, and not the whole image.
By doing this, the stamped image looks as if it’s naturally appearing on the page. With some parts of the image missing, you create a distressed effect that looks amazing on pages, especially mixed media pages.
I do this without any blocks, I just use my fingers to press the stamps where I want and keep the rest off the page. This can get your hands messy and dirty, but that’s a lovely bonus. Art is messy, so just embrace it.
If you stamp the whole image on one side and partly stamp another next to it, see which one is more appealing and interesting. For me, it’s the second one.
Here’s an example:
Look at the text stamp. I like the left one more because it looks like an insider on this page, and the right one is fine, but it just stands on its own.
Of course, you can only do this with more abstract stamps. When I use face stamps, I’ll usually stamp down the whole image, but I’ll also experiment with using these stamps and not use the whole image sometimes. (Experiment, remember?)
You can do this with stencils, too.
I’ve noticed that when I use the whole stencil, it shows ugly edges sometimes. But if I use it only partly, I lose those edges and my design looks more natural and that it belongs to the page. And doesn’t look like it’s a world on its own.
Tip 6: Reuse stencils
When you’re done with your stencil, clean it in a quick-witted way. Take a piece of paper or open another art journal page, put the used stencil onto the paper, and clean it with a wet cloth by pushing the paint inside the stencil. This way, you’ll get another stencil design by using the leftover paint.
By doing this, I already started other pages, so they are not blank pages anymore.
Don’t overthink this process, just clean the stamp, don’t worry about how you clean it or where exactly.
Later, when you go through your journal to start a new page, you’ll discover that page where you cleaned the stencil, and it might just surprise you with new ideas.
Plus, you don’t waste precious paint from your stencils, you reuse it again and again.
Tip 7: Stop the paper from bleeding
If you’re afraid your pages will bleed because they’re too thin, just glue two pages together and see if you get a sturdier page.
I use a collage medium for this, but regular liquid glue can do the trick as well.
Or even a better idea: use gesso if your paper isn’t thick enough. If you don’t know what gesso is, check out this article about gesso for art journaling where I share useful facts about this medium.
When you cover the page with gesso, the paper won’t bleed because this layer of gesso locks the paper from absorbing liquids. Neat, right?
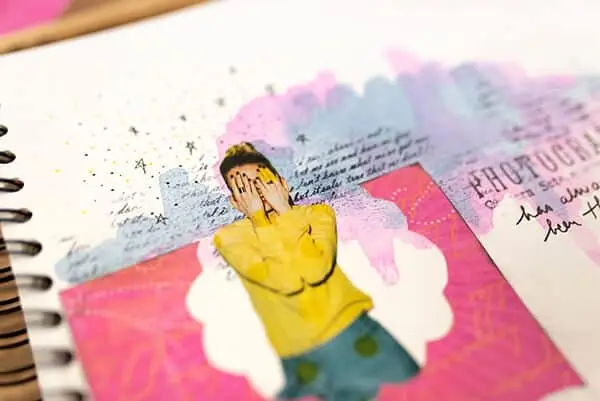
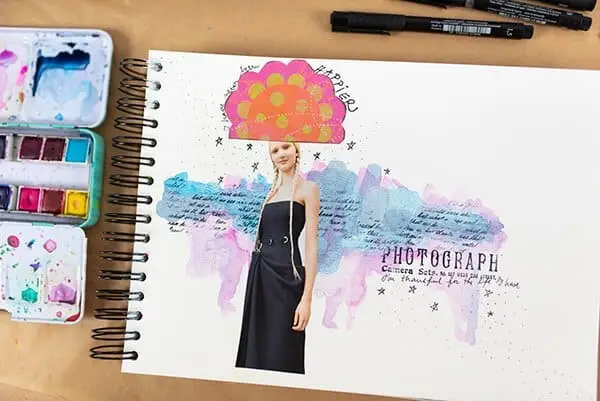
Tip 8: Color coordination
Try to use your main object’s colors on the rest of the page as well. This unites the page and gives more interest to it.
For example, if you have a main/central image on your page, look at its colors. Take a marker or a pen, or even paint, and add some elements on the page in the same color.
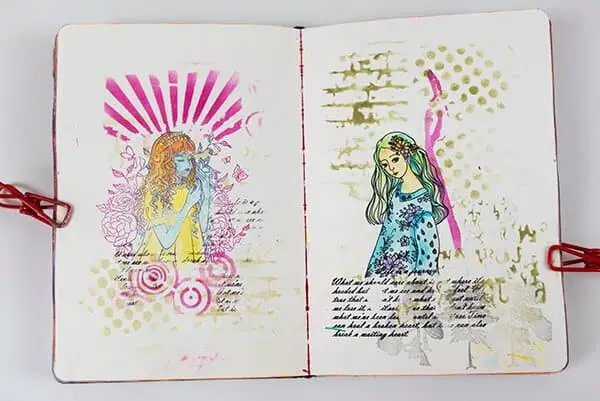
Here’s an example. The girl’s shirt is yellow, and I added yellow dots around to complement the shirt.
Tip 9: Framing
Frame your page or your main object. I learned this in photography from the very beginning and it helped transform my photos from dull to amazing.
Framing is a great way to make things pop and tell the eye where to look and what to focus on.
Here’s an example from my vision board art journal. I framed my images by layering them on pieces of paper. That’s why they stand out.
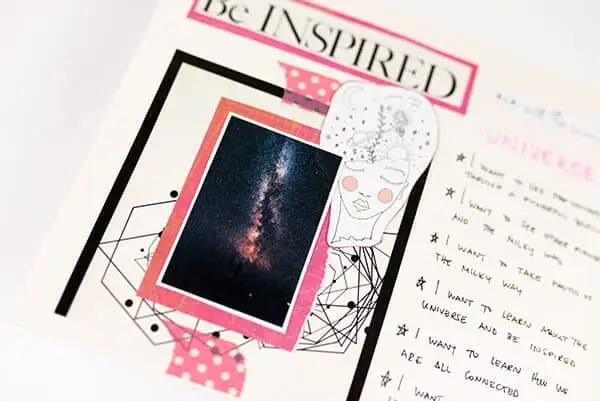
I have a post on how to make a vision board in your art journal, check it here if you’re interested in learning more.
You can frame your images or pages with paint, stamps, washi tape, journaling, or almost anything that you can think of.
Try many tools and supplies for framing and see how you like that.
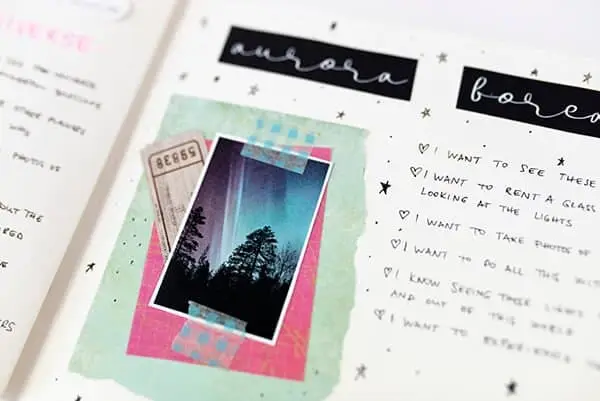
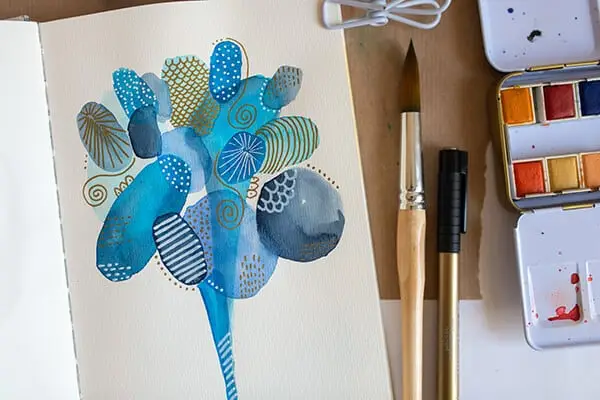
Tip 10: Paint outside the lines
This one is for using watercolors. I love painting with watercolors because they’re soft-looking and transparent.
Since they’re transparent, you can use them and create stunning images.
For example, when you draw a picture for watercolor painting, you don’t have to paint within lines, even better if you paint outside the lines. This gives a looser look.
This looks awesome if you use a black fine liner pen for lines. But be careful to use a waterproof pen. I always use Mitsubishi fine liners and they have never let me down. I paint all over them with my watercolors, and they never smudge.
Here is one of my examples of doing this:
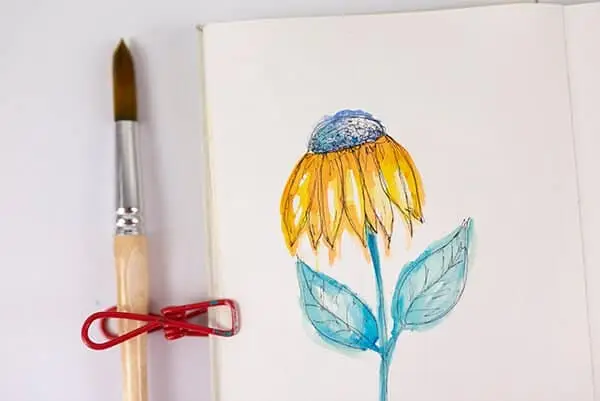
Tip 11: Leave some white space
When we paint in our journals, we tend to use too many supplies.
And then we cover the whole page and often lose focus and make our pages dull and unfinished. Does this happen to you?
A neat trick is to not cover the whole page. Leave some areas where you’re not going to put anything. I also learned about this in photography. It’s also called negative space.
These are areas that you don’t use, don’t paint, and don’t glue down anything there.
However, white space is not only a part of the page that you leave blank, but it can also be anything else.
For example, you can create this negative space by painting the whole page yellow, and then continue adding things and drawing but still leaving this yellow background to show.
So, the white, negative space can be the original paper in the journal, or any other space you’ve created to be blank or left it blank.
If my rumbling didn’t get you anywhere, here are a few examples that might help you get a better picture.
Do you see all this white space that I left untouched? It brings my main object to focus, rather than taking the focus away from it.
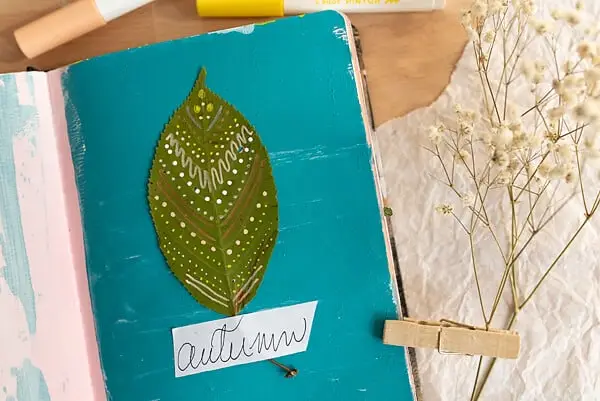
This is an example of white space not being white. I just isolated the leaf by making a unified blue background.
Don’t be afraid of this negative space but take this art journal tip and experiment a bit, I’m sure you’ll discover things you like.
Tip 12: Use odd numbers
When you arrange elements on your page, whether they are strokes, stickers, paper scraps, or images, try adding them in odd numbers. Number three is the easiest to use and the most appealing one.
This is also something I’ve learned through taking photos. Many artists will say that 3 is a magical number. I agree, a hundred percent.
If you want to stamp an image, stamp it in three places. Or for example, if you want to journal, try doing it in three lines.
When you start experimenting with this, you’ll see how your pages start getting that special magical vibe everybody is talking about.
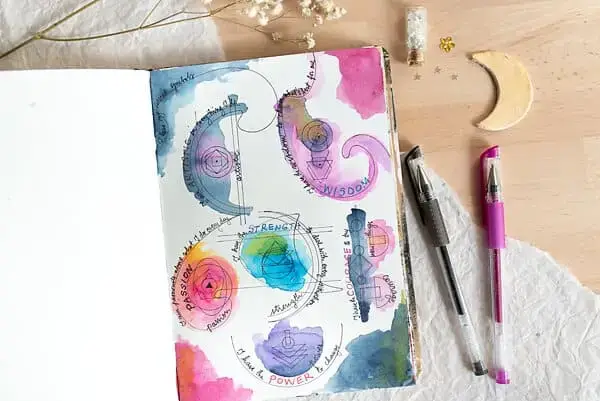
Tip 13: Journaling tip
Your art journal is only for you, and you shouldn’t have to be afraid to write something down in case somebody reads it. If you’re afraid of this, then your journaling won’t be honest and you’ll always refrain from fully expressing your thoughts and feelings.
If you’re afraid somebody could read your journaling, just write in scribbles or tiny letters.
Or write your text on the back of a piece of paper.
Also, you can always paint over your journaling, and this can be therapeutic.
If this doesn’t work, just hide your journal, like we did when we were 15. Oh, I remember the detective hunt for the right hiding place for my precious thoughts.
Do anything that’ll let you express yourself freely in your journals.
Tip 14: Limit your color palette
If you feel your pages are all over the place and feel unfinished, try limiting yourself to only three colors.
This will inspire you to look for more creative solutions and your page will look more appealing.
For example, choose three acrylic paint colors, and some paper scraps in the same or similar colors. Anything you choose, stick to these colors and then experiment with what you can do. Challenge yourself to this now and again to practice color combinations and your page design, too.
Tip 15: Use the rule of thirds
This is one of my favorite art journal tips that I also learned from my photography experience.
The bottom line is to place your main object on one of the hot spots on your page.
These hot spots are created by a grid of 9 squares. To simplify it, imagine a tic-tac-toe grid on your page. The places where the lines meet are the hot spots.
It looks something like this:
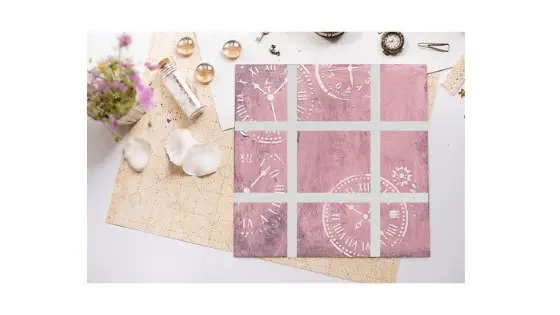
You put your main elements in or around these spots to make the page more appealing to the eye.
This is one of the rules in composition and design. If you’d like to learn more about this, here’s an article explaining how to use the rules of composition in art journaling.
Final art journal tip
Just have fun!
Nothing more and nothing less.
Don’t take your art journal too seriously. After all, it’s just a book that you’re using to express yourself, not to be graded or judged.
Nobody really gives a damn what you do in those journals.
So, if nobody cares, nobody sees it, you won’t be graded in any way, then all that’s left is having fun.
Use these tips and make a fun game out of them. Choose the ones that you haven’t tried before and experiment.
I’d love to hear in the comments if you’ve tried some of these tips and what’s your experience with them.
GRAB YOUR FREE ART JOURNAL STARTER KIT
Get your FREE Art Journal Starter Kit and create pretty pages without wondering where to start or what supplies to use.