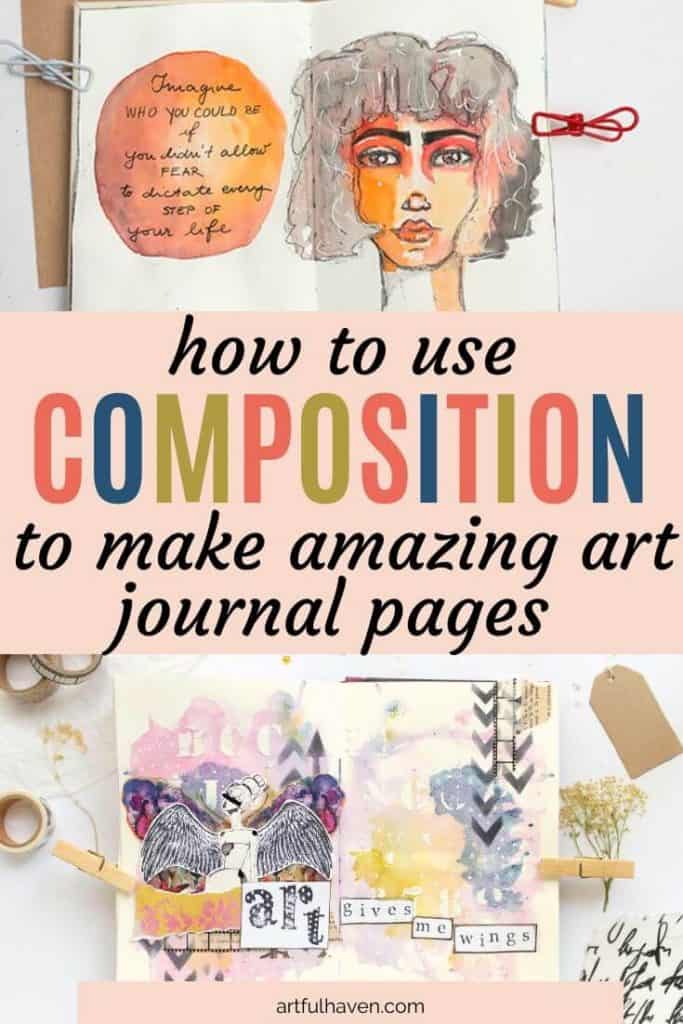
Composition In Art For Beginners: How to Create Interest Like a pro
Does your art sometimes look unfinished, like there must be something more to it, but you just can’t figure out what you need to add or fix?
You might even end up hating your work because it frustrates you.
This is a problem many beginners in art struggle with.
That’s why I wanted to share a solution to these problems by introducing composition in art.
What your art might be lacking is the interesting and appealing composition or organization of the elements.
Let me explain what all this means and how you can use composition to improve your art and make it more interesting to the eye.
I’ll often use my art journal experience to explain composition.
What is composition in art?
Composition in art is the way of organizing the art elements by following certain principles.
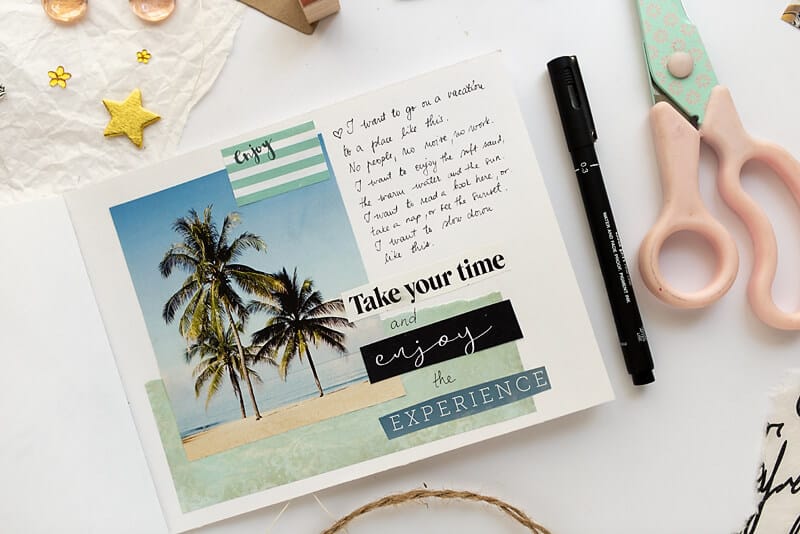
When it comes to art journaling, you can use composition to decide where to put your subjects, words, stickers, paint, etc., to make your pages more appealing and interesting.
For example, if you want to put stickers on your page, you decide where to put them to make the page look balanced, or symmetrical, and so on.
Or, if you want to paint a background with multiple colors, composition lets you decide on paint areas strategically to create interest.
So, the bottom line is that when you’re composing an art journal page, you’re thinking about where to put certain things to create a result you love, and finally, to convey a message through art.
Why is composition important?
I’ve been a professional photographer for about 15 years, and as an amateur, I’ve been into this art form for as long as I can remember.
Photography has helped me learn about composition in art and changed the way I observe the things around me.
In photography and painting as well, an image that doesn’t feel interesting usually lacks composition.
In other words, our eyes are not invited to scan the image, there’s no message behind it and it doesn’t make us feel anything.
Rather, our eyes feel lost having nothing to cling to or nothing to follow, and thus lose interest, say “meh” and leave the room.
This is the point where you get frustrated not knowing what you did wrong, and it makes you mad because you don’t know how to fix it.
Then you leave the room and suddenly art feels more of a nuisance than enjoyment.
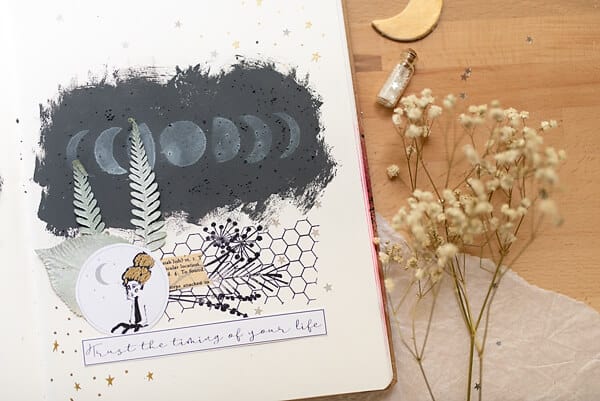
However, if you start thinking about the composition of your art, maybe you can fix these things faster and better.
I’d like you to love your art, and that’s why I want to help you use some design and art principles to play around with and see what happens.
First, I’ll introduce you to the elements of composition in art, and then we’ll talk about the principles of composition.
Finally, I’ll give you some tips and ideas on how to use these in your art.
Elements of composition
I’ll mention the elements of composition artists use but I’m not going to go into many details about all of them.
We’re just going to use the things that we can apply in our art.
So what are the elements of composition?
Color
Texture
Lines
Depth
Tone
Shape
Space
Every artwork you make consists of some lines or shapes, color, or space.
You can use any of these elements and organize them in your work according to the principles of composition we’ll talk about later.
Let’s not dig into technicalities or terminology, but rather see how we can use color or texture or anything else to achieve a certain result.
But before that, I’d like to help you understand the principles of composition.
Principles of composition
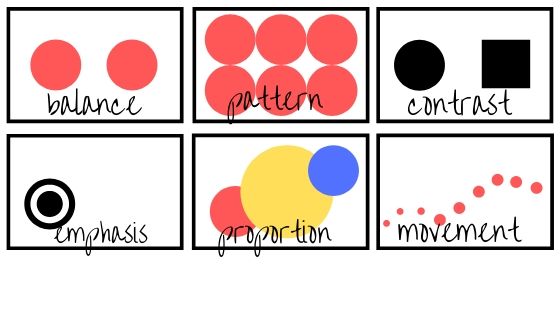
These are the ideas or “rules” artists use to place their elements on their artworks.
You can also look at them as the effect you’re trying to achieve, the result or even the emotions you want to evoke while looking at your artwork.
To put it differently, by using these principles, you influence the way you look at a piece of art, in what way the image attracts and leads the eye, and how it makes you feel.
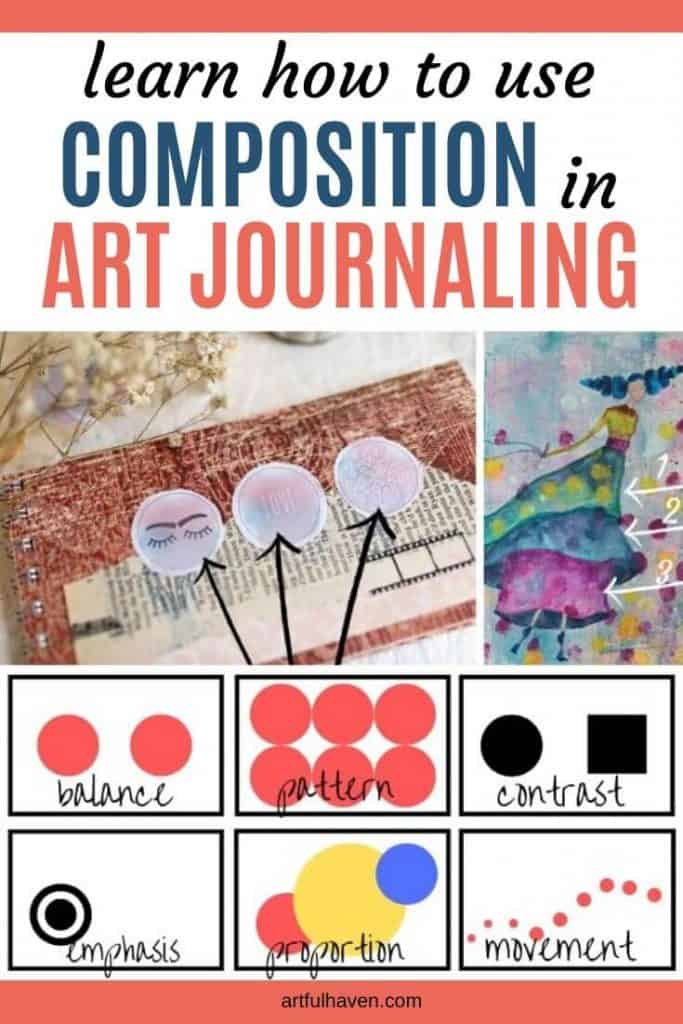
So, here are some of the principles of composition:
Balance
Proportion
Movement
Emphasis
Pattern
Contrast
What does this all mean?
By using different elements, you arrange them on your page in a certain way to achieve balance or movement, for example.
Let’s explain some of these you can use in your art journals.
Balance
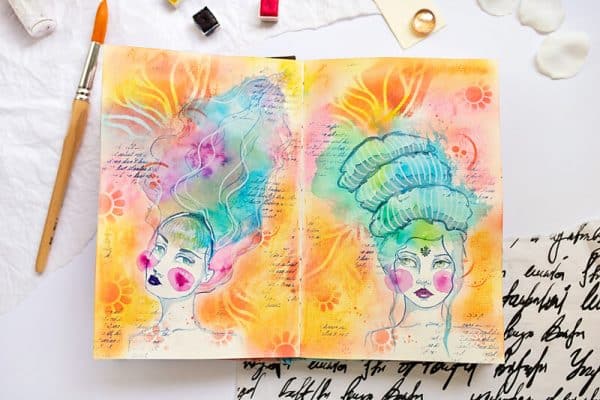
You create balance by placing the elements in a way that they feel balanced together. For example, if you draw a portrait on one side, you can draw something the same size on the other, or fill the other half with hair.
The balanced image is calming and soothing.
Emphasis/Focus
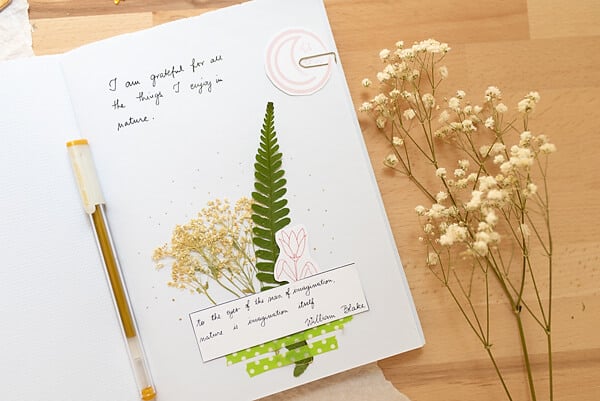
Emphasis or focus is created by having one element that is in complete focus and everything else on the page leads the eye towards that main element.
This is often the case in portraits because all the elements around the face lead back to the face again.
But you can achieve emphasis by any kind of drawing or painting.
Movement
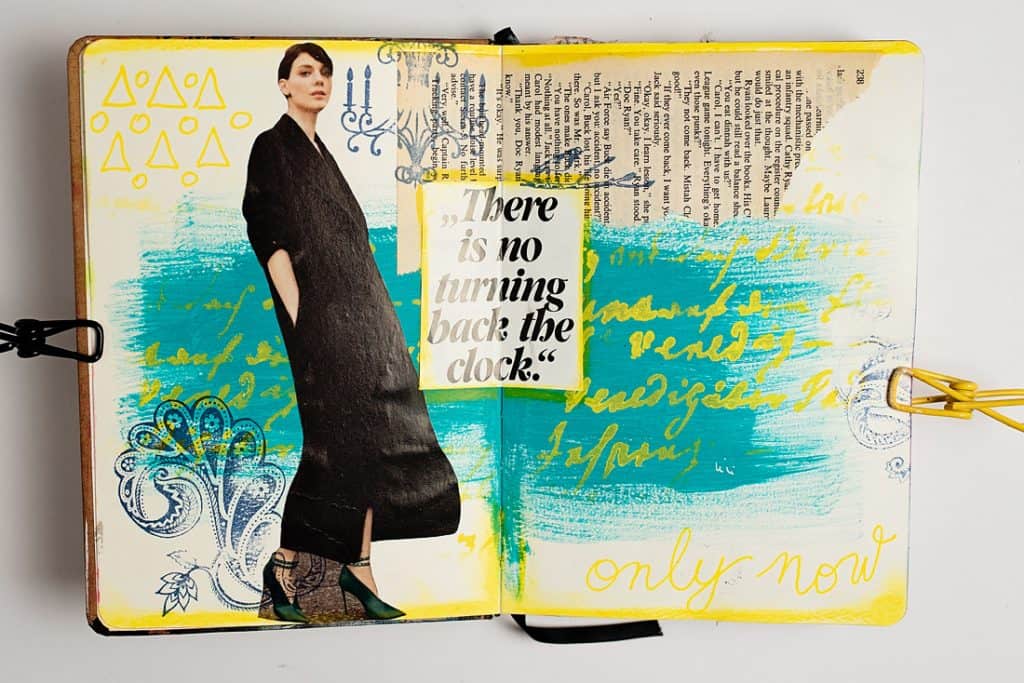
In the photo above, I created a movement with her coat and the brush strokes.
I love creating movement and I often use hair in my portraits to lead the eyes all over the page or a spread by drawing wild, moving hair around.
For this effect, you can use lines or brush strokes, short or long, or anything else that’ll lead the eye all over the page, or in one direction.
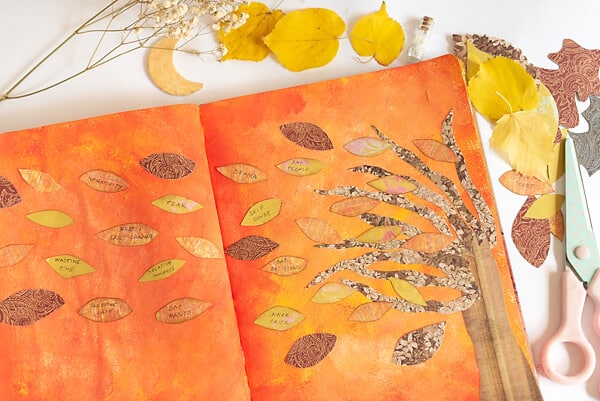
Another example I’ve done is this tree below. I tried to create movement with the leaves going away from the tree.
Proportion
You can use bigger and smaller elements together in order to emphasize the difference between them.
For example, if you paint flowers, you can paint large flowers, and by adding smaller ones around them, you instantly emphasize how the first flowers are bigger and maybe more important for the eye.
Contrast
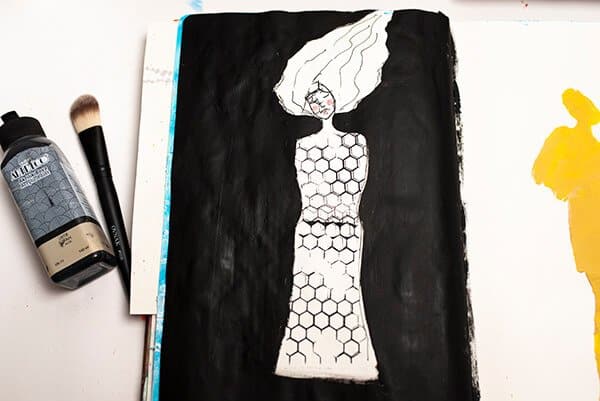
You can achieve contrast by color, like black and white, but there are so many other ways you can do this: with shapes, space, lines, etc.
If you paint a circle, you can achieve contrast by painting a square next to it.
Pattern
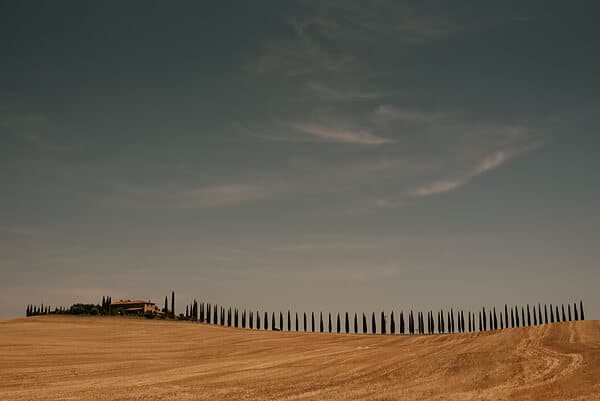
If you want to achieve a pattern, and this effect can be so fun, you draw or paint repeated elements at the same intervals, like in the photo above.
How to use composition in art journaling?
I’m so excited about sharing this with you because I believe art is food for the soul, it’s the tool we use to express almost anything within our minds, hearts, and souls.
That’s why I’d like to share some tips and ideas on how to use composition in art journaling.
I’d like you to learn a bit about composition, explore it in your art journals, and really feel how your art changes when you apply some of the ideas.
1. Create a focal point
I think many of our art journal pages may seem unfinished or not interesting because they lack a focal point.
The focal point is the place on the page where you want your eye to focus right away.
It can be a drawing, a big sticker, a place for journaling, etc.
Let’s see where to put that focal point.
Rule of thirds
Basically, if you take your page and divide it into 9 equal parts by two vertical and two horizontal lines, you’ll get a grid. Imagine this as a grid for tic tac toe.
These lines meet at 4 different points. These points are the most appealing to the eyes, so by placing the objects here, you immediately invite the viewer’s eye to that object.
Let’s call them hot spots.
Here’s an example of a cover for an album I made.
I put the clocks following these focal points and avoiding the center of the image.
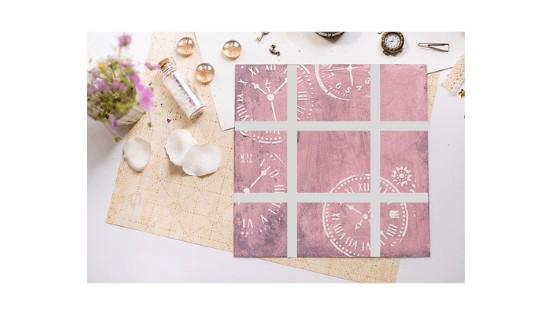
However, don’t limit yourself to these four points only. You can play with the grid even more.
How about placing your main object in one of the thirds in the grid: all the way up or down, or on one of the sides? Through photography, I’ve learned that what’s hidden tends to evoke curiosity and the eye rests on the image longer.
For example, I sometimes draw only half a face on one side of my page, taking up only a third of the page. You can’t see the other half of the face and your eye becomes curious: What’s missing? What’s hidden there?
You can do the same with shapes, flowers, journaling, etc. Play around and see how the effects change while you do it.
Maybe you’ll see the difference in the balance, or you’ll make a perfectly symmetrical page. Perhaps you’ll achieve a pattern by placing more objects/elements on either of the hot spots.
2. Odd numbers
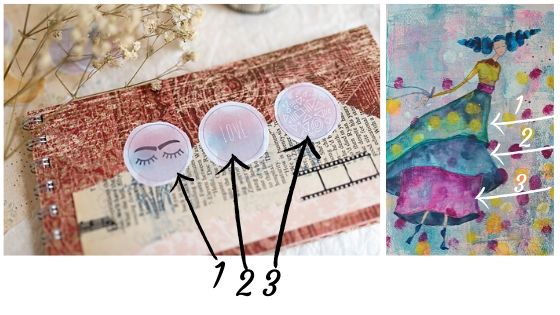
In every art form, odd numbers seem to have a special place. I remember my high school teacher telling us how the numbers 3 and 7 were considered magical numbers in poetry and art. After that, I started noticing this and it felt magical because I found these numbers everywhere!
Odd numbers somehow attract our eyes more. And what I like is that we can use something in our art that has the word odd in itself. It’s like a slap to the perfectionism devil on your shoulder. I love that!
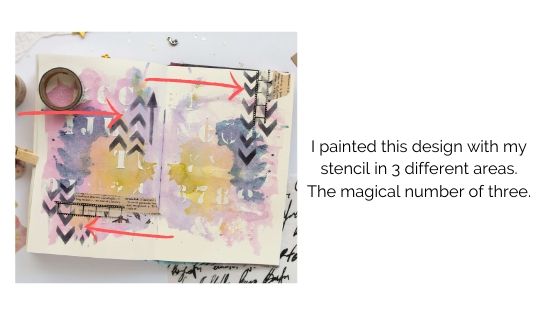
Try experimenting with the number 3, whatever you’re drawing, try to make it three times rather than in twos or fours, and see how you like that.
3. Positive and negative space
Positive space is everything you draw or paint and is a part of the drawing.
Negative space is the rest of the space that’s not used for drawing or painting or has any other element in it.
You use the negative space to emphasize the positive space.
In photography, for example, it’s called white space (although it doesn’t have to be white): all the space except the main object/subject of the photo. Look at the photo below.
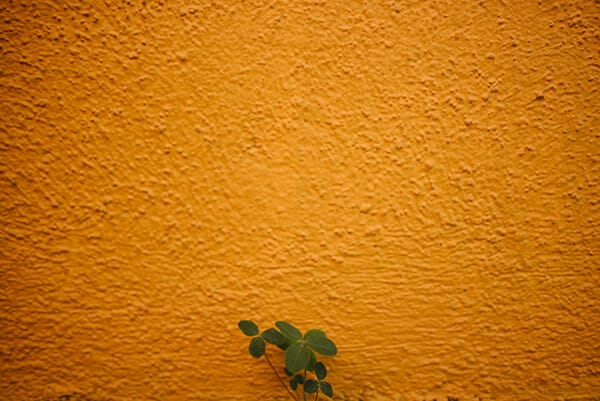
You can play with this to create pretty unusual pages.
For example, if you paint the whole page red, and then draw a flower at the bottom, all this red above and around is the negative space.
You can make amazing effects using this.
Try using complementary colors and paint the negative space with blue for example, and paint a flower with orange. Similar to this photo above. And see how you like that.
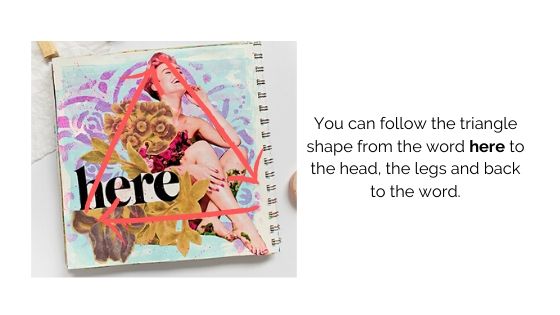
4. Make triangles with your elements
We talked about the rule of thirds and how the number 3 is magical in art. That’s why using triangles in art is very popular and also pleasing to the eye.
This doesn’t mean that you only draw triangles, but arrange elements on the page to make a triangle with them.
Let me show you what I mean in the example below.
Ideas and tips for planning composition in art journaling
Here are a few ideas you can do to experiment and play with composition.
Ask yourself: what do I want to achieve? Balance and calmness? Dynamics and uneasiness? Do you want to contrast two thoughts or images?
Then play with the principles of composition and see where that takes you.
1. Covering the whole page in paint
If you want to paint the whole page, try thinking about your brush strokes and colors according to composition.
Choose three colors and use one to paint the whole page. Then, use the second color and add it to three places on the page. While it’s still wet, blend the third color with it.
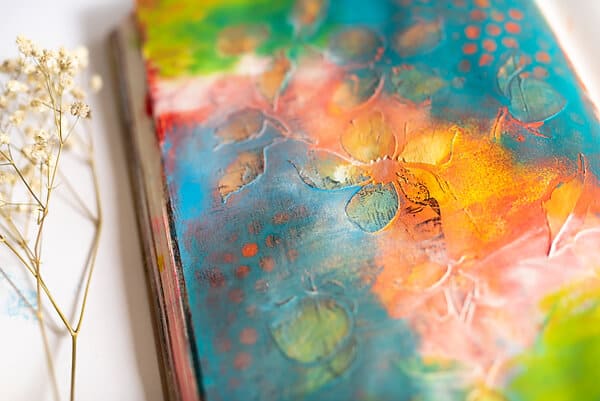
This photo shows how I used blue, orange (and a bit of yellow), and green, where the orange serves as the basis, and I added blue and green in other areas. How does it seem to you?
Now, if you want to add emphasis, take a white marker and doodle inside these spots you’ve painted.
2. Making a collage with paper scraps
Choose your scraps according to a color palette you love. Then, pick an odd number of pieces with the same colors. I usually use three.
Cover the page with the scraps by gluing the pieces in threes, in three different places.
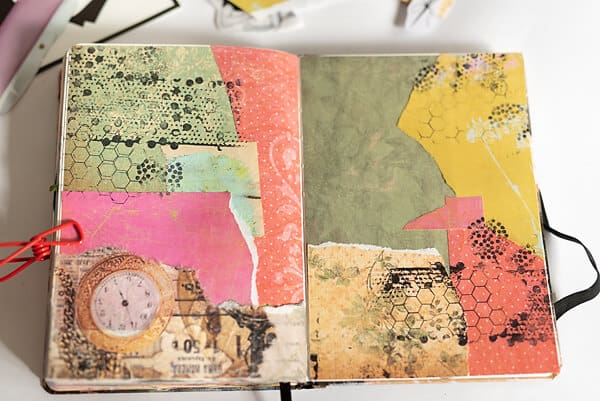
Can you see how I played with colors and have red, green, and brown paper scraps? I put the same colors apart, but they are still connected and balance each other. The yellow piece and the clock stand opposed to each other to connect the page even more.
Also, you can play with the paper pieces and tear them into long strips. Then you glue them down on top of each other by making a vertical or horizontal composition.
3. Adding an image
Whether it’s your drawing, a magazine photo, or your photo, try putting it by following the rule of thirds.
If you draw a face, put the eye on one of the meeting points in the rule of thirds.
Also, if you’re adding an image or photo, you can layer some paper scraps first and then glue the image on top of that to make the focal point truly attractive.
Here are some of my examples of where to put a focal point image.
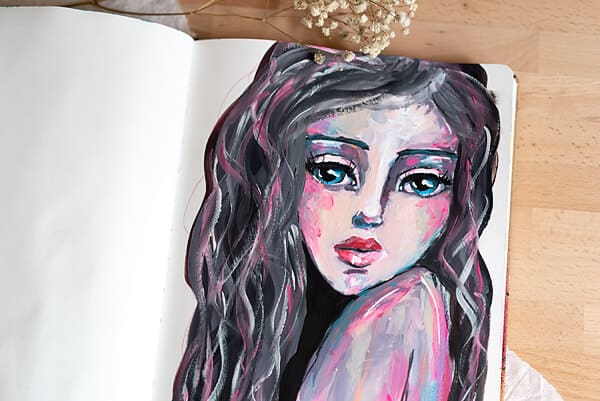
If you can image the grid, her eye is at one of the hot spots within the rule of thirds grid.
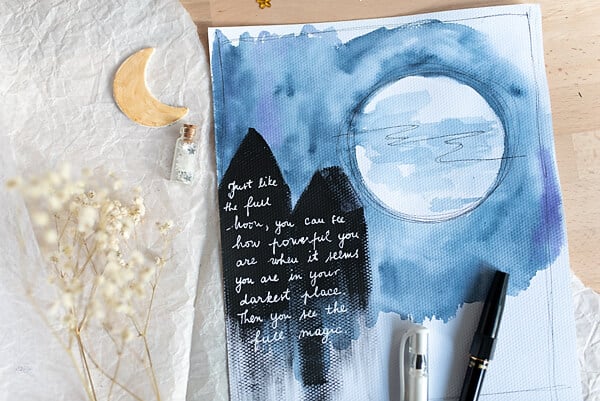
The moon and the buildings are at one of the focal points in the same rule of thirds grid.
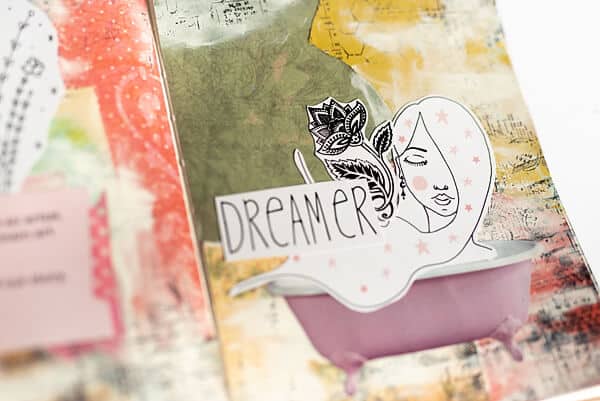
On this page, I added the girl on the bottom third of the page, and I’m quite sure her eyes are at one of the 4 meeting points.
4. Where to do the journaling
We love journaling in our art journals, right?
So, let’s see how we can integrate this with art and make books we’ll want to keep forever.
If you want to achieve balance, you can draw on one page and journal on the opposite.
In the photo below, you can see how I did this. I created balance with two objects and connected them with color, too.
Also, I used the negative space to only draw the eyes to my girl and my journaling. This is the message I want to see and remember.
It would’ve been better if I painted her eyes looking at the journal bubble on the opposite page. Then my eyes would move from the girl to the journaling even more naturally.
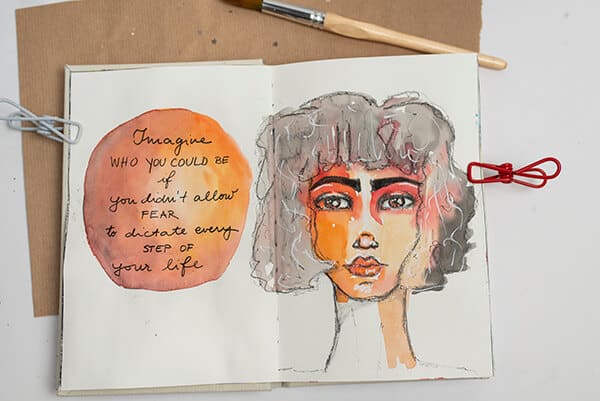
Another idea is to draw/paint your image and then journal in the space around it by filling the entire space with words.
Also, why not use the rule of thirds here as well and do the journaling at the hot spots or within the thirds on the page?
You can paint circles on your page and write words within them. This way, you achieve unity with the circles and variety with different words.
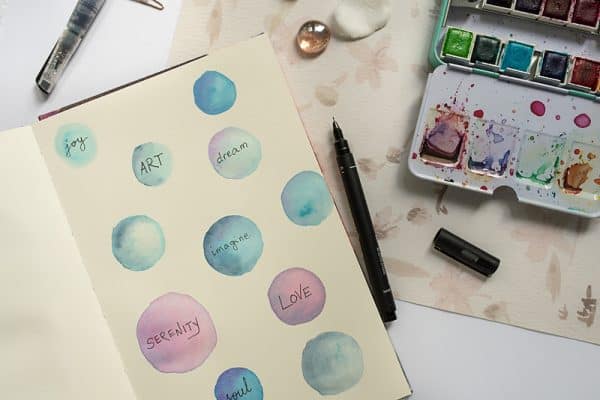
And your eye is going to jump from circle to circle to read every message. Because it is by nature curious and must check all the circles before it leaves the page.
5. How to combine images with journaling?
If you consider journaling as any other element in your art, then you can follow the same principles.
For example, you can make art on one page and journal on the opposite.
Also, you could achieve amazing effects by journaling following the lines of your drawing or an image. For example, I sometimes journal in my subject’s hair or under her eyes.
In the photo below, I journaled along the lines of the mountains.
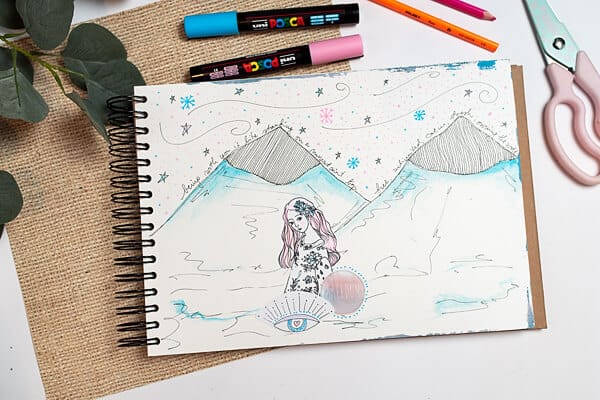
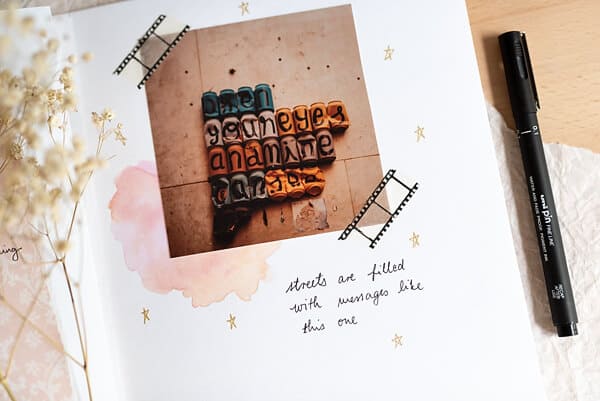
You could put an image/photo above the center, do the journaling just slightly below it, and add a few more elements to unite the page.
Look at the watercolor blob in the image below, the letters on the photo, and the journaling below it.
The eyes go from the photo to the journaling and over the stars again to the photo. Eyes are curious to read. Let them read something, and lead them to the words.
What about journaling inside a shape, a circle, or a triangle? And then place those according to the rules of thirds. It’ll give the journaling an unusual feel and it’ll be more inviting.
You can also take up most of the page by journaling and just add a tiny image or draw something to break the monotony of the page.
Use proportion and play with small and big letters, and do the same with your drawings, for example, combine big and small shapes.
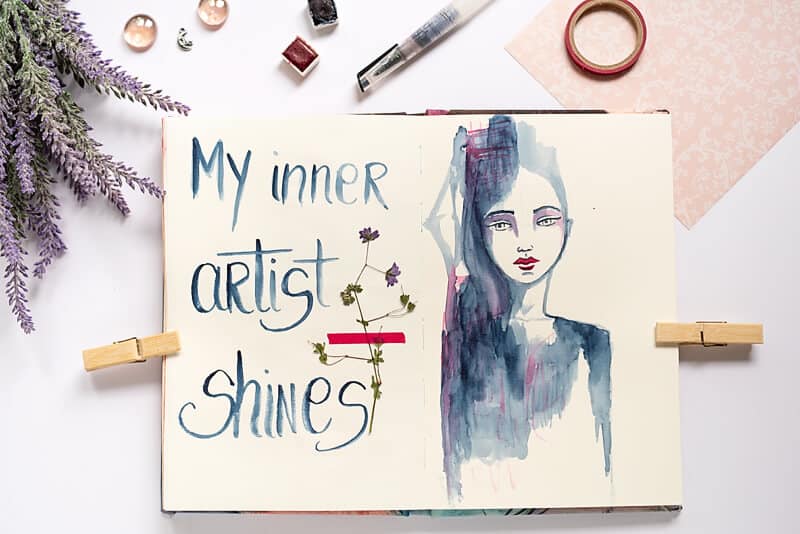
Think about color and combine the color of the journaling pen and your drawing or painting. This will connect the two elements and create more balance.
In the photo below, you can see how I used the same watercolor and brush for painting and for journaling.
How can you improve composition?
I would just say: play and have fun.
You’ll improve by experimenting and noticing how things change on your pages. If you do nothing, well, you know, there’s no change either.
When I started photographing I was quite surprised by what everyone was telling me: learn the rules so you could break them. It sounded weird at the time.
This confused me for some time until I really learned the rules, and then, the magic happens! The moment when you’re confident enough to start strategically breaking the rules is priceless.
The bottom line is that composition does help us improve our art, but it also gives us the chance to play and experiment and make unusual things by breaking its rules. Amazing.
For example, there’s the rule of putting the human eye at one of the hot spots. That’s perfectly fine and the eyes should draw attention.
However, how fun it is to know that rule and make something completely different? Look at the photo below.
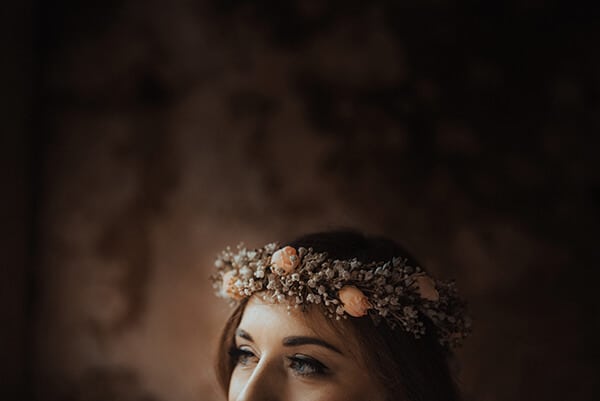
This is from one of my bridal photoshoots. Do you see what I did in this photo? Where are the eyes? Do you find the photo inviting? Does it raise interest? It holds your attention for a few moments, right? Because I wanted it to!
Final thoughts on composition in art
The most important thing I’d say to you is to play and experiment. This is the best way to learn new things.
These rules of composition in art are just guidelines for you and don’t limit yourself to them and start frustrated because you can’t achieve a pattern, for example.
To start, maybe you can choose one element and one principle of composition to start playing. If you use lines, play with them, contrast them, and make them symmetrical or completely asymmetrical.
If there’s one thing I want you to remember is to use the rule of thirds and the focal point.
I’ve seen this as the biggest problem artists deal with: missing a focal point.
This will save you time in deciding where to put something and you’ll be sure you have an interesting composition.
PRACTICE COMPOSITION IN AN ART JOURNAL YOU CAN START TODAY!
Hit the orange button to get your free Art Journal Starter Kit and start making art without staring at the blank page and without the fear of ruining everything. (Spoiler alert: you can’t ruin anything in art journaling, especially now that you’re learning about composition).
