9 Steps to Mastering Female Face Proportions: Easy Tutorial for Beginners
Are you dying to draw faces but you feel like a complete beginner and face proportions make you scared out of your wits?
Let me tell you that it doesn’t have to be that hard. Seriously.
After you read this post and do a few exercises, you’ll be more self-confident about drawing face proportions.
We’ll do a bit of geometry with guidelines and you’ll see how easy it can be to draw a face when you nail the right proportions.
Take the time to practice it and your hand muscles will remember all the moves you make.
It’s so-called muscle memory. It was really comforting when I heard this for the first time because it gave me hope I could draw faces.
And you can do it, too.
How do you draw simple face proportions step by step?
This is just a tutorial for the face proportions, not how to draw each facial feature.
If you’d like to know more about the features, check out this article about drawing female faces whimsical style.
I always draw females faces, so this tutorial shows how I do that, but the same applies to the male proportions. What’s different are the facial features.
These are the steps I follow when drawing faces.
2. Divide the head with guidelines
3. Draw eyes (& irises and pupils)
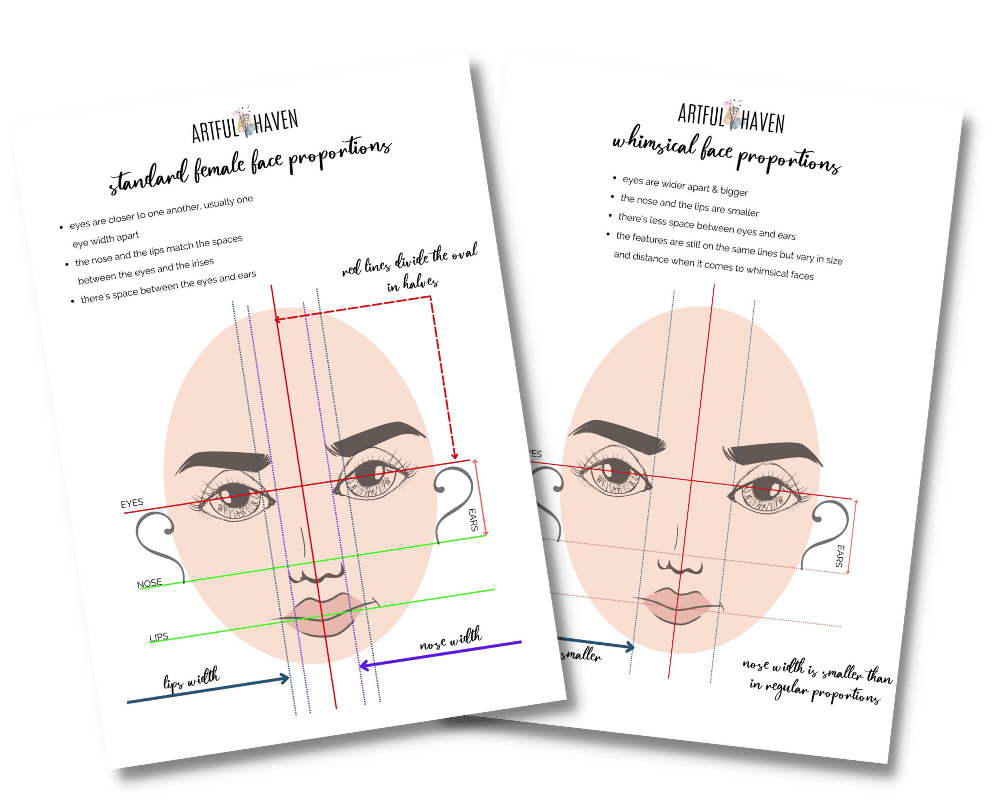
To help you even more with this, I’ve created a printable reference for you, so you can put it in your art journal, above your art table, etc.
You can download it for free below.
GRAB YOUR FREE FEMALE FACE PROPORTIONS GUIDE
Step 1. Draw the head
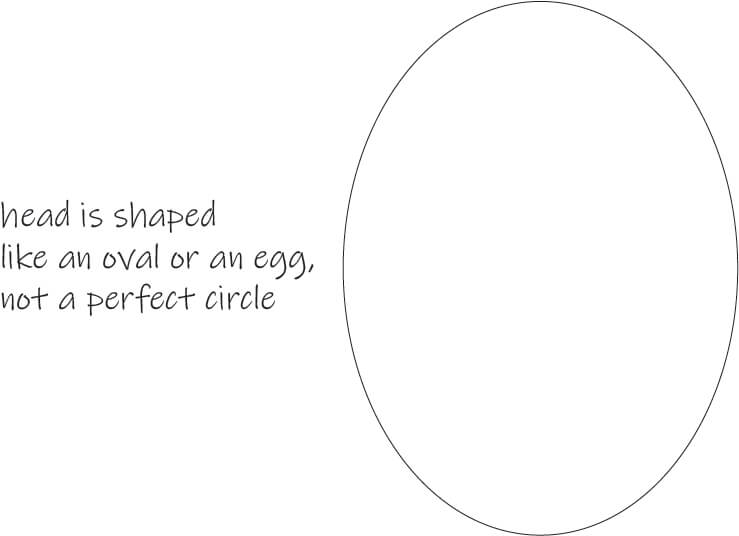
Whenever you try drawing a head, remember that the head isn’t a circle but it’s shaped as an oval or an egg.
The size of the head determines the size of other facial features because we’re going to determine face proportions according to the head size.
So, just draw an oval like in the image below.
Step 2. Draw the face proportions guidelines
When you’ve drawn the head shape, it’s time for drawing all the guidelines to help you place the facial features.
You’ll need 3 lines: one vertical central line, and three horizontal lines.
All these lines divide our head space into halves.
Look at the image below.
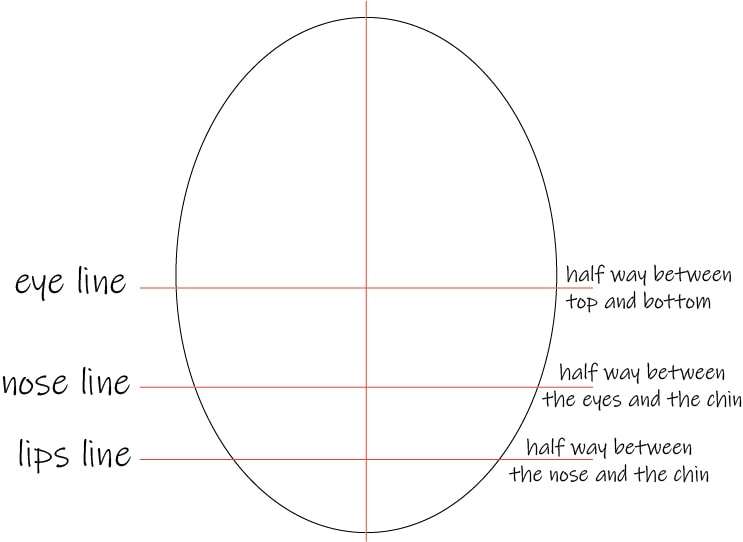
First, draw a vertical line to divide the head into 2 halves.
EYE LINE: I placed one horizontal line that divides the head into two equal halves.
NOSE LINE: When that is done, draw another line dividing the bottom half into two halves again.
LIPS LINE: And finally, add another line to divide the space towards the chin, again in halves.
Step 3. Where should the eyes be on the face?
The easiest thing to remember is that the eyes rest in the middle of the head, measured vertically.
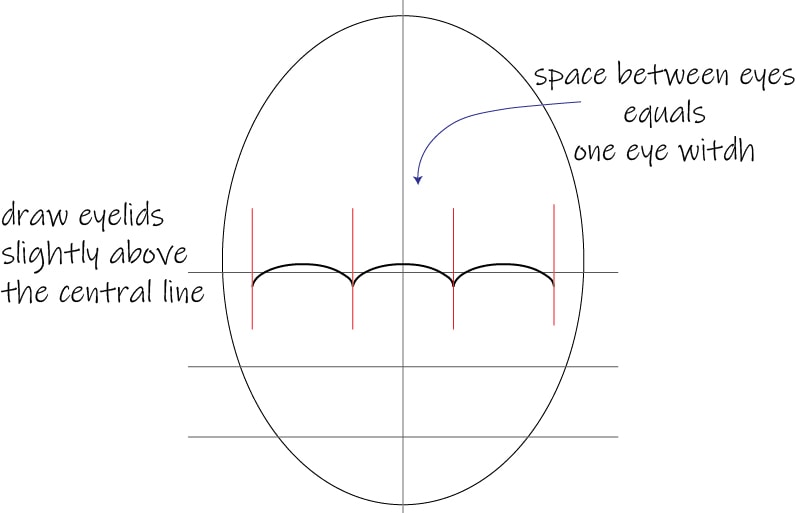
Also, the space between the eyes is the same width as one eye.
To start drawing an eye, measure three eye lengths so that you leave some space between the eyes and the head line.
Draw eyelids slightly above the central horizontal line.
An eyelid is just a half oval shape.
Step 4. Where to draw the nose?
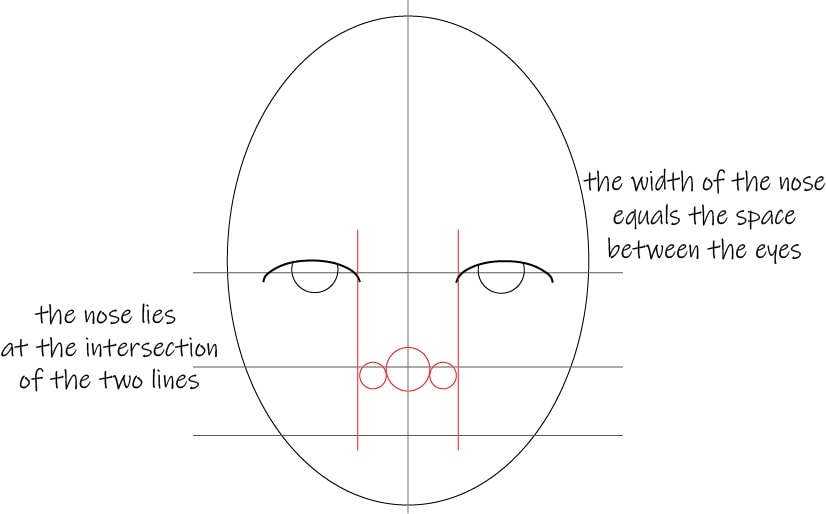
Can you see where the middle horizontal and the vertical central line meet? This is where you draw the nose.
To begin with. just draw three circles like in the image below.
One more thing to have in mind is that the nose width is the same as the space between the eyes.
Step 5. Draw the lips
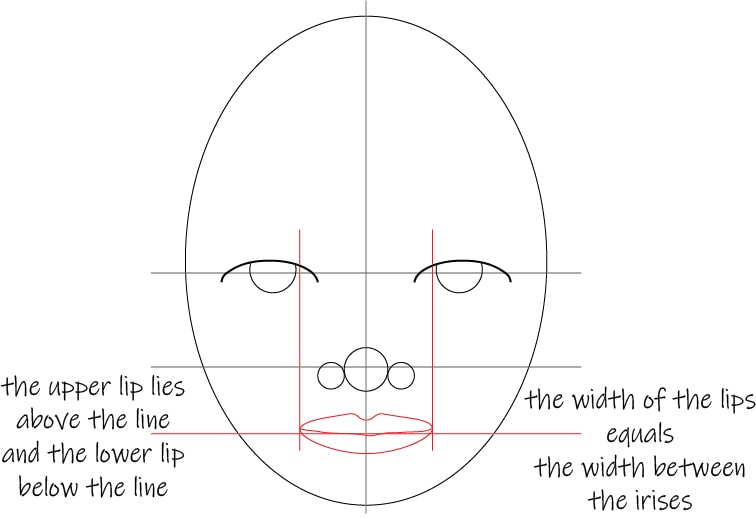
The lips are found below the nose, on the horizontal line.
The horizontal guideline should rest in the middle of the lips so that the upper lip sits above the line and the lower lip below the line.
The width of the lips is equal to the space between the irises.
See the image below.
Step 6. Where to draw the eyebrows?
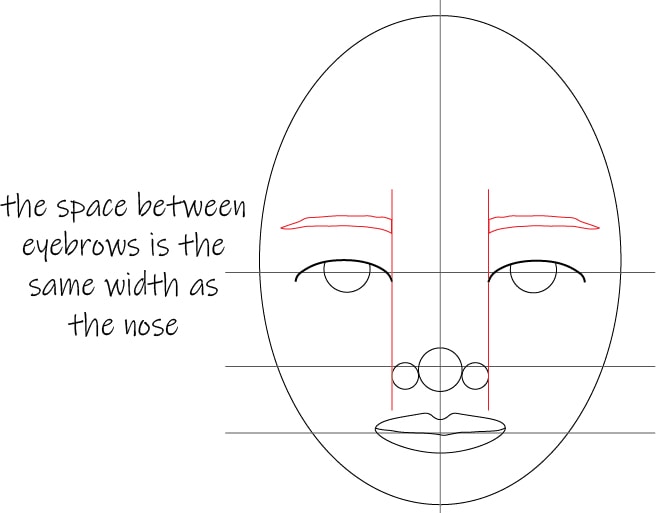
The eyebrows rest just above the eyes, don’t put them too far away from the eyes.
I never measure this distance and I’m just careful not to put them way up so that my face looks weird.
The distance between the eyebrows equals the width of the nose.
Step 7. Where to draw the ears?
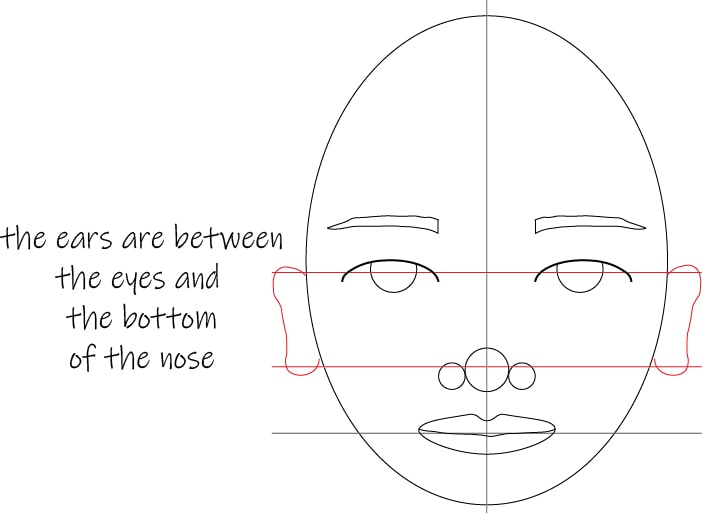
The ears sit between the eyes and the bottom of the nose.
For your reference, use the two horizontal guidelines (image below) and just draw the ear between them, but just slightly above the eye line and below the nose line.
Step 8. Where to draw the neck?
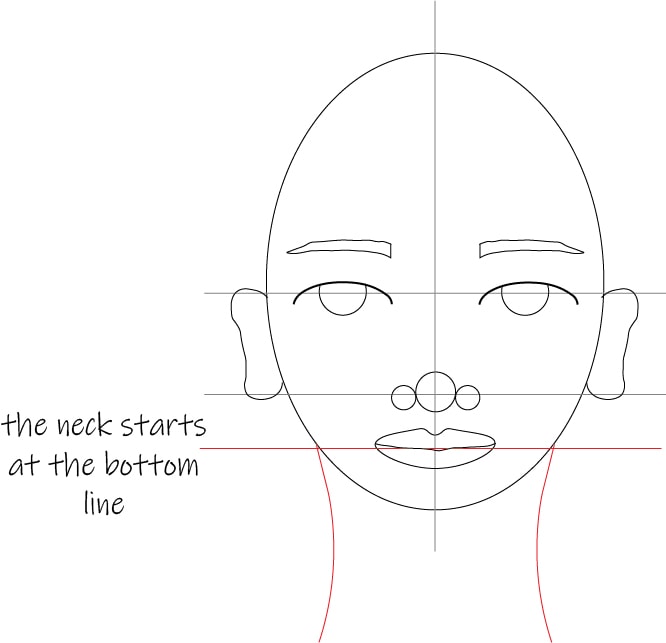
The neck line starts at the bottom guideline, where it meets the head line.
Two curvy lines are enough, don’t draw them straight.
Step 9. Where to draw the hairline?
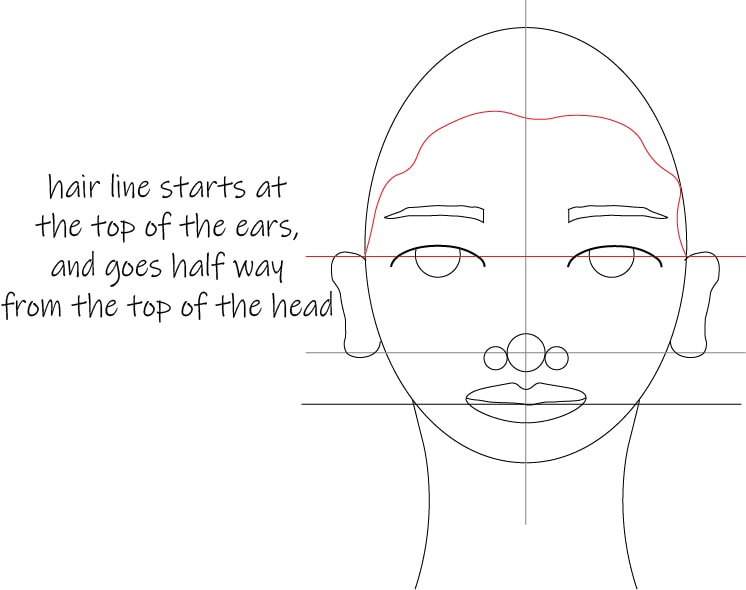
You start drawing the hairline from the point where the central horizontal guideline meets the head, next to the ear.
Continue drawing the line so that it is halfway down from the top of the head.
Mastering face proportions: final (important) tips
You see my drawn girl above and you think she looks like a robot.
I know that. I intentionally made her like this so that you could clearly see where everything begins and ends.
When you start drawing faces, you can be looser.
Try drawing everything as a sketch, don’t measure your lines with a detailed inspection of an engineer.
Here are a few faces I’ve drawn following the face proportions in this post.
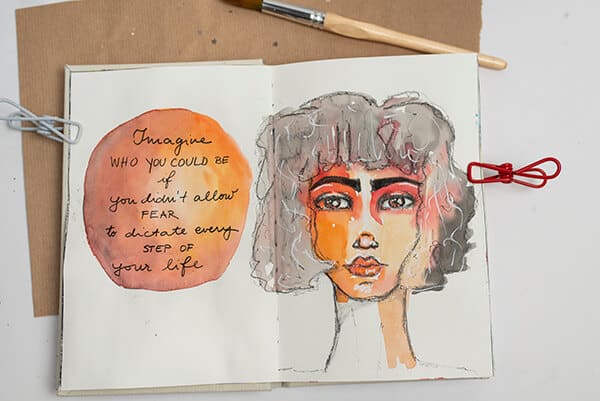
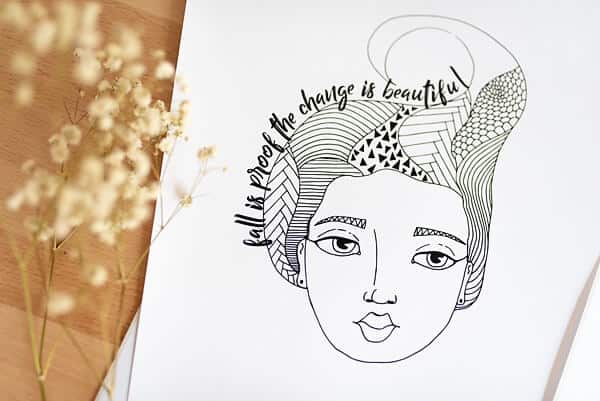
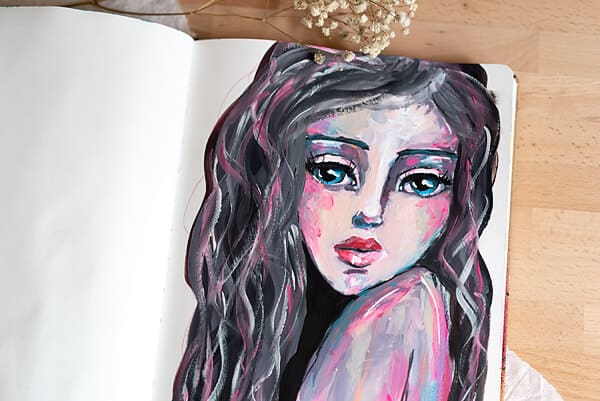
Can you believe they were all once in the “ugly stage”?
There were guidelines and sketched lines all over these faces, but once they were done, and when you erase all the guidelines and paint them, they come alive.
If you want to look at face proportions in another way, take a magazine image of a woman and try sketching all the guidelines on her face.
Then, you’ll see how this all makes sense.
And what’s most important, you’ll be able to draw faces with just a little practice. Do drawing exercises regularly and you’ll soon realize how you’ve progressed.
Don’t measure things down to millimeters, all faces are asymmetrical, and if you try drawing one with symmetrical precision, I promise you it’ll look weird.
Let these proportions be the guidelines, you’re not building a house and it won’t collapse if one eye is a bit larger than the other.
Finally, be a rebel. Break the rules. But only after you’ve learned the right proportions.
Then you can experiment and put the eyes further apart, make the nose smaller, make necks thinner, ears wonkier, whatever you want. The sky is a limit.
If you’re interested in a more academic approach to face proportions, maybe this article can help you.
So now, head off to your art journal and sketch those faces you’ve been wanting to come alive.
GRAB THE FREE FACE PROPORTIONS PRINTABLE GUIDE


