Acrylic Painting Techniques Every Beginner Can Do Easily
If you’re just beginning with painting and want to learn new acrylic painting techniques, I’ll share some neat techniques that are easy for beginners.
I’ll also share other techniques that are a learning curve but they’re definitely doable with a little experimentation and patience.
Acrylic paints are great for beginners because they’re easy to use and dry quickly. The coolest thing is that if you make a mistake, no worries. You can easily paint over it or fix it up.
To get started with acrylics, all you need are some basic supplies:
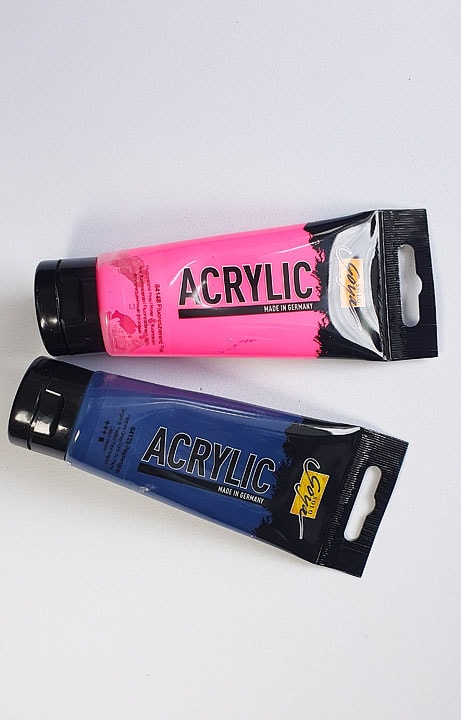
- acrylic paints in different colors
- a set of brushes, with various shapes and sizes
- paper pad or an art journal
- a palette, where you can mix and blend your paints
- a jar with water for cleaning your brushes and maybe some paper towels to blot them dry
- a palette knife is useful for mixing colors too
- a kitchen sponge
Disclaimer: Some links in this post may be affiliate links. This means that if you purchase something through that link, I get a small commission, at no extra cost to you.
Basic acrylic paint application
To start with acrylic painting, learn a bit about your paints. This will grow your overall confidence in painting and using your supplies.
Take a larger brush and try out your acrylic paints by applying smooth and even brush strokes. Dip your brush into the paint and apply it to the paper with a light touch.
Don’t be afraid to play around with different brush sizes and shapes to see what kind of strokes you like best. Remember, it’s all about having fun and experimenting.
Another cool thing to remember is the consistency of your paint. Sometimes you might want it thick and bold, and other times, a more watery texture could work wonders.
If you need thicker paint, use it straight from the tube. But if you want a more watery effect, just add a little water to your paint. Be careful not to make it too runny, though.
Finding the right paint consistency will help you achieve the look you want and make it easier to apply the colors smoothly.
You’ll get this with experimenting and exercise so you need to be patient and play a lot. A LOT.
Introduction to color mixing
You don’t need to be a pro to have fun mixing colors. Let’s start with the basics: primary colors. We’ve got red, blue, and yellow – the coolest trio ever.
These colors are like the superheroes of painting because you can make any other color using just them. Mix them together, and you get secondary colors – orange, green, and purple.
Okay, now let me break it down for you in a super simple step-by-step guide.
- Grab your red, blue, and yellow paints. Dab a bit of each on your palette. Take a clean brush, dip it in the red, and mix it with the blue. You just made purple.
- Now try mixing the blue with yellow, and guess what? You’ve got a fantastic green.
- Keep going, mix red and yellow, and there’s a lovely orange. It’s like being a color chef, cooking up all these amazing hues with just three ingredients. Don’t be afraid to experiment and see what cool colors you can create.
These are the basics of color mixing. You can study the color wheel, too. But don’t let it overwhelm you. In the beginning, focus on primary colors and secondary colors.
TIP: Some colors don’t mix well and create a brownish color. Many beginners often complain about the muddy color they get. This happens when you mix complementary colors (the ones sitting opposite each other on the color wheel).
They dry fast and can be very opaque or even translucent. Once they’re dry, you can’t activate them with water anymore.
They come in a very wide range of colors, consistencies, packages, thicknesses, etc.
For beginners, any student-grade acrylics are ok, since the professional ones are very expensive. So, if you want to learn and experiment, start with the more affordable ones.
The best acrylic painting techniques beginners can start with
Watch the video below to see what effects you can achieve with these acrylic painting techniques:
Using a sponge

This is an amazing acrylic painting technique, especially for beginners. All you need are your acrylic paints, paper, and a kitchen sponge. You know, the one you wash dishes with.
I usually cut the sponge into two or three pieces so I can use those pieces with different colors.
Then, I put some acrylic paint on my palette, dip the sponge in it, check if I need a thick or light amount, and then I start painting with it.
You can use the sponge to paint similar to using a brush – with strokes. Or, you can dab with it. This is one of my favorite acrylic painting techniques. And it’s so easy.
This way, you can add interesting layers and even texture, not to mention create beautiful gradients.
Stenciling

I bet you have some stencils in your stash, whether they’re DIY or you bought them in a store.
A good stencil for acrylic painting should be sturdy so it doesn’t move easily on the paper and doesn’t let the paint bleed underneath it.
You’ll avoid bleeding by being careful of the amount of paint you’re applying.
Most of the time, I do the stenciling technique with a kitchen sponge and a bigger stencil that doesn’t have tiny details on it. (Tiny details can mess things up once they move, or they let the paint bleed).
Of course, you can use a brush as well for stenciling. I suggest a bigger, flat brush and careful slow brush strokes.
I never dilute acrylic paint for stenciling because then it can bleed easily through the stencil and you’ll lose clean stencil marks. But if this happens, don’t worry, experimenting should be fun and mistakes are just lessons.
Brush with two colors
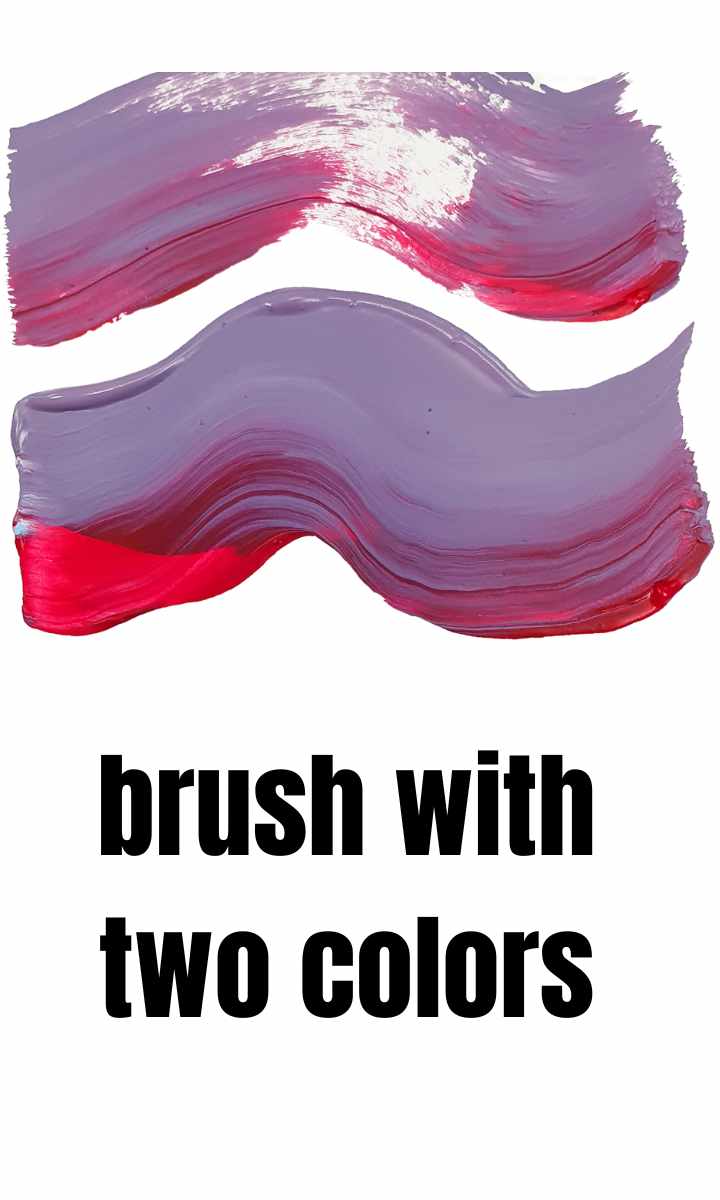
This is a neat technique where you put two colors on the palette, next to each other. Then you take a flat brush and pick all the colors with it. Next, paint a line with your brush and it’ll release all the colors you’ve picked up.
You’ll get a nice little rainbow vibe. This is a great technique to experiment and create interesting things because you never know what exactly you’ll get. Fun, right?
Bubble wrap
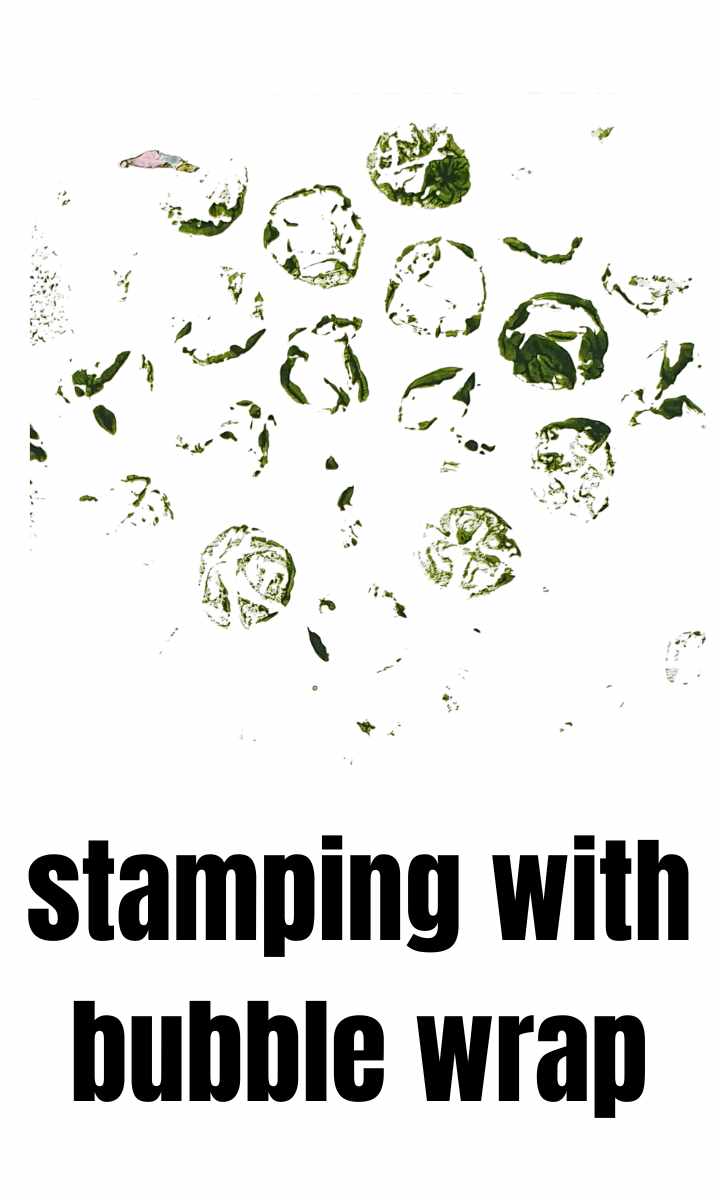
This is a stamping technique that only requires acrylic paint and a piece of bubble wrap.
It’s the simplest of techniques: put some paint on your palette and dip the bubble wrap in it. But do it lightly, you don’t want a lot of paint on it. Then, just stamp with it on the paper.
Another way to do this is to apply the paint on the bubble wrap with a brush. You also do this lightly, in stages, until you’re satisfied with the amount of paint.
Also, don’t press too hard with the bubble wrap onto the paper. Light stamping will give you the best results.
Stamping with objects

As well as with bubble wrap, you can stamp with other objects. And this is where it gets interesting.
Gather some interesting objects like plastic cups, q-tips, a mesh net, bottle caps, etc. you can dip these objects in the paint and then stamp with them.
The results are usually a bit messy but you can create so many interesting marks that you’ll end up having fun for hours.
This is a great acrylic paint technique for adding texture, creating a background, layering, and also adding finishing touches to your work.
The more objects you find and experiment with, the more versatility you’ll have in your paintings.
Brush techniques for acrylic painting
Now, we’ll have fun using brushes for acrylic painting. There are a number of techniques you can try.
Dry brushing
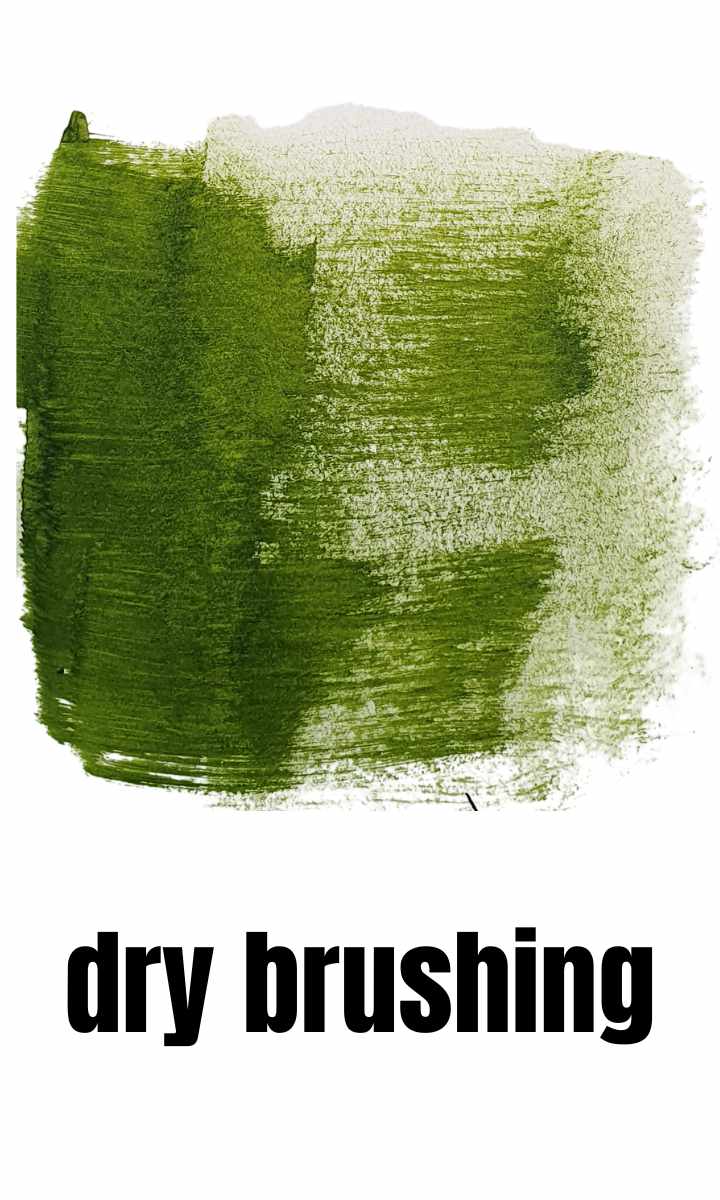
This is so much fun and all you need is a brush, preferably a flat one. Then, you take some paint with that brush, clean off excess paint (if there’s too much), and start painting.
Once you feel the paint is reduced, continue painting with the dry brush, with straight or circular strokes.
You’ll get an interesting texture and no hard edges.
Stippling
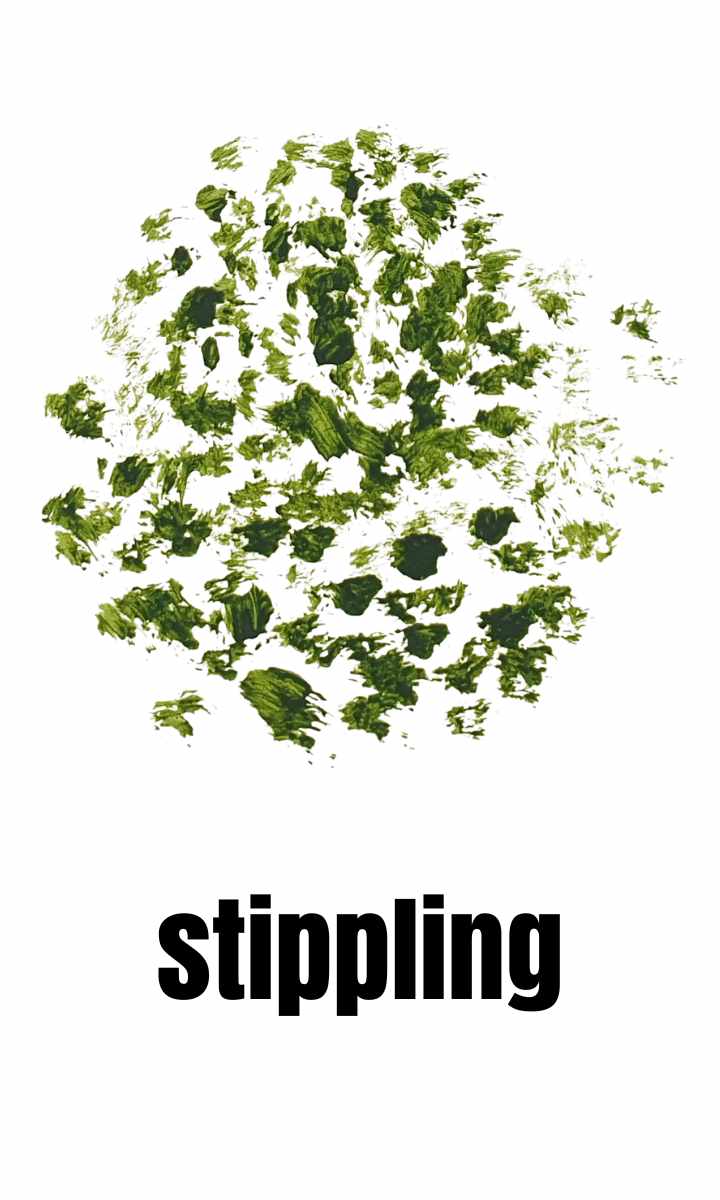
This is a fun one but it also requires more time and patience.
Stippling is actually painting with small dots. So, you paint with dots and create shapes and images that look like solid shapes when looked at from a distance.
Sometimes I use this technique to paint hair or a background. I usually add some kind of waves and fill them with these tiny dots.
This technique is also great for creating patterns.
Splattering

Oh, this acrylic painting technique is so much fun. You can do this with a brush or even a toothbrush.
To do this, dip your brush in paint and then splatter the paint on the paper. The brush/toothbrush will splatter the paint in smaller chunks.
If you want to make this even easier, add a small amount of water to the paint before you dip the brush in it. This way, the paint will flow better and it’ll be easier to make splatters.
The more water you add, the less visible the splatters will be because you diluted the paint.
Detailing
Detailing is just adding details with your small brush. This can be anything, from dots, lines, or any tiny marks.
The best brushes for detailing are small, round, or flat brushes. But they need to be a bit sturdier than watercolor brushes.
You can also add details with other tools like toothpicks. But they won’t hold as much paint as a brush.
Also, this technique is perfect for those with a calm hand and a lot of patience. I do little detailing, only when I’m painting faces, and need to make the eyes deeper and more detailed.
Transparent acrylic painting techniques
Glazing
Artists mostly use a glazing medium for this technique.
Here’s how it works: take your acrylic paint and mix it with a glazing medium to make it thin and see-through. Then, gently paint this glaze over the dried base layer you’ve already done.
The magic happens when some of the colors from below show through the glaze, giving your artwork a fantastic tint and making it look all glowy.
If you want to get even more awesome effects, just add more layers of glaze until you get the look you want.
With acrylic glazing, you can make your paintings pop with depth and dimension. It’s like adding a magical touch to your colors.
The best part is that acrylics dry quickly, so you won’t have to wait forever between layers.
Using glazing mediums might be a bit of a learning curve, so I suggest you experiment with water at the beginning. Experiment with the amount of water and the translucent effects you can get.
Washing

Using glazing mediums might be a bit of a learning curve, so I suggest you experiment with water at the beginning. Experiment with the amount of water and the translucent effects you can get.
An acrylic paint wash is a diluted and transparent layer of acrylic paint that is applied over a base layer to create a soft, subtle, and translucent effect. The wash allows some of the underlying colors and textures to show through.
To create an acrylic paint wash, you simply mix acrylic paint with water to achieve a very thin and watery consistency.
Acrylic paint washes are often used in various artistic styles, such as watercolor-like effects, to add depth, shadows, or subtle color variations.
They are especially useful in creating atmospheric effects in landscapes or softening the colors in a portrait.
For beginners, acrylic paint washes are an easy and fun technique to experiment with. They provide a low-pressure way to explore different effects and add an extra dimension to your acrylic paintings.
Whether you want to create a dreamy watercolor-like landscape or add a weathered look to your artwork, acrylic paint washes are a beginner-friendly method you might just fall in love with.
Acrylic painting techniques for creating texture
Here are some acrylic painting techniques that create a kind of texture, real texture, or visual texture.
The more you experiment with acrylic paint and tools, the more ways you’ll find to create texture with it.
Dripping

Dripping in acrylic painting is a creative technique where artists allow or deliberately guide liquid acrylic paint to drip or flow down the painting surface.
This method often produces dynamic and visually intriguing effects that add movement, spontaneity, and an element of unpredictability.
To achieve drips in acrylic painting, artists can do the following:
1. Natural dripping: You can apply wet acrylic paint to paper, and due to gravity, the paint naturally starts to run or drip downward. You can manipulate the angle to control the direction and speed of the drips.
2. Guided dripping: you can use tools like brushes or palette knives to encourage the paint to drip in specific directions. They may also tap the brush or flick it to create controlled drips.
3. Drip pouring: you can pour thinned acrylic paint directly onto paper, letting it flow and mix organically. Tilt the painting surface to guide the paint and create unique patterns.
Dripping can add energy and a sense of movement to your work. It’s often used in abstract or expressive styles to create spontaneous compositions.
For beginners, experimenting with dripping can be a fun and liberating way to explore the fluidity of acrylic paints.
Dabbing with sponge
I already mentioned using a sponge for painting with acrylic paint. And it’s a great tool for creating texture.
You do this by dabbing with the sponge.
The more paint you add, the more texture you’ll get. But be careful not to overdo it so it doesn’t take too long for the paint to dry.
It’s also important to be aware of the type of paper you’re using. Very thin paper will curl under a lot of paint but if you’re using mixed media paper or watercolor paper, then you can add more paint and not be scared of paper curls.
Palette knife

This is a great tool but it’s also a learning curve.
Palette knives are used to mix the paint but also to paint with it.
By using this tool, you put chunks of paint on the paper and you create real, tangible texture.
You can also control how much paint you use. So, if you feel it’s too much, you can scrape it off with the palette knife easily.
I use this technique to create backgrounds. And I’d suggest you start with that too if you’re a beginner. Painting a whole painting with a palette knife requires experience and a lot of trial and error.
But don’t let this discourage you. As always, the truth is: the more you experiment, the better you’ll learn.
Scraping

There are two ways you can do scraping that have two different results.
First, scraping in acrylic painting is a technique where artists use various tools, such as palette knives or credit cards, to move wet acrylic paint around. With this method, you can create interesting textures, patterns, and visual effects.
When scraping wet paint, you can use the edge or flat side of a palette knife (or a credit card) to gently lift or move the paint around, revealing the underlying layers or creating unique textures.
This technique is often used to blend colors, create expressive marks, or make your painting more dynamic.
This is especially true when you use two or more colors together.
The second way is when you scrape dry paint using a palette knife or similar tool to scratch or scrape away dried acrylic paint.
This allows artists to reveal the layers underneath, which can be used to create highlights, add fine details, or correct mistakes in the artwork.
This technique can be fun for beginners, as it offers a chance to experiment with different tools and see the immediate impact on the artwork. So, why not try it?
Bubble wrap
As I already said above, using bubble wrap can be a great technique to add texture. Simple stamping with this unusual tool will give you interesting results and a lot of texture, especially on backgrounds.
Other acrylic painting techniques
There are many other acrylic painting techniques you can try and play with. They’re not hard to do and you can have a lot of fun with experimenting.
Smudging

Isn’t it fun for kids to use acrylic paint with fingers? Remember that? We all used to do it.
So, you can do it today, too, no matter your age.
If you put some paint on paper and then smudge it with your fingers, you can get interesting results and they’ll always be unique. How fun is that?
You can also use a baby wipe, although I suggest you use a wet cloth that you can wash afterward and use again. Baby wipes mean more garbage. Just my two cents.
So, the bottom line is, you can smudge the paint with your fingers or a wet cloth and play with direction, the amount of paint, mix more colors together, etc.
TIP: When it comes to mixing paint, learn some basic rules from color theory so you don’t always get muddy results but nice-looking combinations and blends.
Lifting

This is a great acrylic painting technique for beginners because you have fun while doing it and learn a lot about paint and what you can do with it.
So, when you want to lift some paint, you do this while the paint is still wet. We can use many tools for this.
For example, you can use weather cloth, your fingers, credit card, palette knife, bubble wrap, or other tools you can think of (just experiment!).
Once you put paint on paper, while it’s still wet, take one tool, and try to lift off some of it. This way, you can also create texture and interesting visual effects.
My advice is to first try it with a credit card and something to stamp with, like bubble wrap.
However, you can also scrape off dry paint. I usually do this with the back of my paintbrush, palette knife, credit card, and even a toothpick.
Acrylic painting technique with fingers
Painting with fingers is always fun and feels so free. Just smudging the paint across the paper without worrying about precision or result…wow…I could do that for hours.
You can create interesting and simple backgrounds using only paint and your fingers.
If you put enough paint on paper, you can even create shapes with your fingers, it’s like drawing on wet paint. Not to mention great results when you mix two or more colors together.
Mark-making
You can make marks on the paint while it’s wet or when it’s dry.
While acrylic paint is wet, it’s easier to manipulate and you can stamp on it, smudge it, scrape it, etc. When it’s dry, you can also scrape it off.
For mark-making with acrylic paint, use any interesting tool or object you can find like bubble wrap, toilet paper rolls, plastic cups, q-tips, palette knife, and even diy foam stamps you can easily make.
Impasto

Impasto technique is a bit on the advanced side. It works with very thick paint and not watery. If you want to try it out, here’s how it works.
If you have thick paint (heavy-body paint) you can do it with only the paint. You use a palette knife and add chunks of paint without spreading it too much.
Artists also use an impasto medium to thicken the paint more so it’s easier to do this technique. This is where it can get complicated for beginners. You need another medium and you need to learn the ratio of paint and the medium.
So, if you’re just beginning with acrylic painting, this technique might scare you a bit, but it’s not impossible to do.
Sgraffito
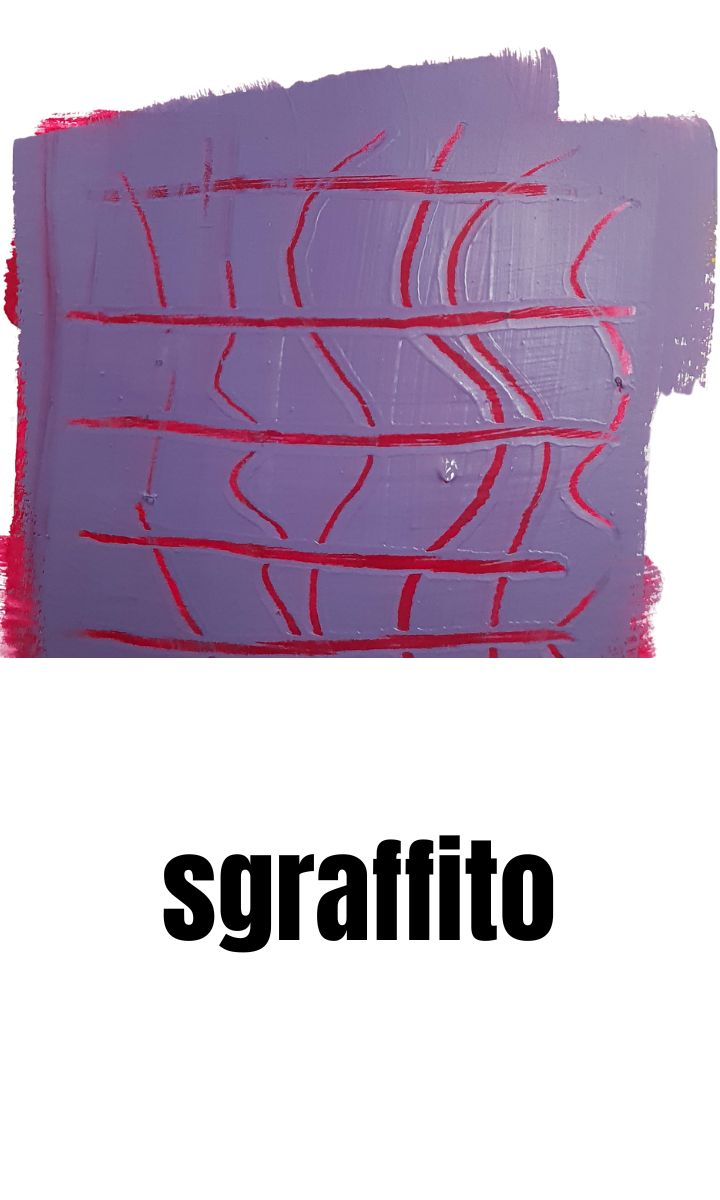
Sgraffito is similar to scraping. It’s also called scratching. With this technique, you first apply a layer of paint and then use a tool to scrape it off.
Artists mostly do this on thick layers of wet paint, but you can slo do it on dry paint.
When used on wet paint, you don’t need to scrape off the paint completely, you can only create marks on the wet paint to show the layers underneath.
This can be a great idea to create contrast. For example, if your bottom layer is yellow, you can use purple or blue on top and then scrape off that second layer. This way, the yellow will appear under the blue scratch marks.
Use tape for straight lines
You can use artists’ tape, washi tape, or masking tape.
If you want to paint straight lines with clean edges, you use this technique. This way, you can create geometric shapes, clean lines, clean edges, etc.
Masking tape is great for this since it doesn’t rip the paper when you remove it and it doesn’t allow the paint to bleed through it.
Gel printing
Using a Gelli plate for acrylic painting is such a cool idea. But, it’s also a learning curve.
A Geli plate is actually a sticky surface where you apply paint, add marks, etc, and then lift the image with paper.
It’s like printing or stamping.
There’s so much you can do with this technique and it offers a lot of opportunities to experiment with different tools and color combinations.
You’ll love playing with it and you’ll get such interesting results that you can easily become addicted to it.
It’s a great tool for creating backgrounds or even whole prints.
But be aware of the fact that you’ll need to spend some time figuring things out. But playing is always fun and you’ll be able to play with geli plate endlessly.
Color gradients

This is a neat acrylic painting technique and it’s not hard to do. That’s why beginners can do this as well.
The point is to create a gradient between two colors. For this technique to work, you need colors that mix well together. For example, red and yellow will work perfectly because together they create orange.
On the other hand, red and green will create a muddy gradient between them.
That’s why reminding yourself of basic color theory is the key, so you can learn which colors mix well and which create muddy, brownish results.
Whenever I do gradients, I use a kitchen sponge and the dabbing technique. It’s proved to be the best and the easiest tool for this.
But as with any other technique, you need to experiment and see what works and what doesn’t.
Practice is the key.
Things to consider when trying acrylic painting techniques
There are a few things I’d like you to have in mind before trying out these techniques. Once you get a hang of this, it’ll be easier for you to paint with acrylic paint.
It’s important to know your tools and the way certain colors behave.
Brushes
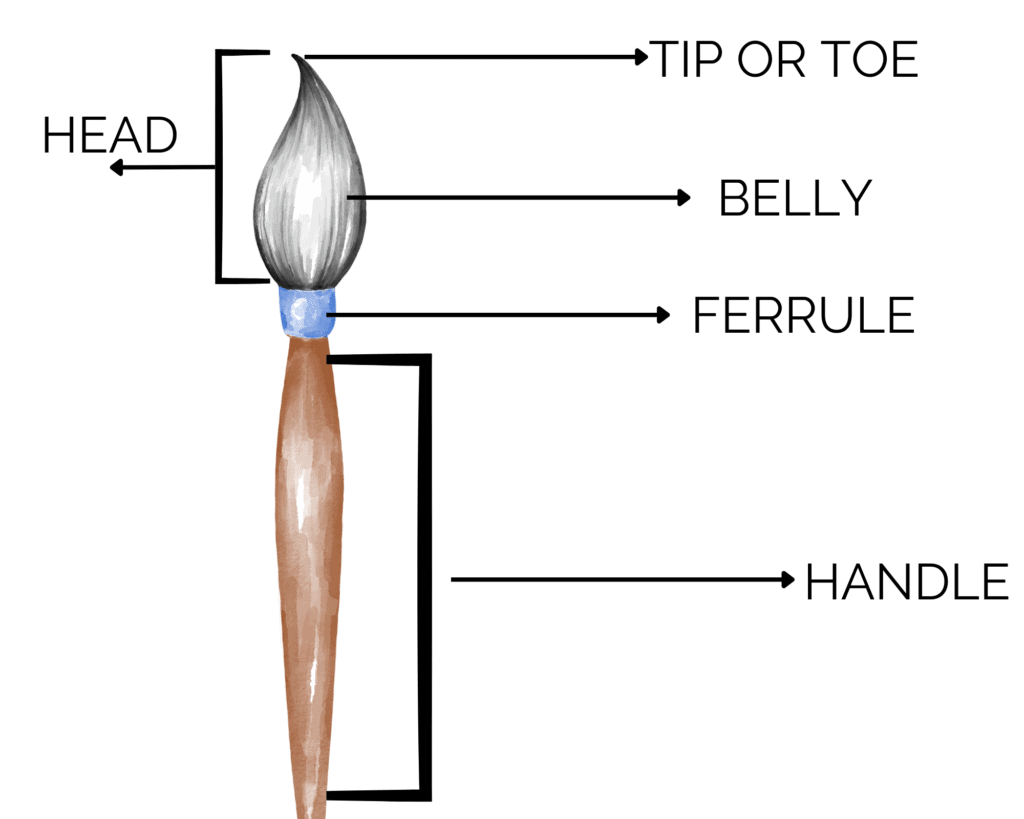
When it comes to brushes and acrylic paint, the safe thing to do is to have flat brushes. Round brushes are often too soft for acrylic paint. Leave those for watercolor.
For acrylic paint, you’ll want sturdier brushes in different shapes, like flat or filbert brushes.
Also, if you want to experiment, you’ll need brushes in various sizes.
Color mixing
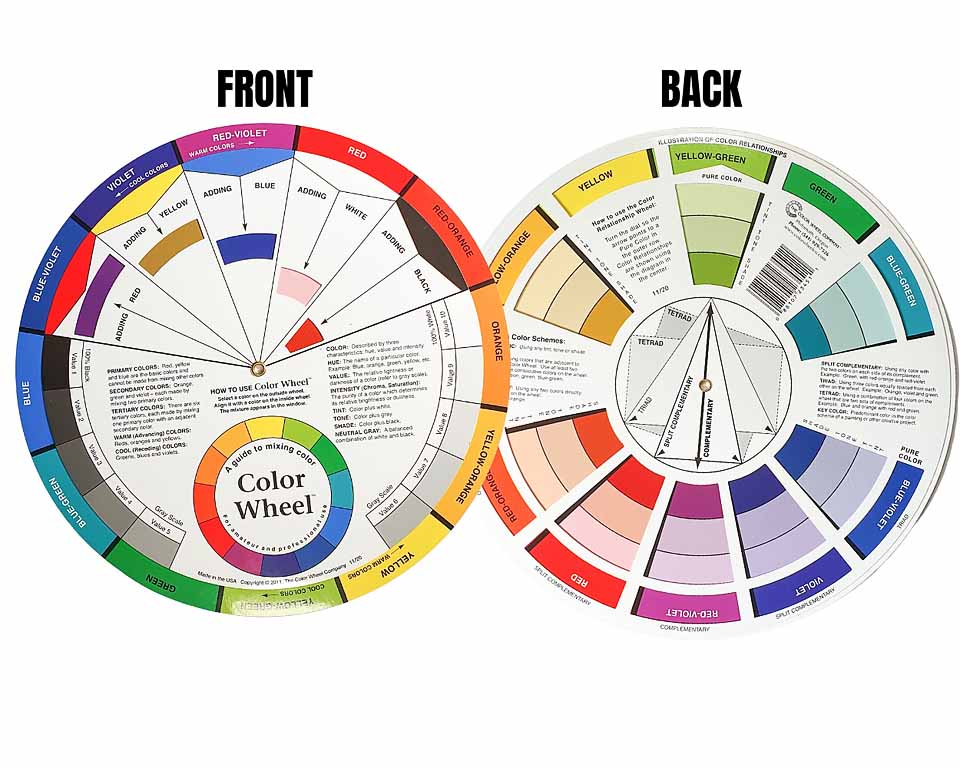
Color mixing is very important in acrylic painting. If you often get muddy colors, this is a sign that you need to learn a few things about color theory.
Color theory helps us mix colors and combine them for the best results.
When you learn about complementary colors and basic color schemes, painting will become much easier for you.
The most important tip to remember is that you can mix most of the colors by just using red, blue, and yellow.
Another tip is to learn complementary colors. For example blue and green are complementary colors. They work so well together as long as you don’t mix them.
Once you mix them, they create a muddy, brownish color. Unless brown is your goal, avoid mixing these two.
Other complementary colors that work in this way are yellow + purple and orange + blue.
Layering (from dark to light)
When you want to add more layers of acrylic paint and want your painting to make sense and be interesting and dynamic, you need to paint darker areas first.
When you paint lighter layers first, then the darker color will just cover them completely.
On the other side, if you paint darker layers first, they’ll still be visible (completely or partially) through the light layers. This is especially the case with watered-down acrylic paint, or paint that is fairly thin.
As with anything, experimenting with techniques is important and you’ll learn more by trying out different things on your own.
That’s why art journaling is a perfect way to do this. You get to paint in a notebook, try things out, and not worry about how perfect it is or be afraid of ruining things.
If it hadn’t been for art journaling, I’d never have grown my confidence in painting. It’s a carefree way to practice, explore and learn.
That’s why I want to invite you to try art journaling and practice all of these techniques without any overwhelm or fear.
Get your free art journal starter kit below and start today.
Get your FREE Art Journal Starter Kit
Start painting without any overwhelm in an art journal and learn what art journaling is, what supplies to use, and grow your confidence in art-making – perfect for beginners.
