How to Paint With Watercolor: A Beginner’s Guide to Watercolor Basics
If you’ve been wondering how to paint with watercolor because you’re an absolute beginner, this guide will help you start using watercolor and set the grounds for you to learn wonderful things you can do with this medium.
I know how watercolor can seem terrifying and that’s why I’m sharing all the watercolor basics you need to start using it today.
I mostly use my art journals to paint with watercolor, but the supplies and techniques you’ll find in this post can serve you in any other case (provided that you use good paper, but more about that later in the post).
Disclaimer: Some links in this post may be affiliate links. This means that if you purchase something through that link, I get a small commission, at no extra cost to you.
It’s an art medium with pigment in it and it’s water-soluble. This means that when you add water to this pigment, you can spread the pigment with a brush.
As opposed to acrylic paint, watercolors are lighter, translucent, and I would say, more gentle than acrylics. And so soft-looking!
However, they can be intimidating. This mostly happens if you paint with watercolors and don’t add enough water, or you don’t spread the pigment enough with your brush, or you add too much water and then you can’t control it.
Remember, watercolors are not supposed to look like acrylics, which are opaque and not transparent. On the contrary, watercolor paints should have the effect of translucency and softness.
Another thing that’s different from acrylic paint is that watercolors react with water even after they’re dry.
Don’t worry, you can still paint in layers, but keep in mind that if you use too many strokes over one area, you’ll lift the paint from the previous layer.
This comes in handy when you intentionally want to lift paint from certain areas, but more about his technique later in the post.
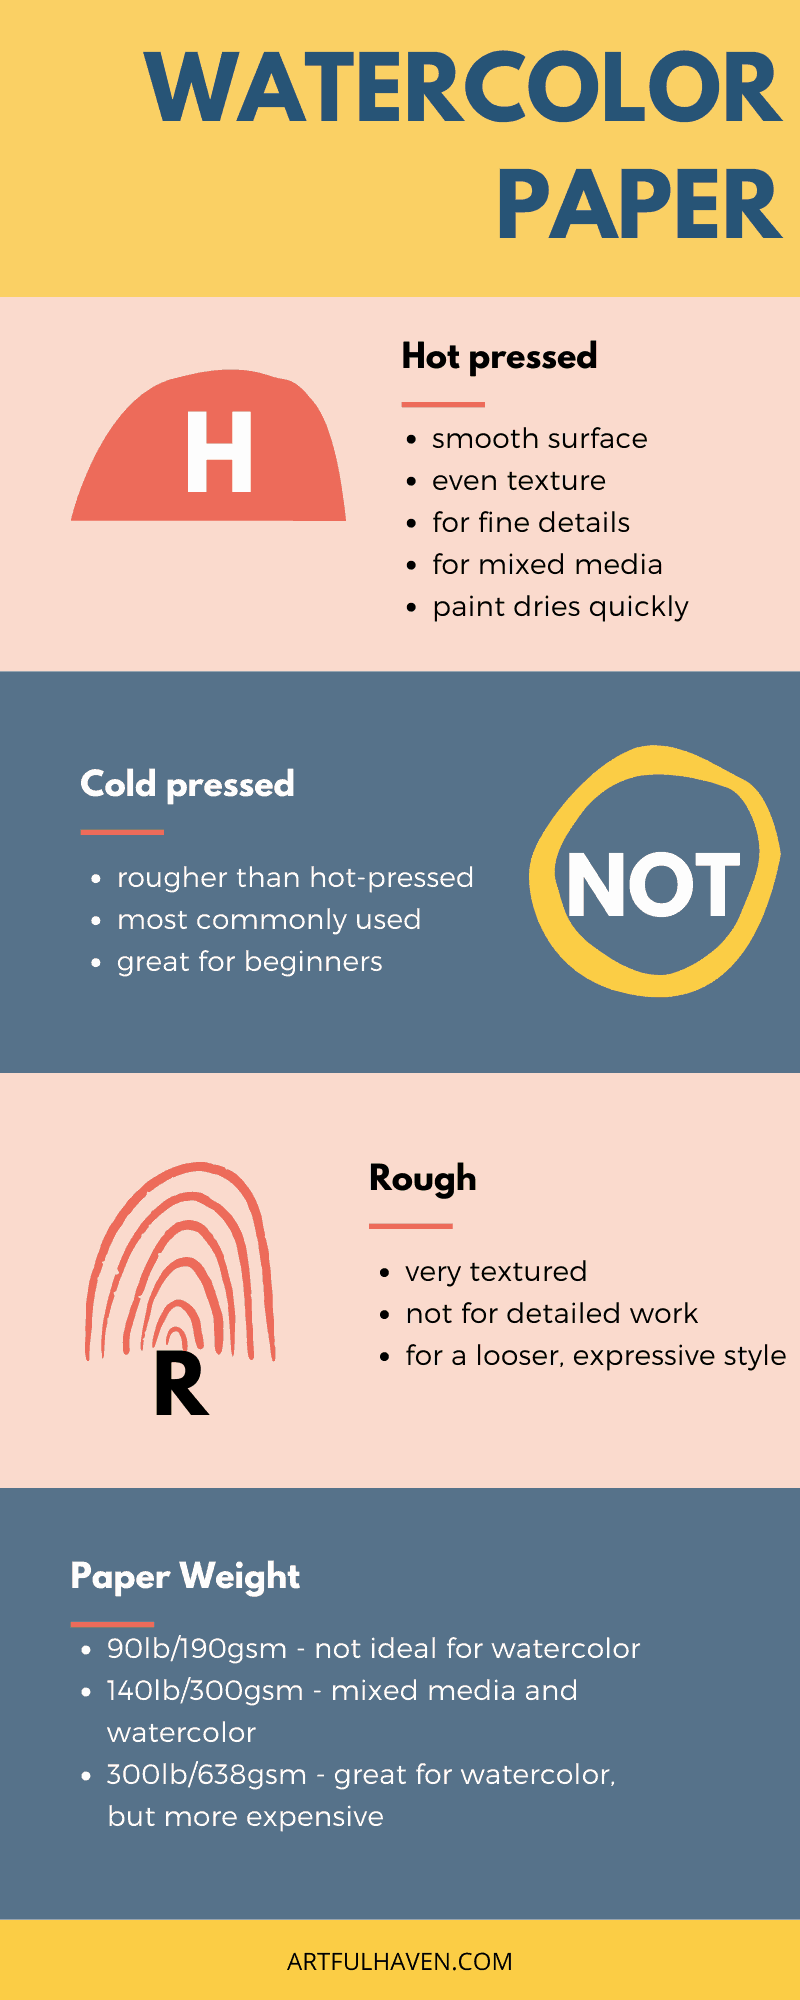
What kind of paper do you need for watercolor?
If you’ve been disappointed with your watercolor paintings, no matter how hard you try to make them lovely, the odds are you’re not using the right paper.
Here’s the thing. Watercolor just looks bad on printer paper or any other plain thin paper. But when you use watercolor paper, everything changes. And I mean, everything!
It took me quite some time until I realized that the only reason my paintings were awful was because of the paper. Since then, I’ve rarely painted with watercolor on thin paper. The joy of seeing how watercolor behaves on watercolor paper is just worth it.
So, before you venture further with watercolor, get some watercolor paper and you’ll see how things will change for you.
Find out more about the watercolor paper: Watercolor Supplies for Beginners
How to use water when painting with watercolor?
Besides using the right paper, you also need to learn how to control the water if you want to paint with watercolor. However, don’t feel discouraged because this comes with practice, and the more you paint, the more you’ll learn about this wonderful medium.
I’d like you to remember a few things:
- The most important thing you must know now is that the paint goes where there’s water. Your watercolor will never run on a dry area unless you intentionally put it there with your brush.
- Another valuable lesson is that the more water you put on the paper, the harder it is to control it.
So, start with little water and build from there. But if you end up with a lot of water, you can use a dry brush and pick up some water with it. Or, you can use a paper towel and gently press it on the water so it picks up the extra water.
- Also, adding too much water can destroy the paper, even if it’s thick watercolor paper. If you go over one place too many times with water and your brush, you’ll tear the paper, no matter its thickness. And you don’t want tiny bits of paper coming off while you paint.
- Finally, the more water you use to mix watercolor paint, the lighter the paint will be. So, if you want a really transparent, soft effect, use more water than paint.
On the other hand, if you use more paint and less water, you’ll create bolder paint but you’ll also have more defined edges. That’s something to keep in mind.
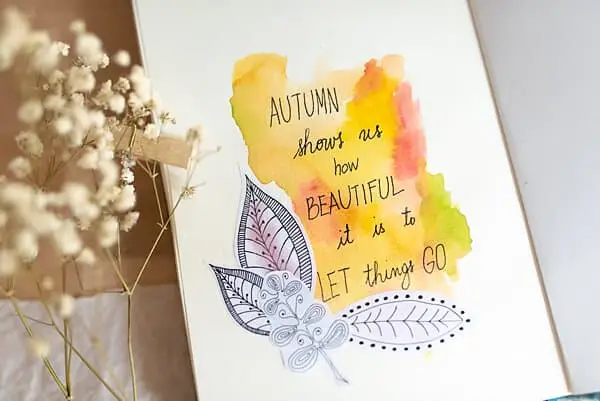
Layering with watercolor
When you paint with watercolor, all layers are mostly visible. That’s what’s so great about this medium, it’s translucent and soft.
But how to paint layers and what to be careful about?
- First of all, remember to start painting from light to dark. If you start the other way around, you’ll soon realize that you can’t do much. You can’t lighten the paint later if it’s too dark, but you can add more if it’s too light.
- When painting in layers, make sure the first layer is dry before you add the next one. Also, if you overdo a certain area with water, you might pick up the paint from the first layer because watercolor always reacts with water.
So, be careful about this and try to paint with lighter strokes, and don’t stay in one area for too long.
- If you want to paint the highlights, with watercolor, you don’t actually paint them. All you need to do is leave the white space and they become the highlights of your painting.
If you really want to learn how to paint with watercolors but don’t have enough confidence to do it yourself, there are great courses you can take. I’d recommend Creativebug where you can find a huge number of watercolor classes for beginners, with a monthly subscription that won’t break the bank.
Can I use watercolor on Gesso?
I’ve tried to paint with watercolor on a page primed with gesso, and must tell you that I don’t like the effect. The watercolors don’t show their full potential on gesso. As I already said, they are the most beautiful when used on watercolor paper.
However, sometimes I use them on gesso when I don’t want to paint a true watercolor image, but just add some bits of soft color to a page.
For example, if I want to create a paint flow, or make a soft background under an image or photo.
I’ve had great results painting with watercolor on Liquitex clear gesso. It’s not perfect, but it allows you to make a few blotches to add interest.
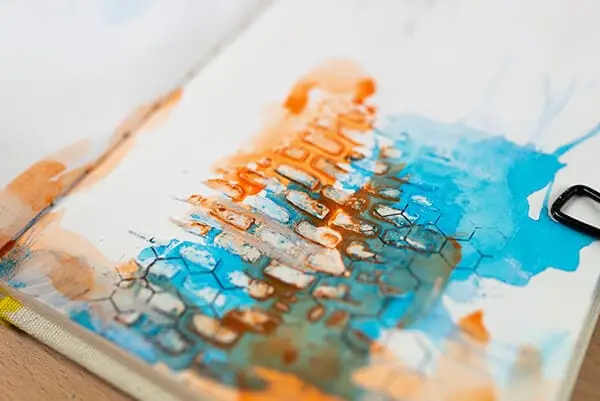
Another case I’d use them is on texture paste. First, I make a design with a texture paste and then I add watercolor over that. The paste resists watercolor for the most part and you might love that effect. Here’s an example below.
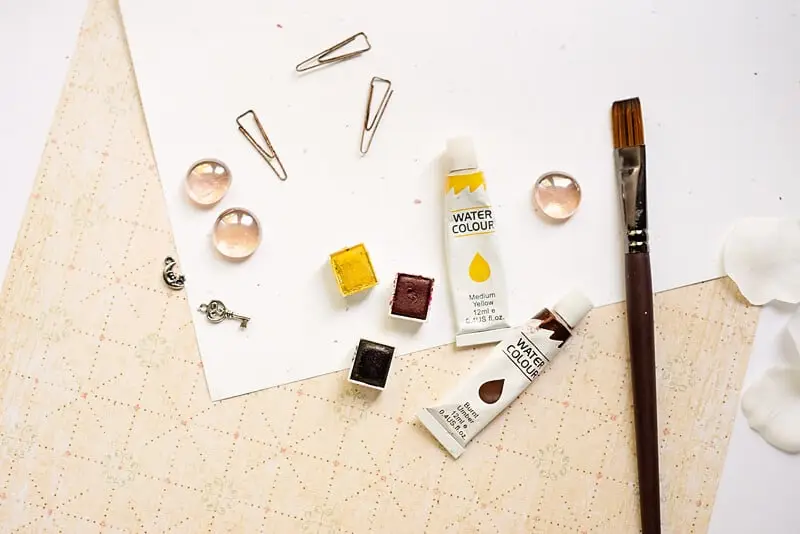
Watercolor painting supplies
If you’re wondering what you need to paint with watercolor, here’s a simple list of watercolor art supplies you’ll need to get started.
1. Watercolor paper or an art journal with watercolor paper inside
If you try using watercolor paints on regular thin paper, you’re up for some disappointment.
However, since art journaling is rule-free and carefree, there should be no limits to what you can use or make. I use watercolors whenever I can and this sometimes includes shitty paper.
But, if you want to see how perfectly watercolor behaves on watercolor paper, please find the paper.
You can find this paper anywhere, like in stationery shops, hobby, and craft stores, and of course, online. Search for the paper that is 300gsm/140lb. This is the weight of the paper or its thickness, to put it simply.
These are art journals and paper pads that you can use for painting with watercolors:
- Strathmore Watercolor Pad
- Jane Davenport Art Journal
- Canson Watercolor Pads and Journals
- Moleskine Art Collection Watercolor Album
2. What are the best watercolor brushes for beginners?
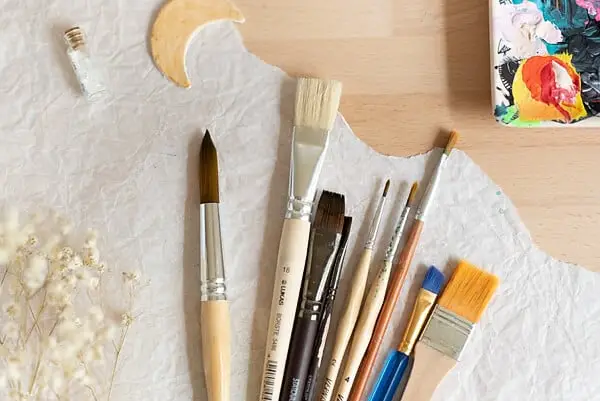
When I want to paint with watercolor, I use soft and round brushes.
This is not to say you can’t use flat brushes. It’s just been my preference and I love working with round, soft brushes. They tend to soak up just the amount of water you need.
If you want to know more, there are two types of watercolor brushes: made with natural and synthetic hair. The former ones are more expensive but of course, they perform better.
However, if you’re just a beginner, I’d suggest you get brushes with synthetic hair. They’re cheaper and will do the job just fine. Rather than investing in an expensive brush right away, you can invest in watercolor paper.
Here are some choices you can check out:
Round brushes for watercolor with synthetic hair
Round brushes with natural, squirrel hair
Fun and inexpensive brushes: water brushes
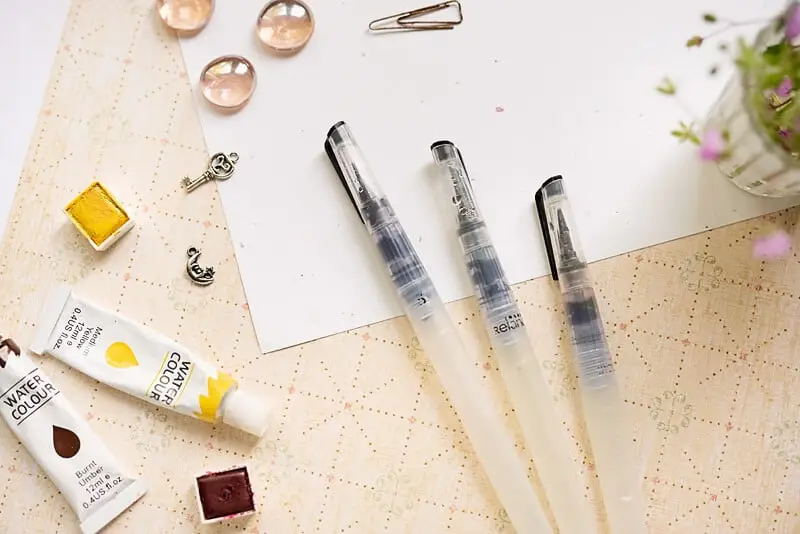
These are one of my favorite tools for painting with watercolor.
These water brushes already have a water container, so they’re always wet and you apply water just by pressing it firmly.
This is why they’re an excellent choice for a travel journal kit or a small kit you always carry around with you, without worrying about having jars of water always ready.
Having these brushes lets me sit on my couch, under the blanket, and still paint! I don’t have to sit at the table, and making art on the couch is a special kind of creating, a more loose and carefree one.
3. Water/jars
It’s obvious that you need water in order to paint with watercolors.
The container is not that important, you can use jars, mugs, plastic cups, or anything you feel is suitable for this.
I usually reuse jars or plastic containers.
So, what you’ll need are two of these containers.
First, you clean the brush in one container and then dip it in the second one to further clean the brush.
The first jar will always be dirtier than the second one, but this way you save time instead of changing the water in the jars more frequently.
4. Paper towel
You’ll need a piece of folded paper towel in order to clean your brushes quickly or to dry them when you need to.
The great thing about this is that you can reuse the paper after it’s dried. Well, not for eternity, but I’ve been using just one piece of paper towel for many paintings.
5. Watercolor paints
Yes, I left these for the end. It’s pretty obvious that you need these, right?
So, if you’re just beginning to paint with watercolor, you can buy cheap, student-grade watercolors at any craft store.
However, if you’ve tried those and want something better and more up the artsy ladder, I have an amazing solution for that.
I’ve been using Jane Davenport’s watercolor set I instantly fell in love with. The colors are vibrant and they’re already mixed so you have a nice choice of different colors.
But it still contains the three basic colors: red, yellow, and blue, if you’re into mixing colors. They’re called the Bright Watercolor Set.
Recently, I bought another of her watercolor sets called the Neutral set. And surprise surprise, I’m loving it! The colors are amazing for painting skin tones, which is awesome if you’re into painting whimsical ladies like I am.
Combine these two sets and all you’re ever going to do is more and more watercolor paintings, I’m telling you.
Find out more about watercolor supplies: Basic Watercolor Supplies for Beginners in Art Journaling
Basic watercolor painting techniques
I’m not going to write novels about this because it’s a topic for a whole other article.
However, I’m going to introduce you to a few basic watercolor techniques that I’ve been mostly using and that you can start with and improve your skills.
You can also refer to this cute infographic I created, so you can easily see the results of these techniques.
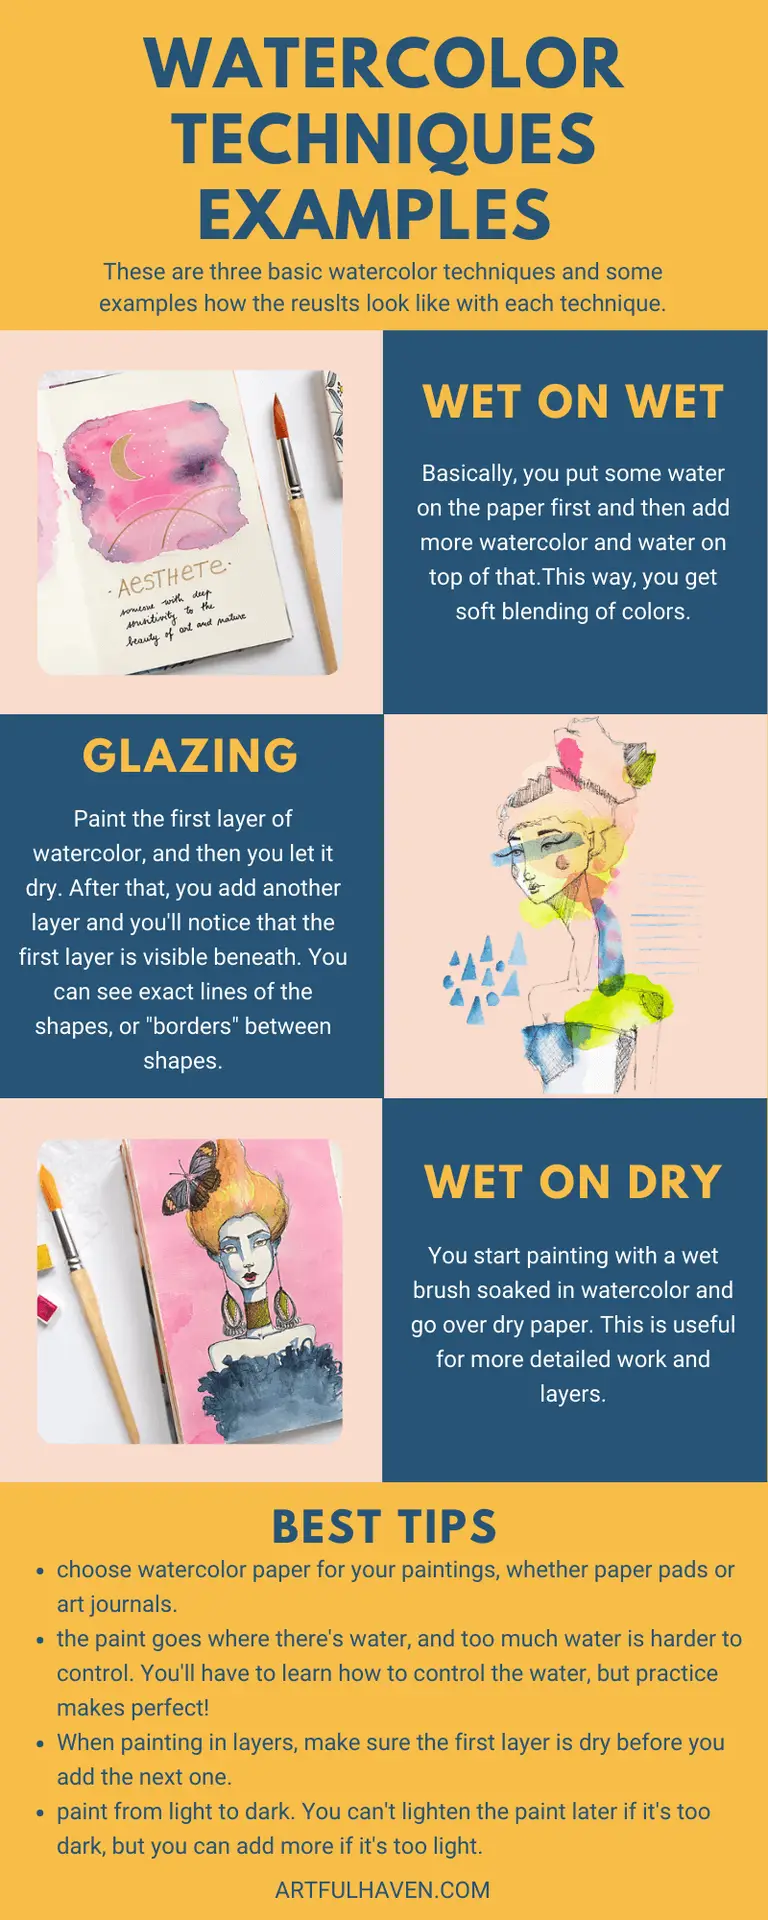
Here are the four techniques you can start practicing:
- Wet on wet (soft blending): for larger areas or a soft look
- Wet on dry: for layers and detailed work
- Glazing: for transparent layers
- Paint lifting: to create marks or even lettering, to pick up an extra color, or create highlights
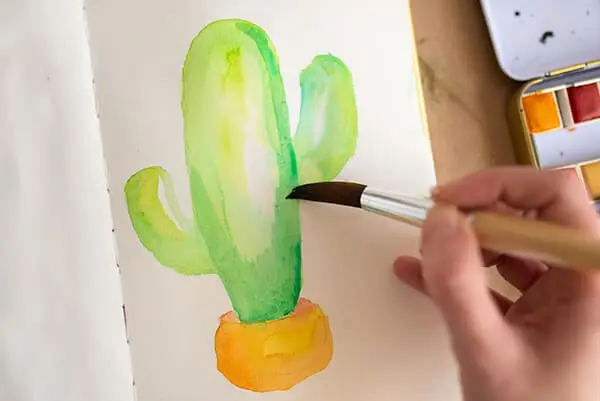
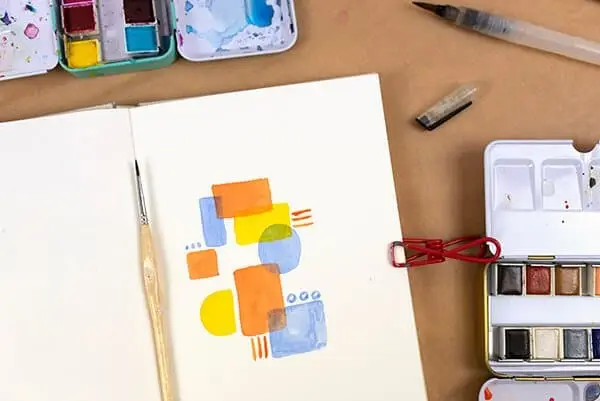
1. Wet on wet (soft blending)
Basically, you put some water on the paper first and then add more watercolor and water on top of that.
If you can’t see the water on the paper, just tilt your head a bit and the wet areas will be visible. These are just little perks every artist does.
I think it’s important to mention again that watercolor paint goes where there’s water. If you paint a circle with water and then add watercolor, the paint only flows within that circle, not the dry area around it. This is one way of controlling the water and paint.
I love this technique because the watercolors blend so softly and the transitions between shading and colors are not visible.
Here’s an example:
I applied the wet-on-wet technique and see how the colors blend nicely and have no definite lines between them?
The best way to see how this works is to practice like this:
- paint a circle or a square only with water.
- then, dip your brush in water and pick some watercolor
- finally, touch the wet area with the tip of your brush
You’ll see how the paint spreads with each touch of watercolor.
2. Wet on dry
This technique is the quite opposite of wet on wet. To achieve this, you start painting with a wet brush soaked in watercolor and go over the dry paper. It’ll still look soft like wet on wet and the same rule applies here: the paint (pigment) only goes where there’s water.
The main thing to remember is that when you paint like this, you immediately control the water with your brush and where it’ll go. It’s like drawing with a brush.
With this technique, you’ll achieve more precise areas with lines and shapes.
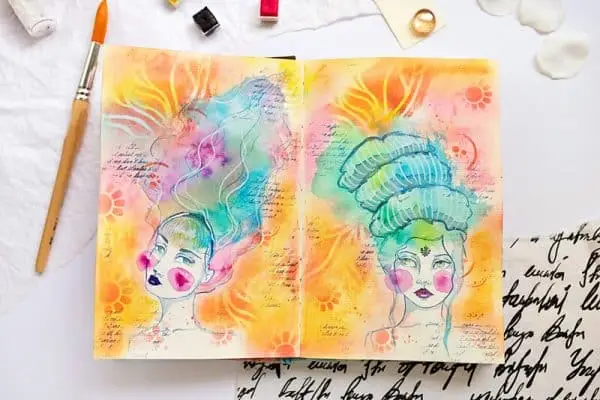
3. Glazing
The point is, with this technique, to paint the first layer of watercolor, and then let it dry.
After that, you add another layer and you’ll notice that the first layer is visible beneath. You can see exact lines of the shapes, or “borders” between shapes.
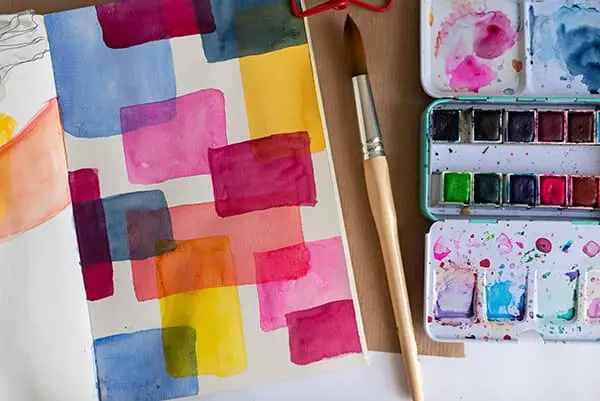
If you look at my art journal page above, you’ll see how the shapes of watercolor dance together but each of them is visible and unique on its own.
This way of painting lets you make beautiful markings and shapes.
Just bear in mind that the more layers you add, the darker the painted area will be.
4. Lifting the paint with a dry brush
When you paint an area with watercolors and want to create marks, you can take a dry brush and lift some paint while it’s still wet.
You can also do this when the paint dries, but then you need to use a wet brush in order to activate the dry paint.
This technique can be fun if you want to create different markings or even try writing something. The important thing is that you experiment and see what you can do and what you enjoy the most. That’s how you learn and have fun.
Learn more in the post: Watercolor Tips For Beginners In Art Journaling
How to paint with watercolor – recap
So, if you’re only a beginner and want to paint with watercolor, there are a few things you need to have in mind.
- First, choose watercolor paper for your paintings, whether paper pads or art journals.
- Second, remember that the paint goes where there’s water, and too much water is harder to control. You’ll have to learn how to control the water, but practice makes perfect!
- Third, you don’t have to get expensive art supplies just now, you can practice with cheaper options and then build up from there.
- Finally, there are some basic watercolor painting techniques that you can start with: wet on wet, wet on dry, glazing, and paint lifting. You can try just one to start with, and when you have more confidence, try other techniques as well.
And remember to have fun! Don’t be hard on yourself, you’re only a beginner, and mistakes are allowed. That’s the only way to learn and master things: through making a bunch of mistakes. This requires patience, so give yourself enough time to learn to paint with this medium.