The Simplest Mixed Media Art Journal Tutorial Step By Step
If you’ve started art journaling and want to try out mixed media as well, here is the simplest mixed media tutorial for you.
We’ll use fewest supplies possible but still create a genuine mixed media page with a soft, feminine vibe.
If you don’t have the supplies or tools I’m using, don’t worry. I’ll give you alternatives you can try.
Supplies for this tutorial
These are the supplies I used for this tutorial. They are all optional. You can make this page simple or have multiple layers. If you don’t have all of these supplies, just skip them and do something else that seems to be appealing to you. Or use the alternatives I suggest below.
- art journal
- watercolors (or acrylic paint)
- paintbrush
- stencil (you can cut your own – you’ll see later in the tutorial)
- make-up sponge
- a napkin or paper scraps
- washi tape
- letter stamps (or your own handwriting)
- ink pad (or a marker/pen)
- relief paste (or thick acrylic paint, or just an ink pad) + old credit card
- glue
- an image
Step 1
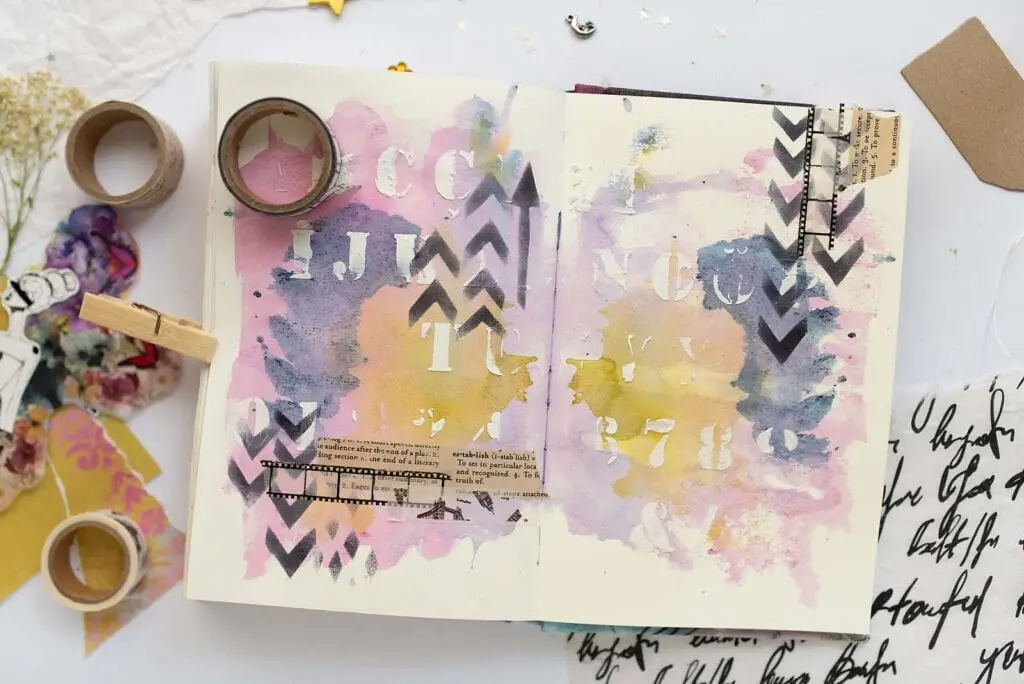
First, open your journal with a blank spread. Paint one page with watercolor, either one color or more. Cover the whole page or just some parts. Just experiment!
Then, while the paint is still very wet, close your journal so that the blank page presses the painted one. Keep it like this just a few seconds and then divorce them! Repeat if you want to have layers of color.

Step 2
Take a stencil of your choice. I love numbers and letters. Use an old credit card for this. Pick some relief paste and use the stencil to create great texture.
You can use acrylic paint as well for this effect. Or, if you’re not sure, just use a dish sponge and dab some acrylic paint through the stencil.
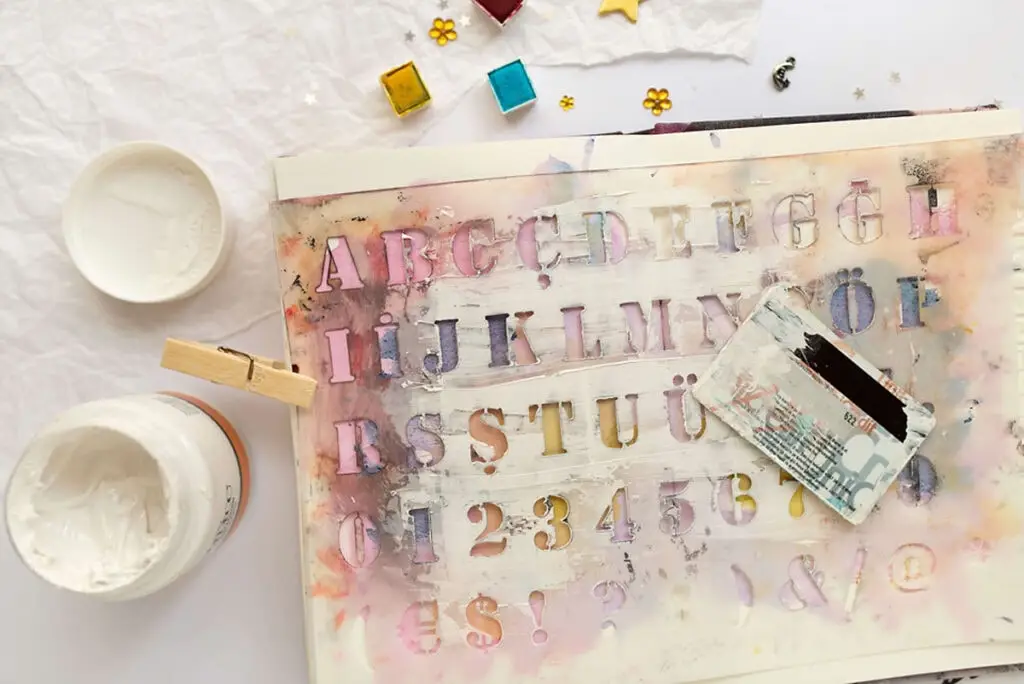
If you want a look like this, don’t use the whole stencil. Just here and there, so it looks more natural and unfinished.

Step 3
For this step I used another stencil. But this one is handmade. I just randomly cut out some shapes on an old photo. It’s been really useful :).
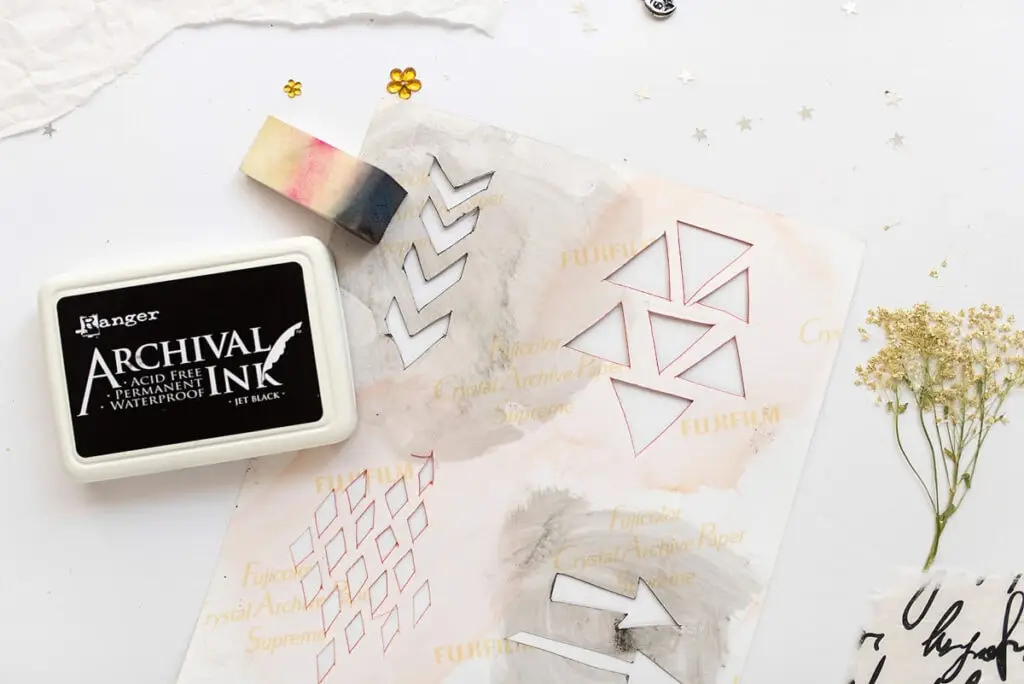
Then, use a make-up sponge and black ink. Make a few shapes on the spread in three places. This is because our eyes like odd numbers, and number three is a magical number, according to poets, artists and designers.
Step 4
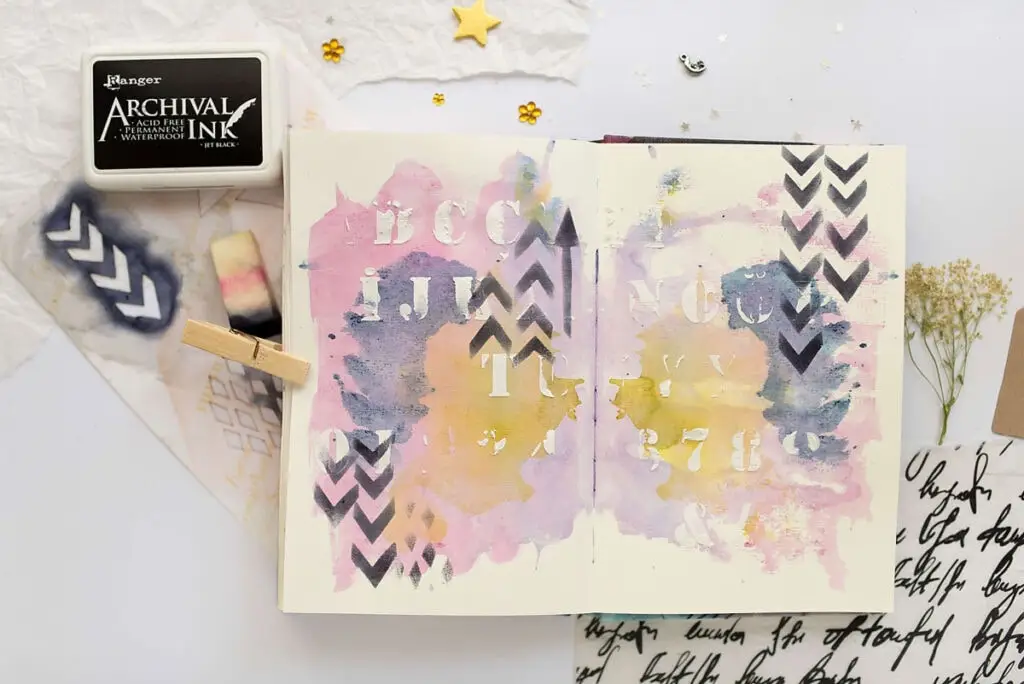
Then, collect some ephemera like washi, paper, a napkin and cut-out designs (from books or magazines, or you can even use your own photo).
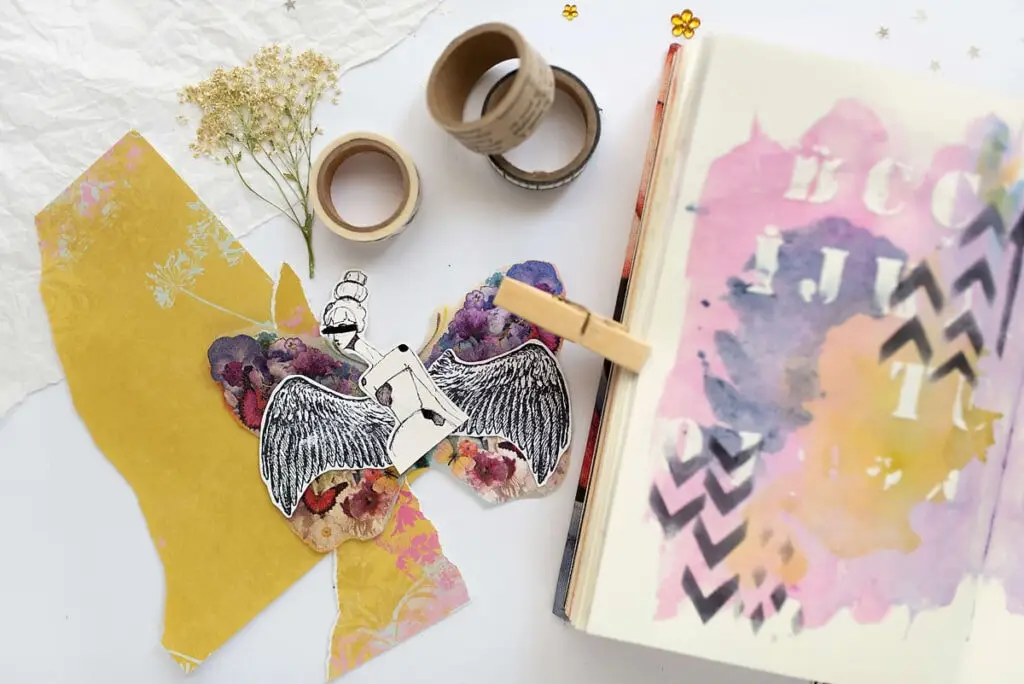
Here, I just put some washi tape in the places I used the stencil earlier. I love these earthy tones of washi. They are calming. See how I concentrated around three focal points? The magic number :).
Step 5
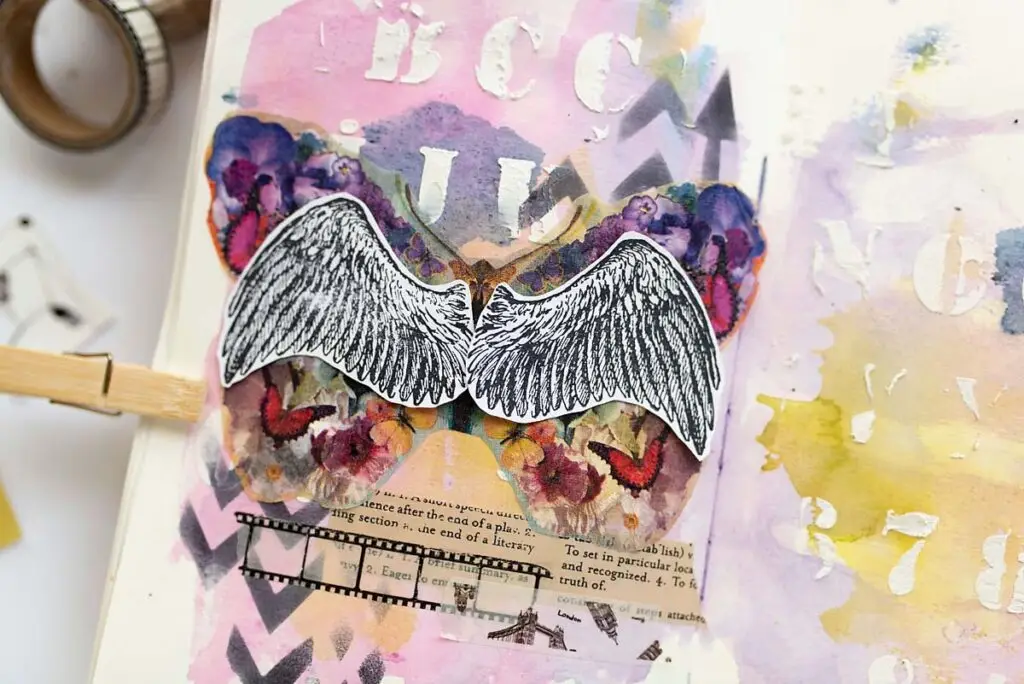
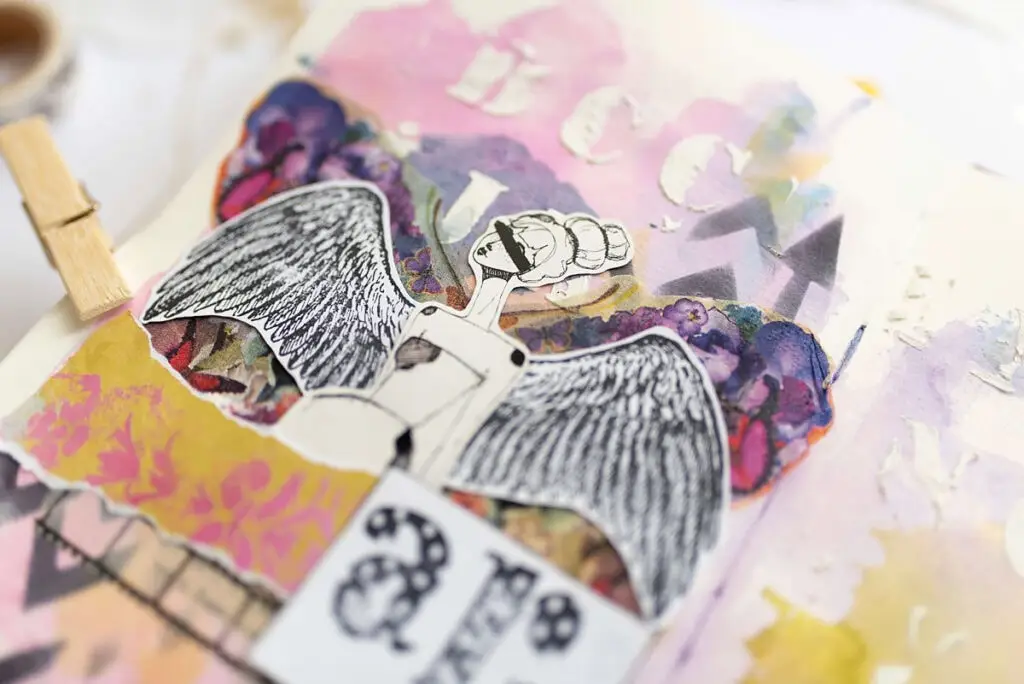
Then, I glued down my napkin butterfly. I imagined it as a nice background for my winged girl. I glued it with Distress Collage Medium by Ranger, but you can use any glue.

Then, I glued down the stamped wings.
Step 6
It’s time for more ephemera! I stamped some words on a paper. Then I painted the margins with black ink pad, and finally glued them all down in a position I liked.
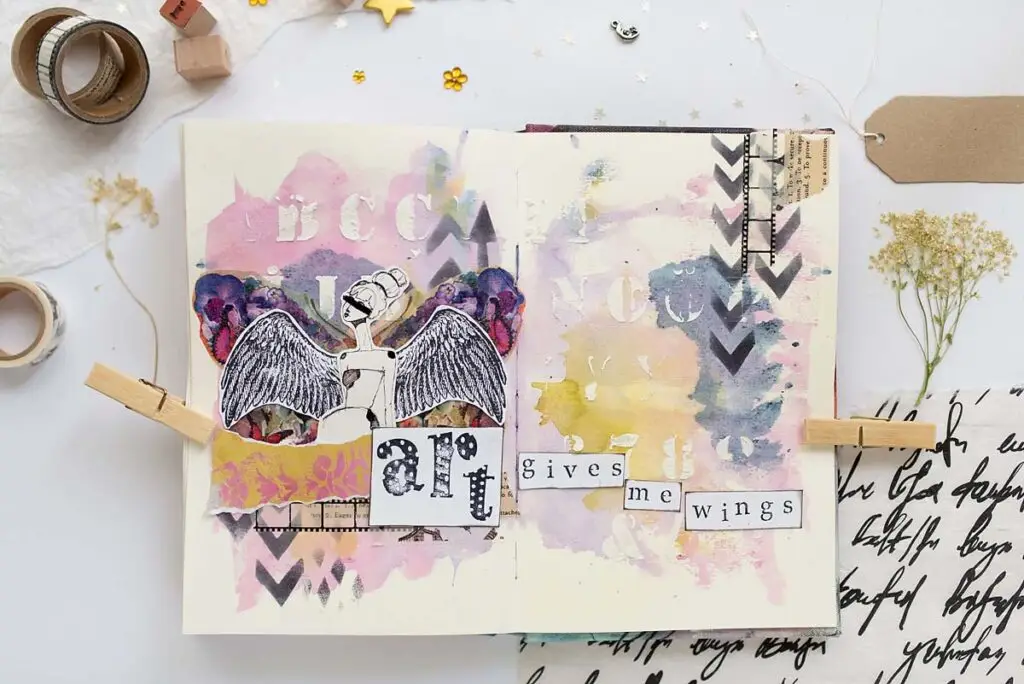
Step 7
If you want, you can use your pens or markers to draw around the words, to make them pop out a bit. Also, I used a white Posca pen to add some dots and stars.

Here’s the finished page. I hope you’ll try this mixed media tutorial and make wonderful, soft pages!

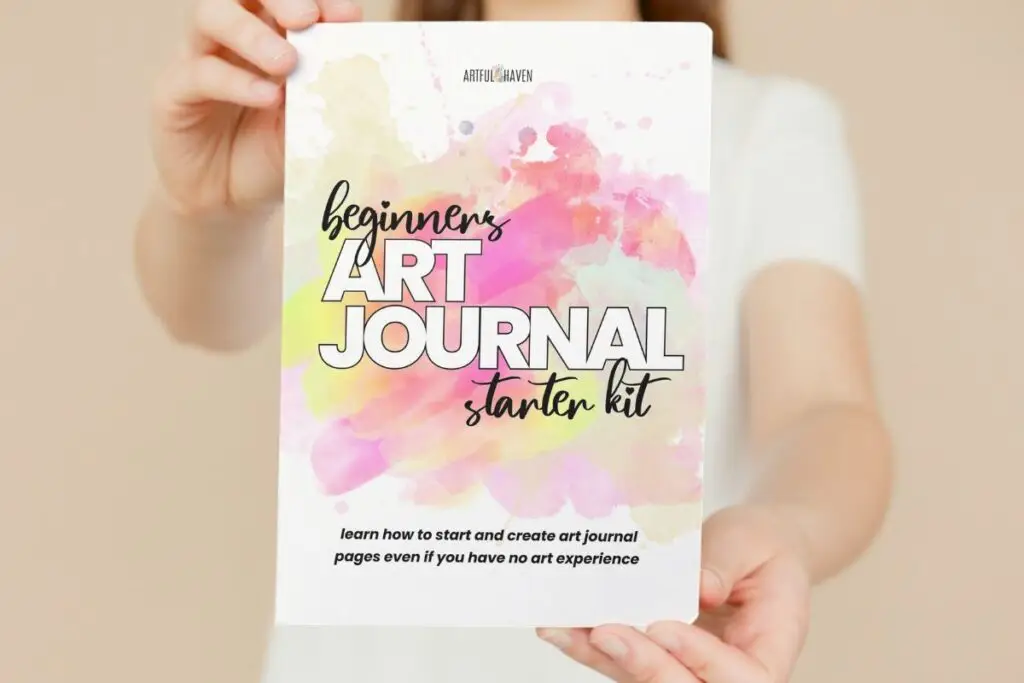
FREE Art Journl Starter Kit
Get this free art journal starter kit and begin making art without overwhelm and with confidence. Learn about simple techniques and tips for beginners.
If you want more mixed media art journal tutorials, you’ll love these:
Easy mixed media art journal tutorial with a magazine image
3 Easy mixed media background tutorials
3 Mixed media art journal tutorials using stencils