Best Acrylic Painting Tools And How To Use Them Creatively
Acrylic painting tools are the easiest ones to use in my experience (compared to oil painting tools). The beauty of acrylic paint allows you to use different tools, even DIY ones, and get interesting results.
I’ll be sharing basic and simple acrylic painting tools for beginners, especially art journalers. You won’t have to spend a lot of money, and I’m sure you already have many things around your home for acrylic painting.
Also, you’ll get tips for using these tools – how to get the best out of them, plus where to get them.
Basic acrylic painting tools
Let’s go over the basic and optional tools for painting with acrylics.
By basic, I mean that everyone should have these when using acrylics, whether you’re a beginner or an advanced artist.
The basic acrylic painting tools:
- Paintbrushes
- Palette
- Water jar
Not too many, right?
Disclaimer: Some links in this post may be affiliate links. This means that if you purchase something through that link, I get a small commission, at no extra cost to you.
Paintbrushes
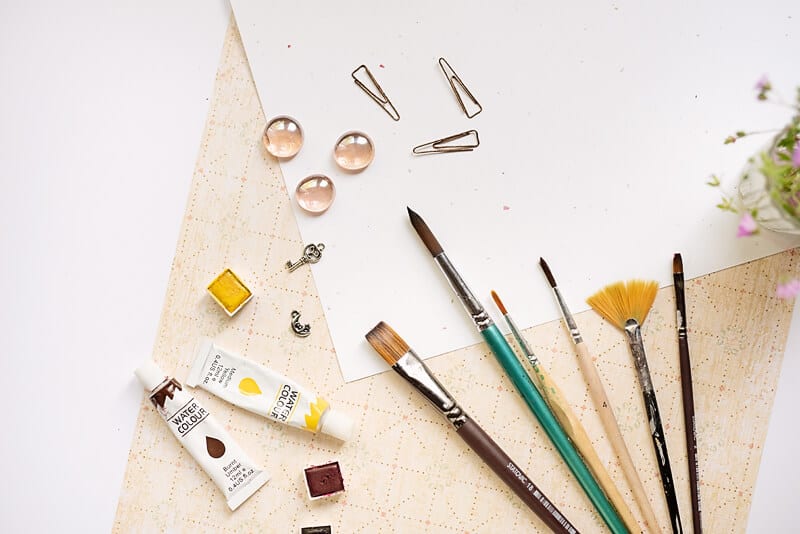
There are many types and sizes of paintbrushes, but if you’re just starting, you can get flat brushes because they work great with acrylic paint.
Also, filbert paint brushes are great for getting more details without creating hard edges.
Think about what you’re planning on painting. If you need a brush for the background, choose a larger, flat brush – size 20 and up.
If you want to add marks or details, get a filbert brush in a smaller size like 6, 8, or 10.
Paint palette
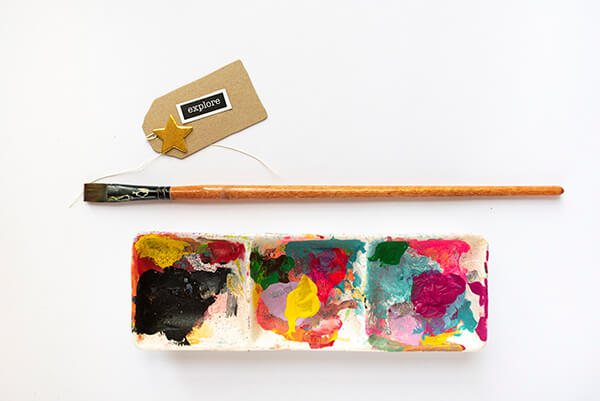
A painting palette can be anything. You don’t have to spend money to get one. You can use any plate you have, anything plastic, ceramic, or glass.
If you want to get a palette with sections, there are a number of sizes and styles to choose from.
What’s good about acrylic paint palettes is that when the paint is dry, you can add a different paint on top without activating the first, dry layer.
That’s why I stopped washing my palettes. I was just lazy, washing them took me away from the actual creating, so I just stopped.
However, I’m careful with the amount of paint I squeeze out, I don’t want to waste it. So, if you’re like me and don’t like cleaning, just don’t add too much paint at once so you don’t waste it.
Water jars
This one is really simple and self-explanatory. Just get a jar or a mug that you don’t use anymore, and fill it with water.
The only advice I’d give here is to choose a jar nig enough so you can add enough water. If you choose something small, even one brush dip will make the water dirty.
Even more, you can have two jars and clean your brushes in both. This saves you time from going to the sink to change the water.
Optional acrylic painting tools
And here’s where the fun begins. You can use many things to paint with acrylics that can boost your creativity and inspire you in a lot of ways.
Or, these tools can make your life easier (because they’re neat practical things).
Sponge/foam brushes
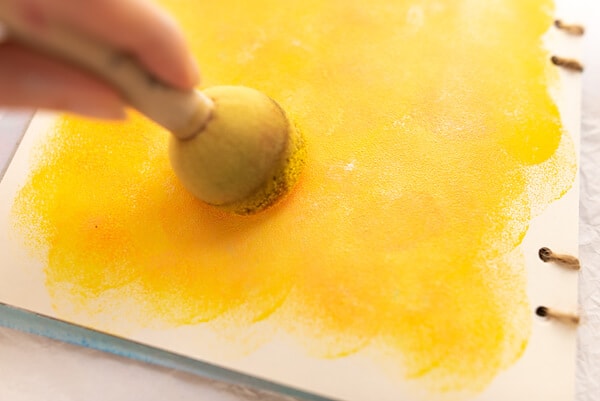
Basically, these are sponges with a holder. They need to be firm enough to spread the paint. But if you water down your paint, they are a marvelous tool to use.
They can be great for covering larger areas and you can also use them with stencils.
Painting knife
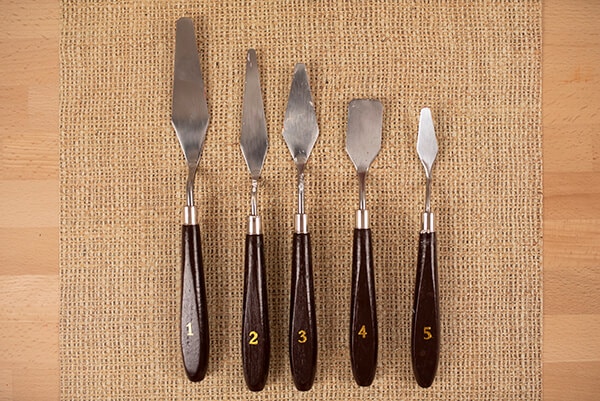
A painting knife or a palette knife (there is a slight difference but they can basically be used for the same purposes) is a great tool for painting with acrylic paint.
With it, you can mix paint as well as add paint to your surface while creating texture.
It usually creates a thick layer of paint or smudges the paint, but you can play around with it and see what you can achieve.
They’re easy to clean but you need to clean them right after using them because acrylic paint will get dry and then you’ll have problems getting it off.
For this, I use a paper towel or a cloth and just remove the wet paint with one move. It takes just a few seconds so it doesn’t take a lot of your precious time off actually painting.
Also, you can get painting/palette knives without spending a fortune.
If you still don’t have one but you’d like to try this style of painting, you can use an old credit or gift card. It can create similar or even the same effects as the painting knife.
Kitchen sponge
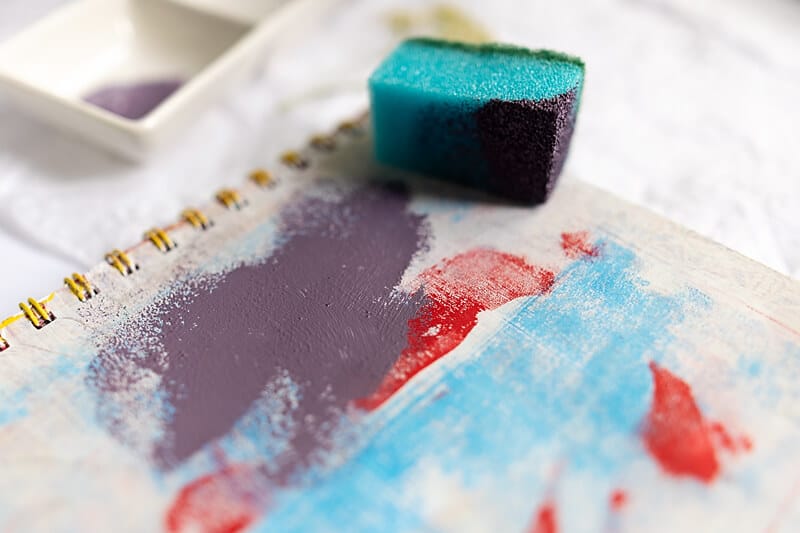
This is one of my all-time favorites to use for acrylic painting techniques. It’s amazing because:
- It’s cheap
- It’s easy to get
- It’s easy to replace
- You can reuse it over and over again
- It creates great texture when you dab with it
- You can cover a lot of areas, so they’re great for backgrounds
- They’re amazing for blending different colors
- You can use them in combination with stencils and this gives amazing results
Try out the sponge you have in your kitchen right now. Cut it out in 4 pieces (or more or fewer, depending on the size) and try dabbing with it or blending two colors together.
After you finish, if you want to reuse the sponge, wash it immediately. If you do so, you’ll be able to use it again. Otherwise, the paint will get dry and then the sponge is completely worthless.
Painting sponge
There are a number of art sponges you can buy specifically for painting. They look like sea sponges and you can create interesting textures with them.
You can use them like you’d use a kitchen sponge, but since their shape isn’t geometrical, they won’t leave hard edges while dabbing with them.
Masking tape
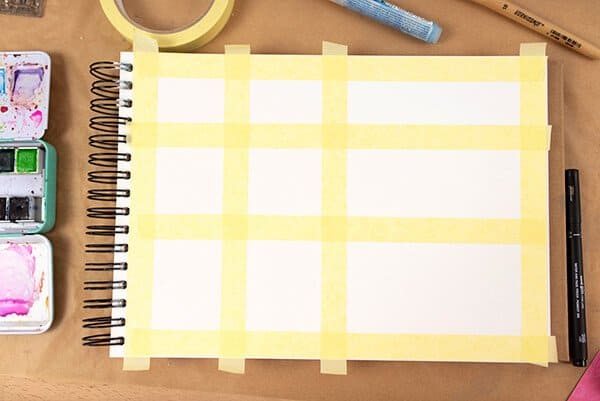
I don’t use this one often but it’s an interesting tool for a few reasons.
With masking tape you can:
- Frame your page/paper so you get a nice white space/frame around your painting
- Play with it by creating shapes and then painting within the shapes. Then lift the tape and you’ll have great patterns or shapes
- Put straps of tape to secure the journaling space. After you’ve painted the page, remove the tape and you’ll have nice, white space to write on
Texture tools for acrylic paint
There are different texture tools for painting with acrylics, whether you buy them or just use things from your home.
You’ll mostly get texture if you apply a thick layer of paint and then create texture with some tools.
For example, a scraper can help make lines by picking up some paint.
There are amazing texture tools you can find in your home. I’ll share those below in the cheap tools section.
Binder clips
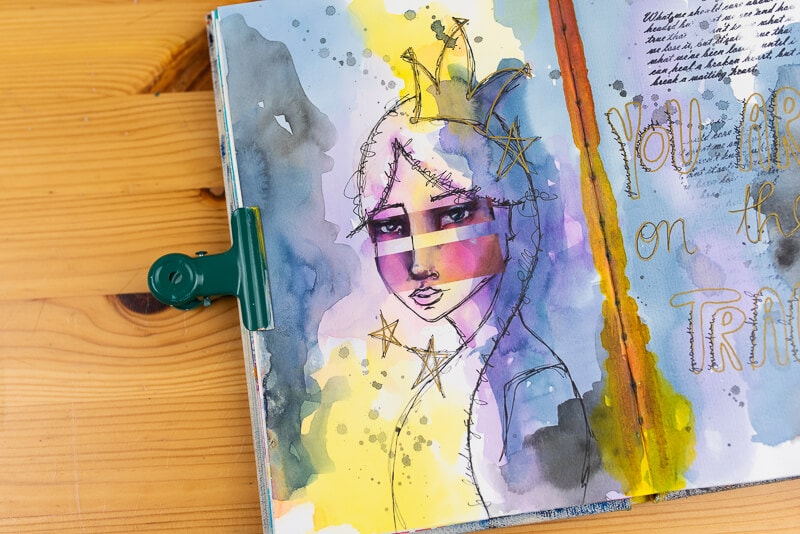
No, you don’t paint with them, but they’re useful tools to keep your art journal ages from moving while you paint.
I take a few pages and clip them together so that my journal stays flat the whole time, especially for small journals.
Gesso (not actually a tool, but…)
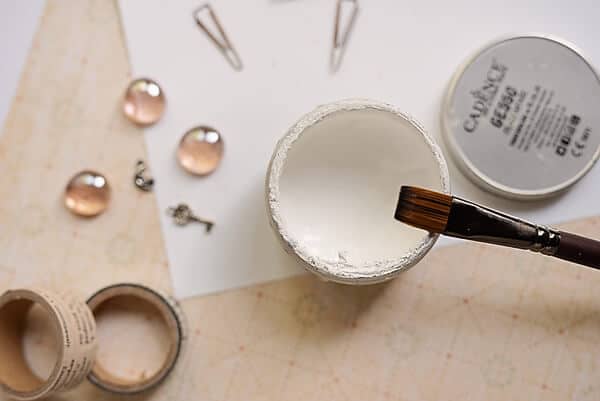
Gesso is not an acrylic painting tool, but it’s a great medium.
You use gesso to prime your page for painting. This was mostly used on canvases, but it’s very popular in the art journal community for a few reasons:
- When you cover your page with gesso first, acrylic paint also becomes richer in color
- If you have thin paper, gesso can help by securing no paint bleeds to the back of the paper
- You can use white or black gesso to cover “mistakes” you don’t like
Heat gun
A heat gun can be a life-saver. It’s like a very hot hairdryer but it doesn’t blow things away. You can use it to speed up the process of drying acrylic paint.
Just use it carefully because it can get really hot, and you mustn’t keep it in one place for a long time or the paint will turn into frying bubbles.
It takes just seconds to dry the paint, so don’t overuse it.
However, if you have time to wait for the paint to dry, you should do so. You see, while using the heat gun, some paint may have awful smells and you shouldn’t inhale that.
It’s just my thinking…if it smells bad, it’s not good for inhaling.
What is the best tool to mix acrylic paint?
I usually mix acrylic paint with a flat brush or a palette knife.
Sometimes, I can also use a kitchen sponge for mixing if I’m going to use the sponge for painting as well. It’s a great process for perfectionists, to lose the need to have everything perfectly blended.
Also, if you want to experiment, you can also try mixing the paint with a wooden stick, like ice-cream sticks.
What’s the best tool for creating texture?
Creating texture with acrylic paint is always interesting. And even more, you can use sooo many tools to do this. And most of them you can find in your home.
Here are some examples of tools for texture:
- Scrapers
- Kitchen sponge
- Bottle caps – you dip them in paint and stamp
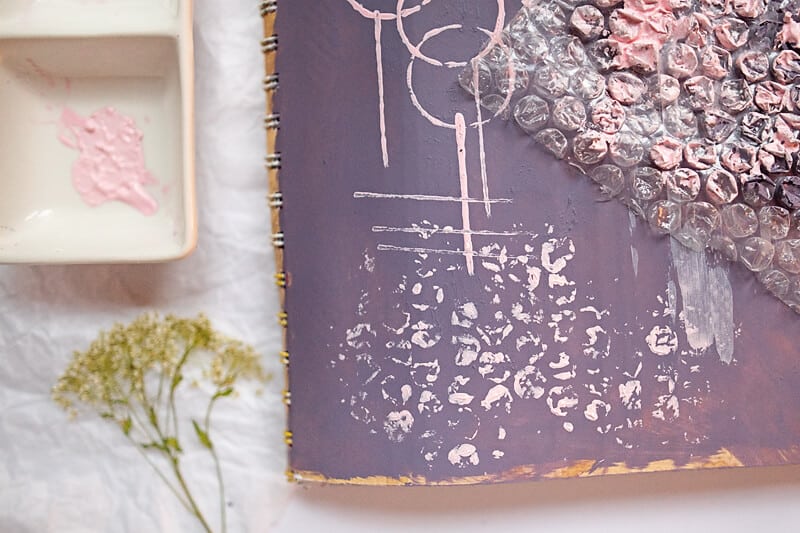
- Bubble wrap – gently apply paint on it and then stamp with it. Don’t put too much paint on the wrap because it will smudge more easily
- Foil – put a thick layer of paint on your page, then add the foil and wrinkle it. When the paint is dry, pick up the foil.
- Cardboard – add paint with it, scrap paint off, stamp with it
- Credit/ gift card – same as with the cardboard
- Brayer
What are the best tools for acrylic backgrounds?
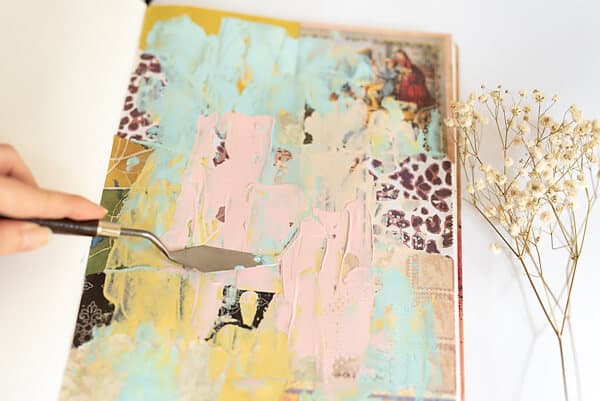
When you create backgrounds with acrylic paint, you need tools that can cover larger areas quickly. Also, you need tools that are good for blending.
Brush
For painting backgrounds, you can use a larger flat brush. They are great for covering larger areas with bigger strokes. So you won’t waste much time.
Palette knife
A palette knife is also great for covering backgrounds because it can carry a lot of paint at once and you can smudge it easily with it.
Just bear in mind that the paint strokes will look different than the ones done with a brush.
With a palette knife, you’ll get more texture and it’ll be harder to cover every inch of the page equally.
Sponge
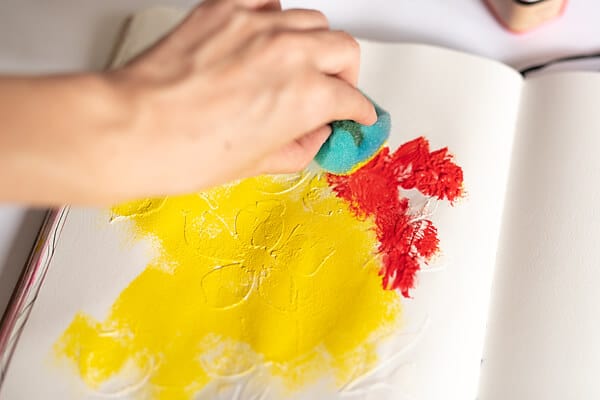
As I already said, a kitchen sponge is an amazing tool. If you use it for painting backgrounds, cut it into bigger pieces, if time is of essence to you.
Dip it in paint and then dab it on the paper.
The sponge works great for creating a blended background. You can achieve this by dabbing two colors at once.
Stencil
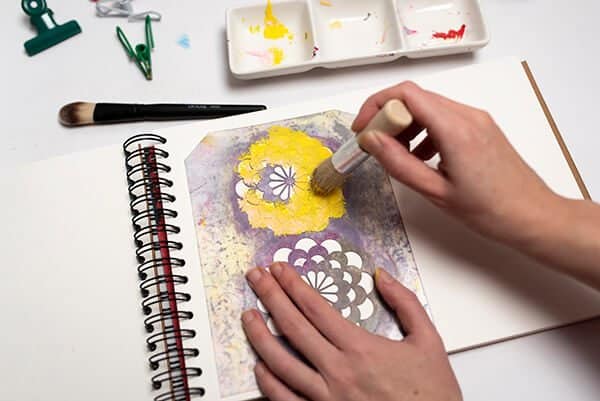
In combination with a kitchen sponge, a stencil is such a fun tool for backgrounds.
You can use one stencil or combine more to create a busy background or even a patterned one.
Plus, you can use a stencil brush with stencils. In the image above, I’m using this tool to paint flowers on my page.
Brayer
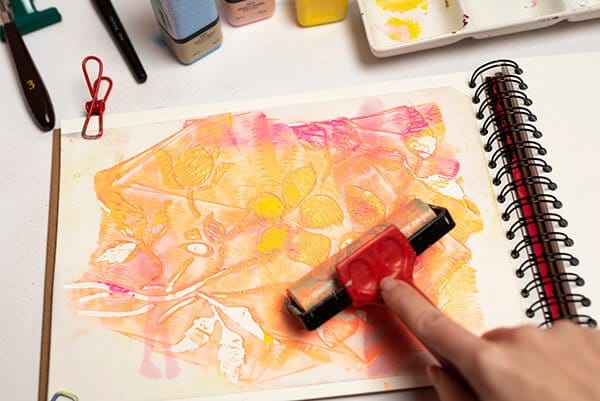
This tool is sometimes the fastest. This means it gets a lot of paint at once on your page with just a few moves.
It’s a handy roller that allows you to spread the paint in any direction quickly. It’s like it irons out the paint.
However, it creates a visual texture by leaving some white spaces. You can avoid this if you use more paint and repeat the process once or twice.
Cheap (or free) tools you can use for acrylic painting
The cheapest tools for acrylic painting can be found in your own home. I’ve already mentioned some of these, but here’s what you can use for painting without spending a lot:
- Sponge – great for texture, covering larger areas, and blending
- Credit card or a piece of cardboard- for texture, even mixing larger amounts of paint, for stamping
- Bottle cap – for stamping
- Bubble wrap – for stamping, and you can create whole backgrounds with it
- Foil – for texture, for backgrounds
- Fork – for adding lines, like a paint scraper
- Toothbrush – it’s great for creating splatters of paint
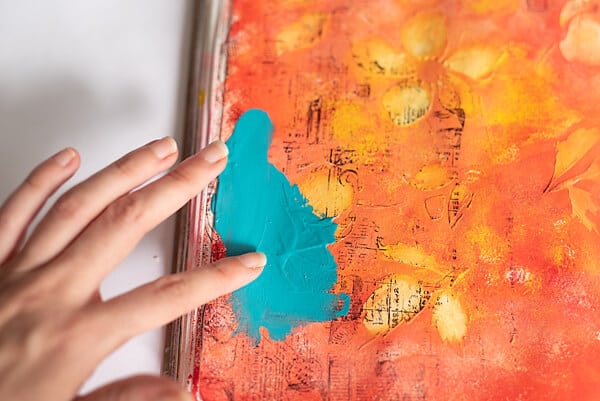
- Fingers – the cheapest tool there is. Mix the paint with your fingers, paint with your fingers, it’s a lot of mess but also a lot of fun
Acrylic painting tools – final recommendation
The bottom line is, that you can use a great number of tools for painting with acrylic techniques. Here are the best ones I’d recommend trying:
- Brush
- Palette
- Kitchen sponge
- Brayer
These are the tools you’ll mostly use and always come back to. With time, you can experiment with many others, and you should. Experimenting with and exploring painting leads to creativity and growing your confidence, and creativity will result in making art journal pages you’ll be proud of.
You might also be interested in:
Acrylic Paint Brushes Basics: Best Brushes For Beginners In Art Journaling
What Is Acrylic Paint? – Everything You Need To Know To Start Painting With Confidence
13 Simple Acrylic Painting Tips For Beginners That Will Transform Your Art

