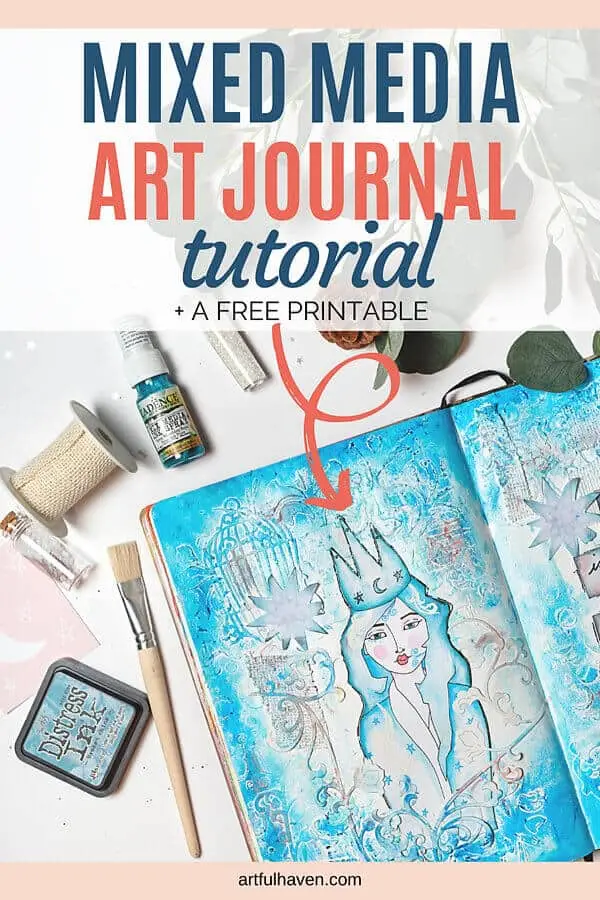
Mixed Media Art Journaling: Winter Wonderland Art Journal Page
Today, I’m doing a mixed media art journal tutorial for making a winter-themed art journal spread.
I’ve done the tutorial with detailed step-by-step instructions and I hope you’ll love it and make your own winter art journal pages.
Disclaimer: Some links in this post may be affiliate links. This means that if you purchase something through that link, I get a small commission, at no extra cost to you.
Mixed media winter wonderland
If you’ve wondered what mixed media is, let me just give you the basic info but you can read more about it in my article about another mixed media tutorial, where I share a bit about mixed media in general.
Mixed media is creating art with different media, the choice of media being unlimited. Besides art supplies, you can use anything you want in this kind of project, like ribbon, buttons, etc.
Mixed media supplies I used
I just wanted to list the supplies I’ve used in this tutorial, but I encourage you to use any supplies you want. You can find replacements for my supplies, or use something completely different. Just enjoy and don’t worry if you don’t have all of them.
White Gesso
Paper cut-outs for texture
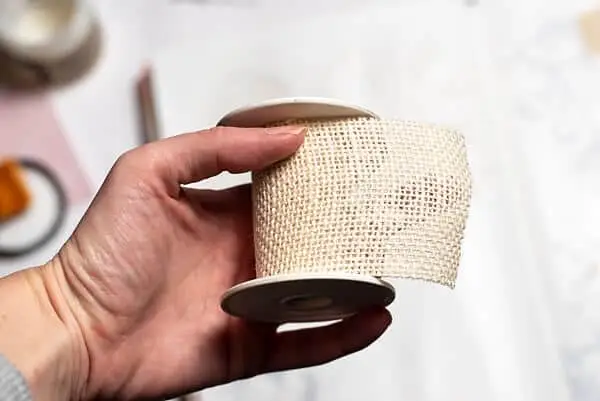
Some burlap
Blue spray ink by Marabu
Embossing ink and powder
Faber Castell Gelatos
White texture paste
A Winter Fairy printable (you can download it for free by filling in the form below, or at the end of the post)
Distress Ink pad (Broken China)
Glitter
Distress Collage Medium (you can use any glue you want. This will serve to glue down the paper)
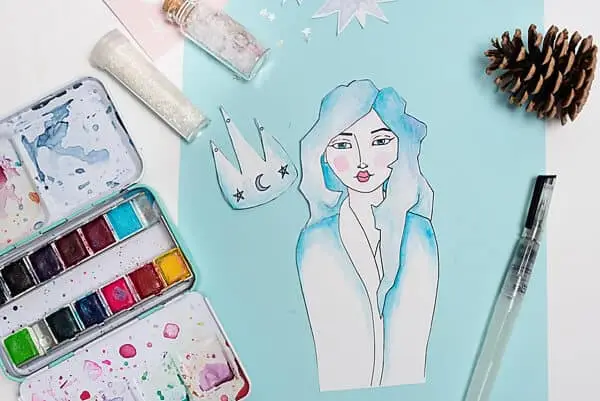
Step 1. Winter Fairy printable
Print out the Winter Fairy on a thick paper, so it’s sturdier and easier to glue afterward.
First, I cut her out and painted her with watercolors by highlighting her rosy cheeks and her frosty hair. I used the Jane Davenport Bright Watercolor Set, which is amazing by the way.
Step 2. Gesso
I used gesso to cover my whole spread because I knew I was going to use a lot of water, and gesso stops the paper from absorbing all the liquid.
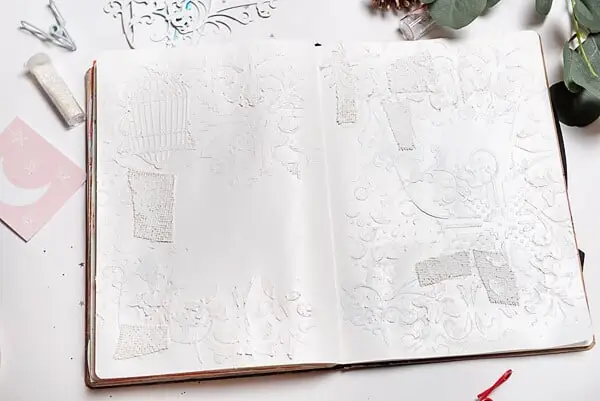
Step 3. Making texture
Most of the steps in this tutorial are about creating texture. These kinds of pages look strange in the beginning but as you progress, you can start imagining what the page is going to look like.
Textured mixed media pages are great fun to make, and also very messy. So, have that in mind.
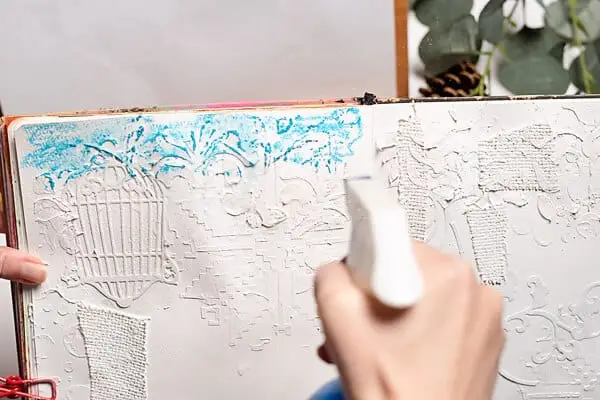
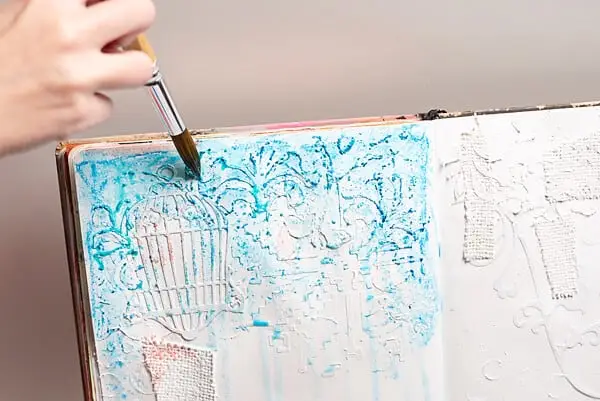
Texture with texture paste and stencils
Here, I used texture paste and 3 different stencils.
I tried to get as much texture as I can and leave the middle to glue my winter fairy later.
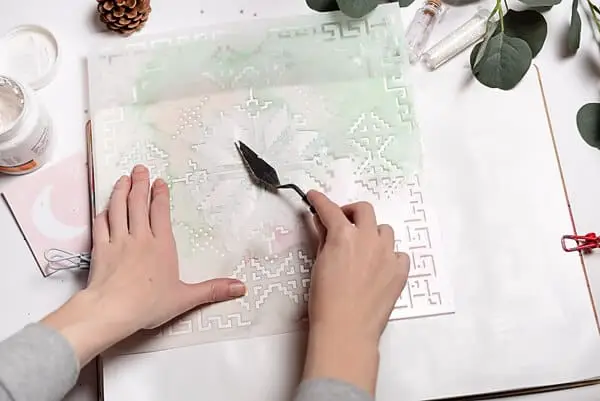

When it’s all done, let it dry. Even better if you have a heat gun, but be careful with texture paste. If you warm it too much, it’ll start to blow like a bubble. But hey, if that’s the texture you’re hoping for, then go for it.
Get texture from gluing things down
Here, I used some cut-outs I had in my stash, and just glued them down with Distress Collage Medium.
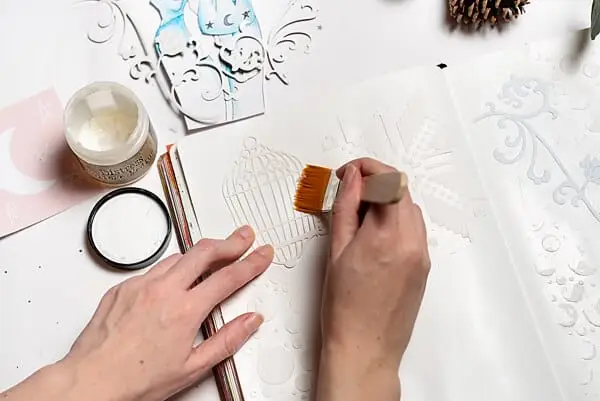
Also, why not add some fabric? This burlap that is usually used for gift wrapping is a great choice for this tutorial. I cut it in small strips and glued them down randomly.
Finally, when I glued everything down, I covered the whole spread with gesso again. Why? Because I wanted to unify all this texture into white. This is what the spread looked like after this step.
Leave to dry.
Step 4. Decorating the Winter Fairy
I was impatient for the pages to dry, so I turned to the fairy again and wanted to give her a bit more pop.
And that’s when I screwed things up (laugh). Well, you’ll see. But it’s not a screw-up really. I don’t care about these little things.
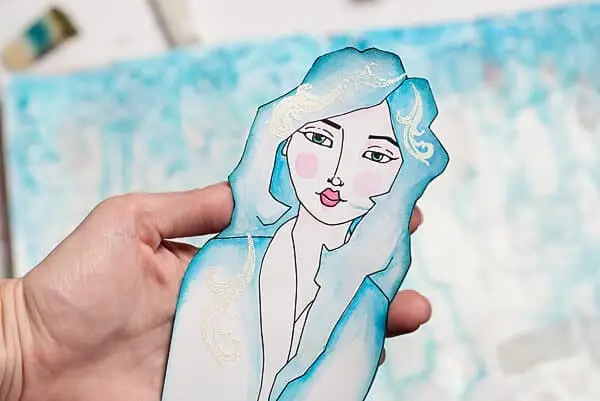
First, I wanted to add some glow to her and decided to emboss her hair. I used embossing ink, white embossing powder, and some old stamps I had.
If you don’t have the embossing supplies, maybe you can add some details with a gel pen or other paint that you like.

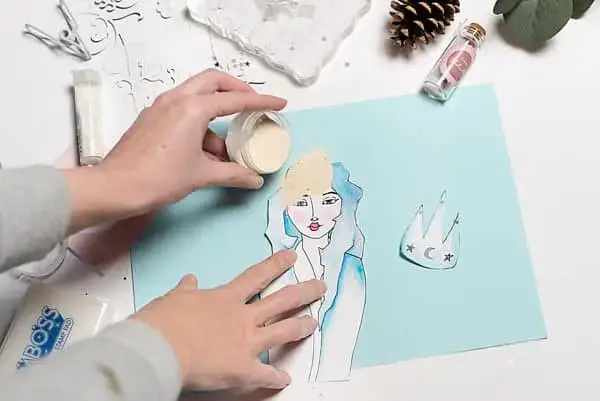
I don’t know if you can see her hair shine, but the glow is there!
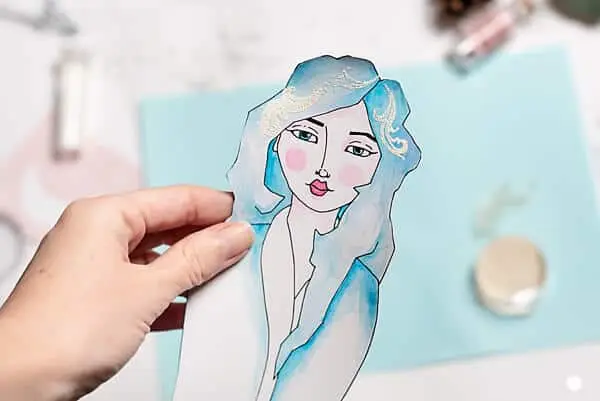
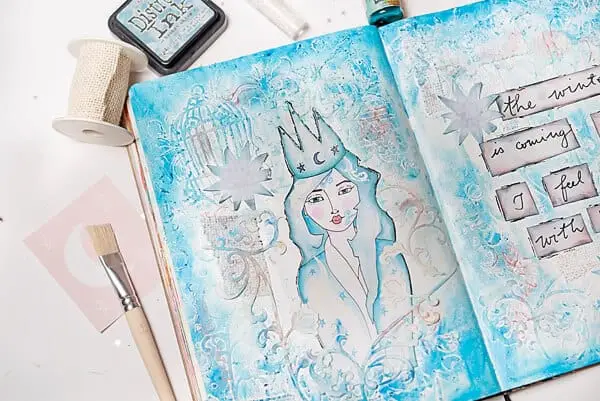
Still, I wanted to make her pop more. Next, I used Distress Ink (Broken China) to distress the fairy’s edges a bit. A make-up sponge does a great job here.
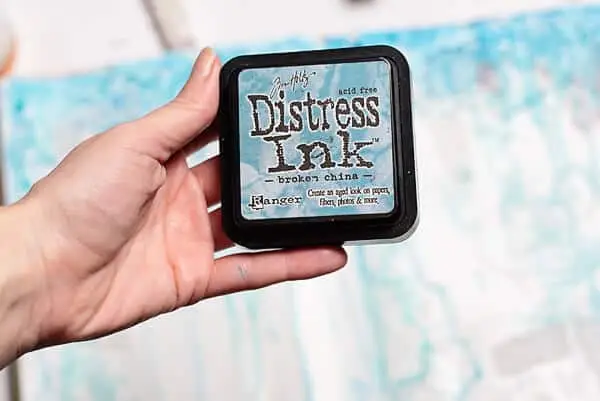
Just go over the edges a bit until you’re satisfied with how she looks.
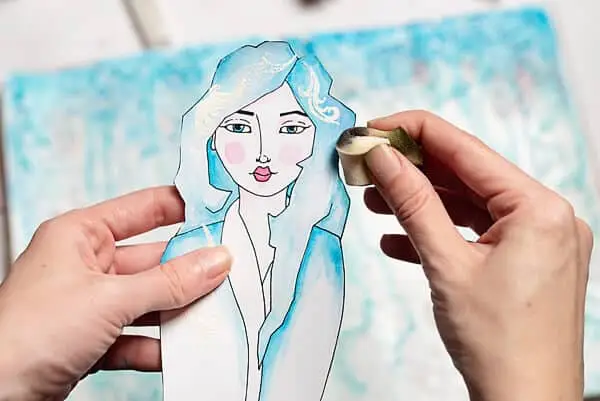
And here’s where I screwed up. See that blue line on her face? First, I was all like: No, no, no, nooooo! But then I figured, what the heck, I can turn this into a face tattoo. And so I did. You’ll see.
Step 5: Adding color with Gelatos and water
I chose Faber Castell’s Gelatos because they blend so well on gesso, and are also water-soluble.
If you don’t have Gelatos, you can use ink, or watercolor, or watered-down acrylic paint. Just experiment.
First, I put some dark and light blue Gelato on top and sprayed it with water.
Next, I added some blue ink with a paintbrush. Inks are great for mixed media art journaling, and other projects, too. I mostly use Marabu Mixed Media Art Spray, and they’re great.
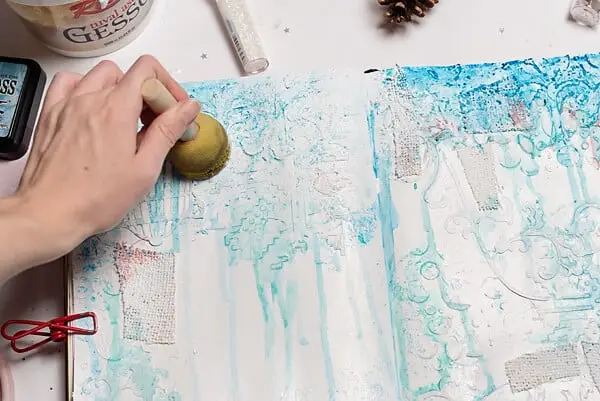
Step 6: Adding more texture with gesso
After this is all dry, I took a sponge (kitchen sponge works great here), dipped it in gesso, and dabbed all over the page. Dabbing with the sponge creates a nice texture and tones down bold colors.
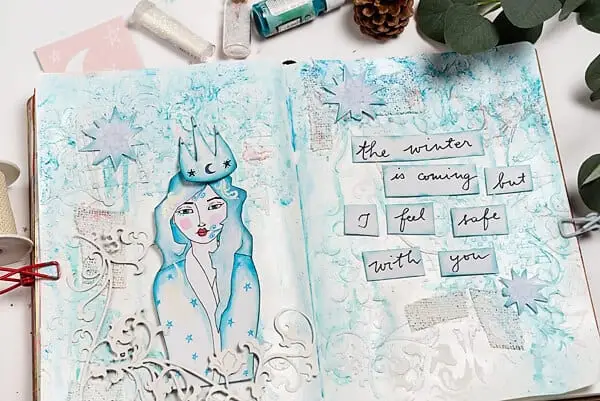
Step 7: Gluing down the fairy
After the gesso is dry, start planning where to put the Winter fairy and other ephemera you want to put on this mixed media page.
This is how I figured mine would look like. I threw in some word blocks as well.
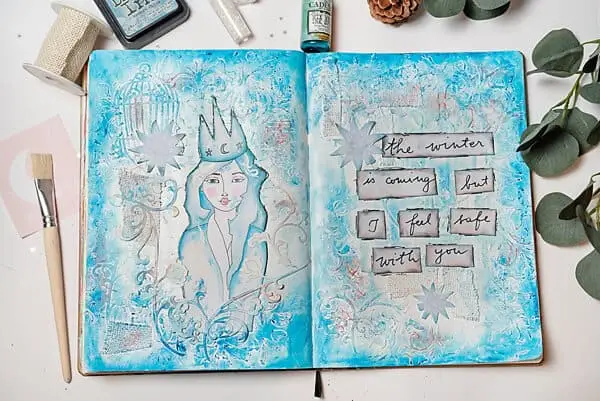
It’s starting to look like something, isn’t it? And notice the mistake cover-up on the face (laugh).
Step 8: Distressing the edges
I love distressed edges. They give depth and serve as a nice framing for the whole page.
Again, I used Gelatos, but this time I only smudged the paint with my fingers. Gelatos are great for this technique. I just love them for being so soft and blendable.
However, be careful if you have a lot of texture paste on the page. It can sometimes be very sharp when dry, so if you blend with your fingers, try not to get hurt.
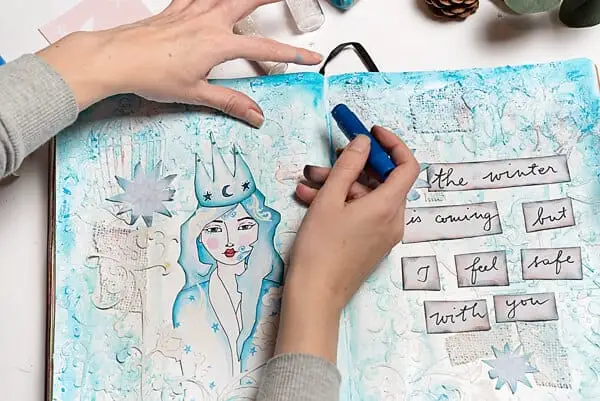
Step 9: Outlining the fairy
Sometimes I love outlining my images just to make them stand out a bit. For this, I used the Edding marker. It can write on textured backgrounds, but just be careful not to push it too hard.
If you want to know more about pens and markers that write well over textured backgrounds, check out this article where I list some good pens and markers that are great for mixed media art journaling, among other things.
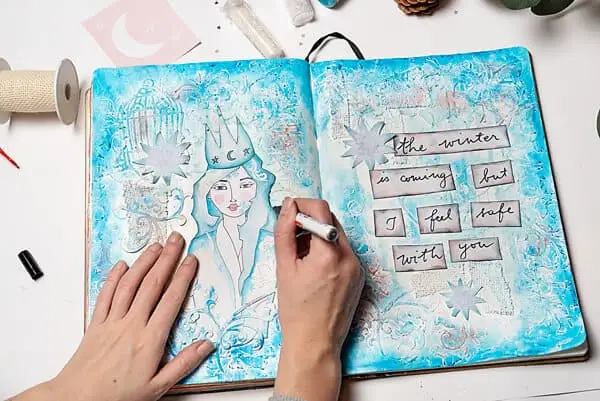
Et voila! Here’s my finished mixed media art journal spread with a beautiful Winter Fairy. Reminder: you can download this fairy printable for free at the bottom of the post.
Mixed media wonderland: final thoughts and tips
With mixed media, as well as art journaling, there are no rules. You are free to make what you want with the things you like.
However, sometimes you can get frustrated if you use the supplies in the wrong way. For example, if you try using a fine line pen to write on the textured background, you’ll see zero results, the pen will clog, and you’ll end up frustrated.
So, my point is, just learn what supplies work for certain purposes and you’ll get less annoyed.
Above all, mixed media art journaling is an amazing opportunity for unleashing your inner artist without any fear or worries. It really gives you the freedom to create without limits or rules.
Pick up your favorite supplies, download my free fairy printable and enjoy your mixed media journey.
GET THE FREE WINTER FAIRY PRINTABLE
Download the fairy printable and get unlimited access to my free resource library packed with free art journal printables. Just fill out the form below.