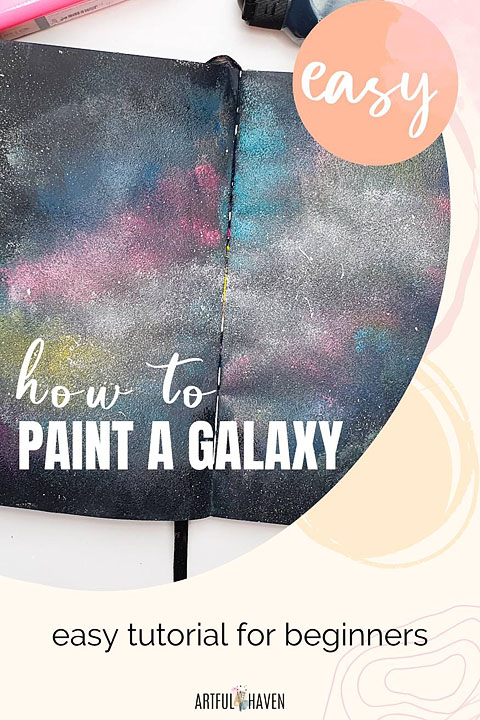
How To Paint A Galaxy With Acrylic Paint – Easy Tutorial For Beginners
Many beginners wonder how to paint a galaxy because those paintings often look magical and visually mesmerizing. I’m here to tell you it can be done easily with just two simple tools you have in your home and some acrylic paint.
First, I’ll share what art supplies you need and what colors to use for the best results. Then we’ll go over all the steps for painting a galaxy.
This step-by-step galaxy painting is a great tutorial for beginners but even more advanced artists who haven’t tried this technique so far.
There’s also a video of me painting a galaxy, so be sure to watch that as well.
What supplies do you need to paint a galaxy?
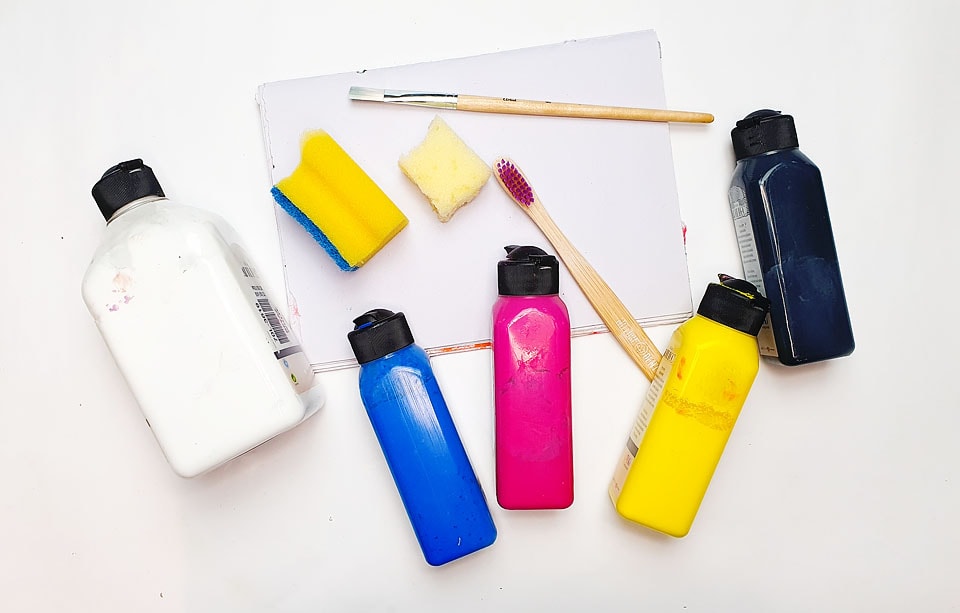
You don’t need many art supplies to paint a galaxy. Here are some basic supplies and tools you can use even if you’re a complete beginner.
- Sponge. This can be a kitchen sponge or an artist’s sponge. A kitchen sponge is handy and easy to use and everyone has it. An artist’s sponge is similar to this. I have a cheap one I got for $1 but again, I like using kitchen sponges more.
- Acrylic paint. You can use any acrylic paints you have on you. I’ll share color options below.
- Toothbrush. You can use a toothbrush to add interesting details like stars and mists. You’ll see in the tutorial how I do it.
- Paintbrush. Instead of a toothbrush, you can use a regular flat brush for the same purpose.
- White pen/marker. If using a toothbrush or a brush for stars isn’t your thing, you can use a white pen or marker to add details.
However, this will take more time and focus and you shouldn’t use fine-tip pens on a textured background like the one we’re about to create.
This can destroy the nib of the pen in a matter of seconds. Instead, you can use an acrylic marker like Posca pens.
They’re amazing for these things because they can write on textured surfaces.
Types of sponges you can use
- Kitchen sponge. This is the easiest choice. However, there’s just one thing I’d like you to consider, and that is using this brush can leave hard edges because of its shape.
You can avoid this by securing a grip of the brush to tuck all the edges under your fingers. I like the kitchen sponge for this technique better than the artist sponge. In my experience, it blends paint better.
However, my artist brush is student-grade. - Artists sponge. It’s also a great choice, as I already mentioned above.
They’re a bit softer than kitchen sponges, at least the ones I have. This means they take more paint in. - Why you shouldn’t use a make-up sponge. Makeup sponges are really thick and have no air inside.
This means that they don’t hold too much paint and leave flat marks rather than textured ones.
FREE ART JOURNAL COURSE FOR BEGINNERS
Sign up for my free art journal course for beginners so you can finally start making art you’ll love instead of fearing the blank page.

Where to find reference photos for painting galaxies?
- Unsplash
If you’re afraid to start this on your own, there are plenty of photos you can use as references. The simplest way is to just google galaxy images on Google.
Also, you can find more painting references on Unsplash, a site with free photos you can use for references.
And yes, Pinterest is also a great source of painting inspiration.
But if you watch this simple tutorial for painting a galaxy, you’ll be all right. Just remember the steps and practice. Then you won’t need Google or Pinterest.
What colors do you need to paint a galaxy?
- Basic: black and white
- Other: purple, blue, pink, yellow
This can be quite a challenge and you can choose the colors you like but keep in mind that you need to use basic colors like black and white.
Black is usually painted on the edges and some inside because our space is pretty dark, right?
Besides black and white, use purple, blue, pink, and yellow. I always use these when I paint a galaxy and they work great together.
How to paint a galaxy step-by-step
You can watch the video below to see how to paint a galaxy step by step, but you can also read all the steps with images below the video.
1. Choose your colors and put them on the palette
Prepare all the colors and put some on your palette. You can use any palette you have as long as it’s big enough so you can have them all in one place.
I used Jane Davenport non-stick sheets that are amazing for this. You can also use a large piece of paper, a ceramic plate, a plastic plate, or someething similar.
2. Add a black frame
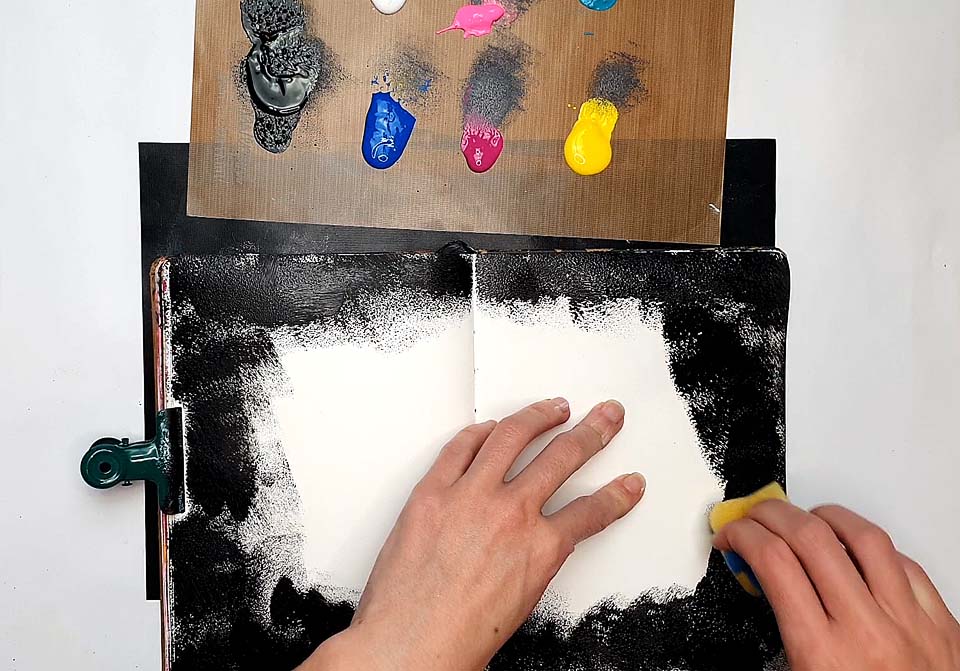
Start dabbing with black on the edges of your paper/page. Leave some white in the middle where we’ll use other colors.
You don’t have to cover the whole page. If there is some white space left, don’t worry about that now, we’ll cover them later.
3. Then add other colors
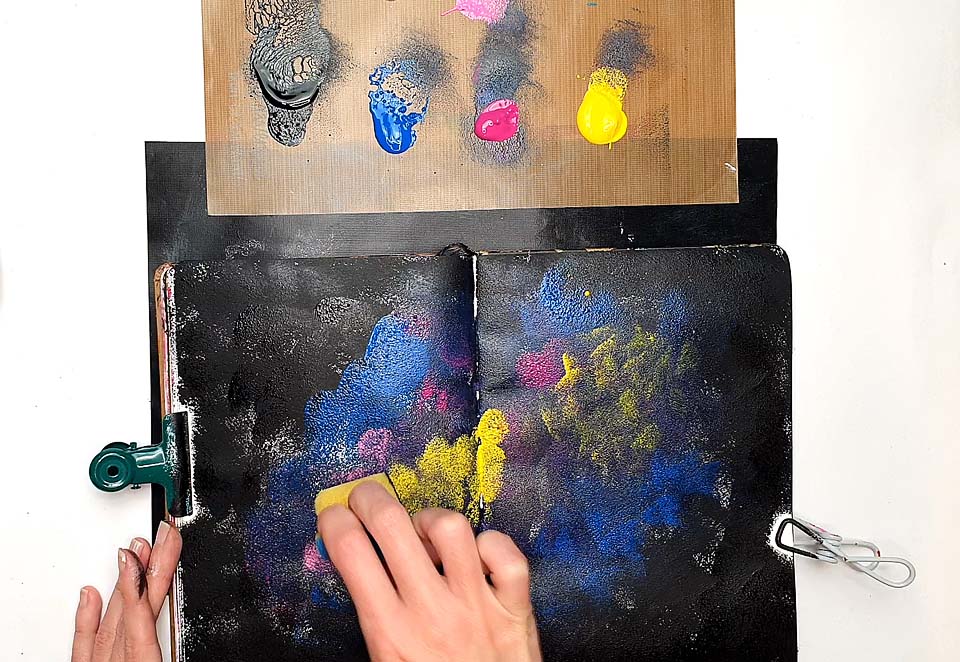
Then start adding blue and purple, and yellow and pink. The secret is to add them at the same time with the same sponge and blend them as you go.
When you’ve done that, add white in the middle.
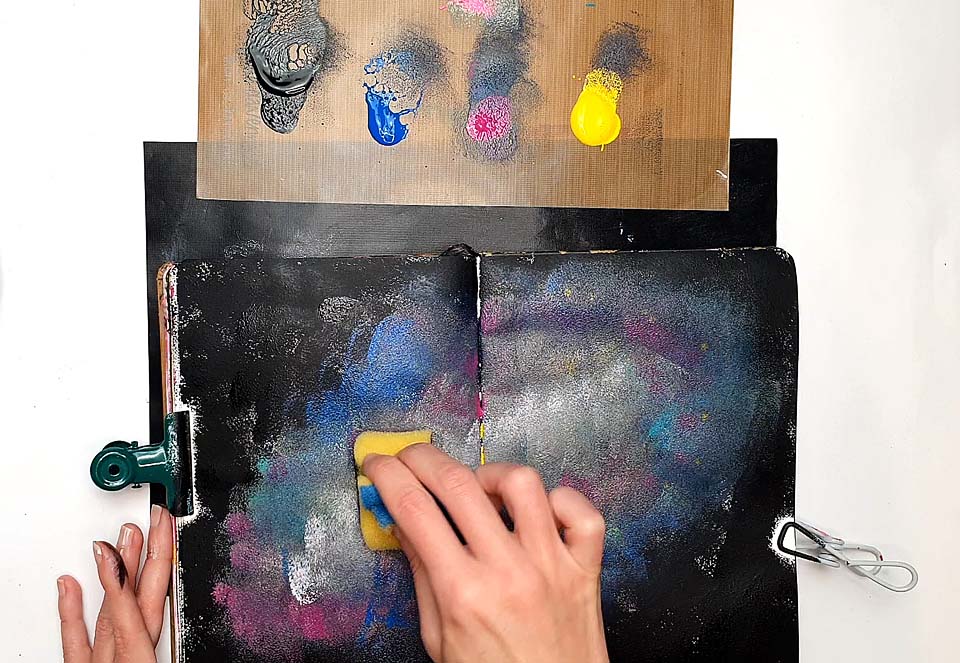
Finally, add colors by blending and dabbing all around leaving a lighter strap in the middle. Adding white can help emphasize that.
4. Add more black
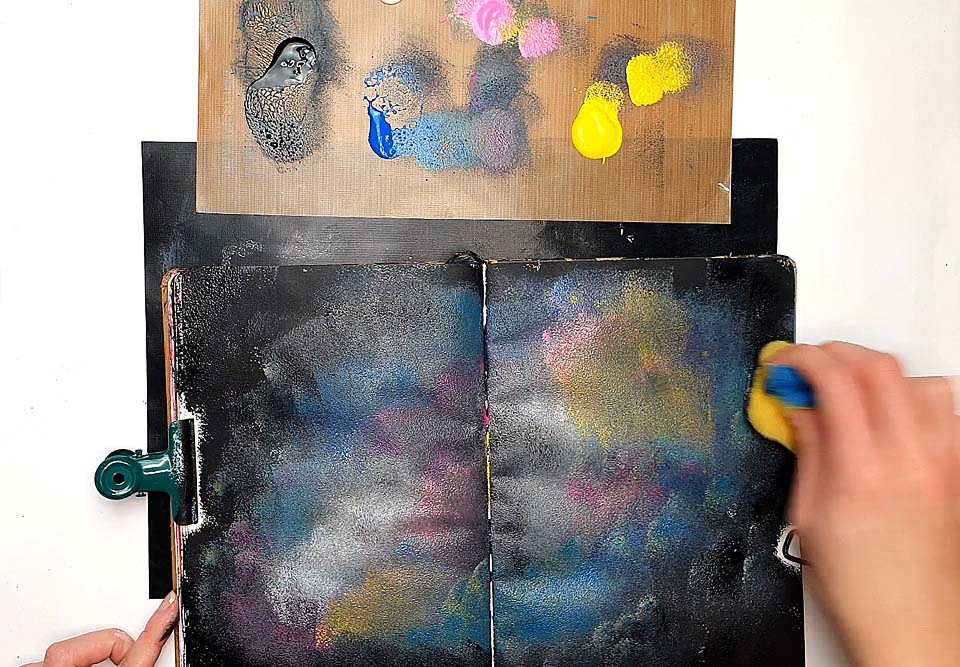
Now, start adding more black on the edges but inside, too. Just don’t cover the whole thing.
5. Add stars and mist
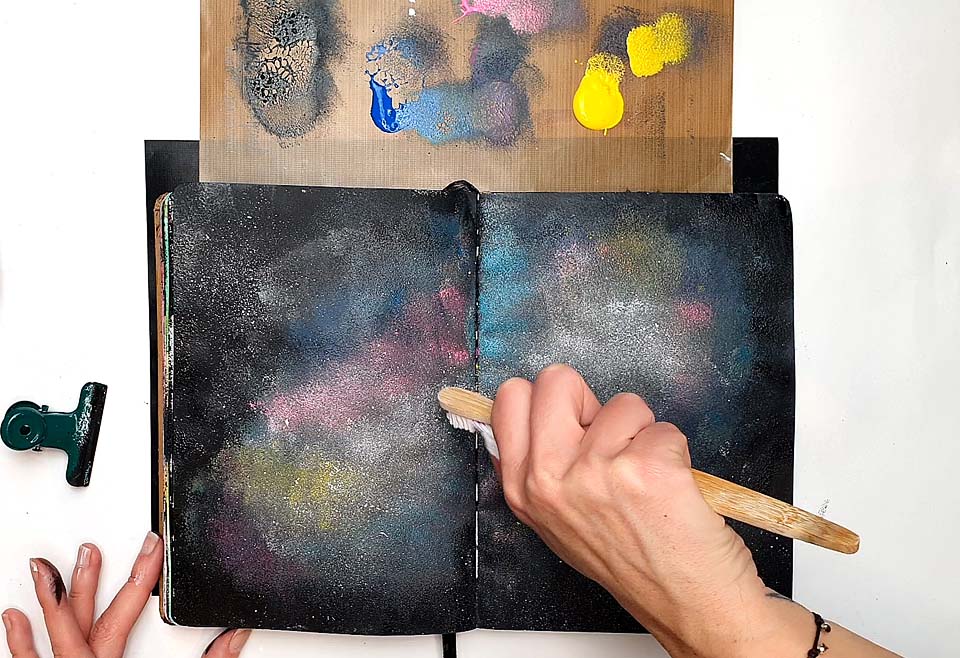
Finally, use a toothbrush, dip it in white paint and use your finger to sprinkle the paint on the paper. Put more white in the middle and some on the black outside the central area.
How to add stars to your galaxy painting?
Here are a few ways you can add stars to your galaxy. They’re all easy and fun to use. Some can get messy, but embrace that and I promise you’ll love it.
With a toothbrush
You take an old toothbrush, put some white on it and then go over it with your finger to release paint drops onto your painting. Move around with it and experiment with the angles and amount of paint.
I suggest putting in small amounts of paint to start with. You can always add more. The more paint you put on the toothbrush, the bigger the splashes will be. I like the stars to be small and dispersed.
You can always decide to put more stars in some places and fewer in others, to make things irregular and more natural.
With a small brush
You can use a flat brush for the same effect. The splatters will appear more directional and in one line, so move your brush and hand in various directions while doing this.
You can also use a round brush and dip it in watered-down acrylic paint. Then, hold the brush above your painting and release the paint by hitting the brush gently with your finger (or another brush).
With a Posca pen/any white pen
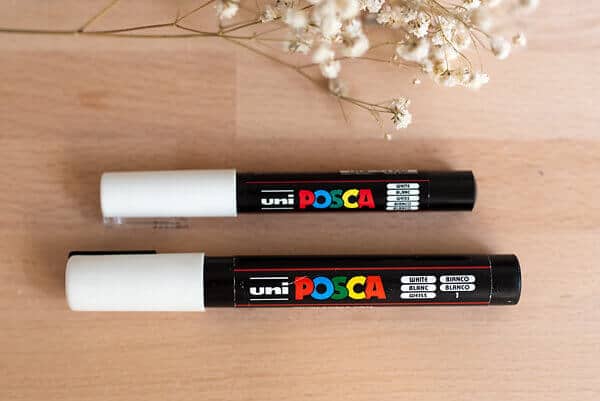
If you’re not into a toothbrush or a brush, just use a white marker like a Posca pen. This then becomes doodling on your painting, but it can be meditative. You can draw dots in various sizes, stars, constellations, etc.
With ink
Instead of white acrylic pain, you can use white ink with the same tools I mentioned above: a toothbrush or a brush.
Final tips for painting galaxies with acrylic paint
- First, put the paint down on your palette and then start blending from dark to light
- Use the sponge to dab, not like a brush
- Add bright colors
- Don’t forget white and black, they give great depth to your galaxy painting
- Work on the paint while it’s wet, so you can blend it easily. Once acrylic paint is dry, this technique no longer works
- You’ll need a lot of dabbing and layers, so be patient and add color until you like the results
- When you build layers with acrylic paint, you start with darker colors and finish with lighter ones
FREE ART JOURNAL COURSE FOR BEGINNERS
Sign up for my free art journal course for beginners so you can finally start making art you’ll love instead of fearing the blank page.


